- An error has occurred, which probably means the feed is down. Try again later.
Archive for the ‘Azure’ Category
Download Virtual Disk VHD of an Azure VM on your local Machine
In the article we will know the steps to download the Virtual Disk VHD of an Azure VM on your local machine.
Firstly, we need to create a Blob container. To do so, either create or access a Storage account, Select Storage browser > Blob Container > Add container > Type name and click Create as shown in below screenshot

Now we need to open Cloud Shell using the icon on top of the screen

A new Bash window will start, it might ask you to create a storage if not already created
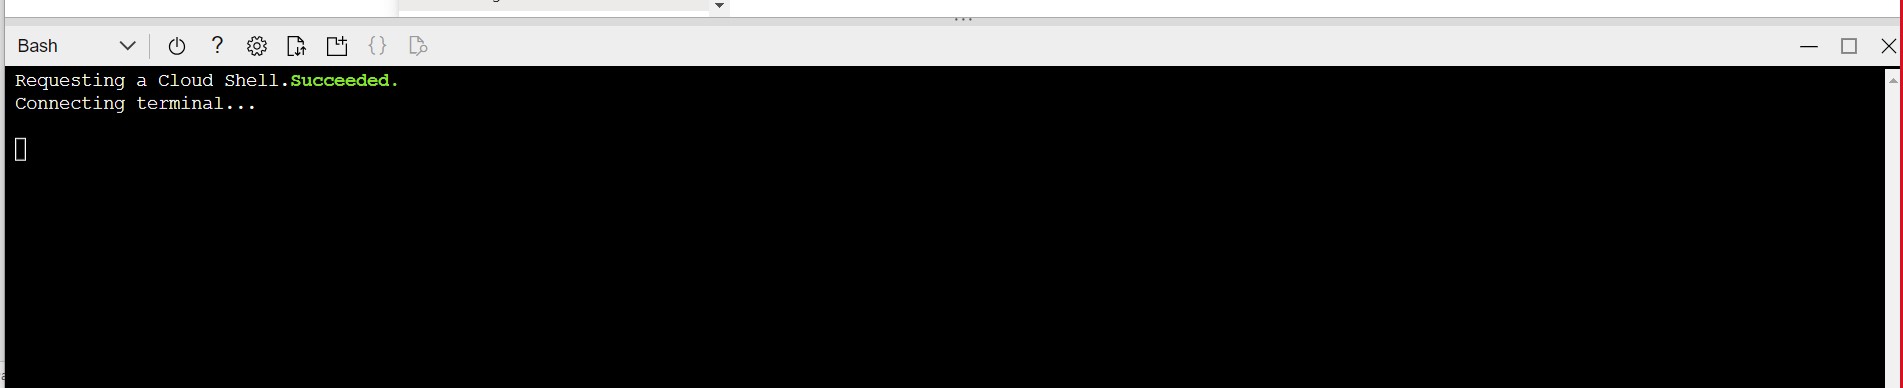
Once ready, you should see below screen

Now you need to run below command. If you don’t know the VM diskname you can check from VM Properties > Disk option from left navigation
az disk grant-access –duration-in-seconds 86400 –access-level Read –name Diskname –resource-group AzureRG

Once completed, you should see a link which will be direct link to download the VHD file.
Note: this will download the entire VHD file not just data size so in my case it was 2 TB.


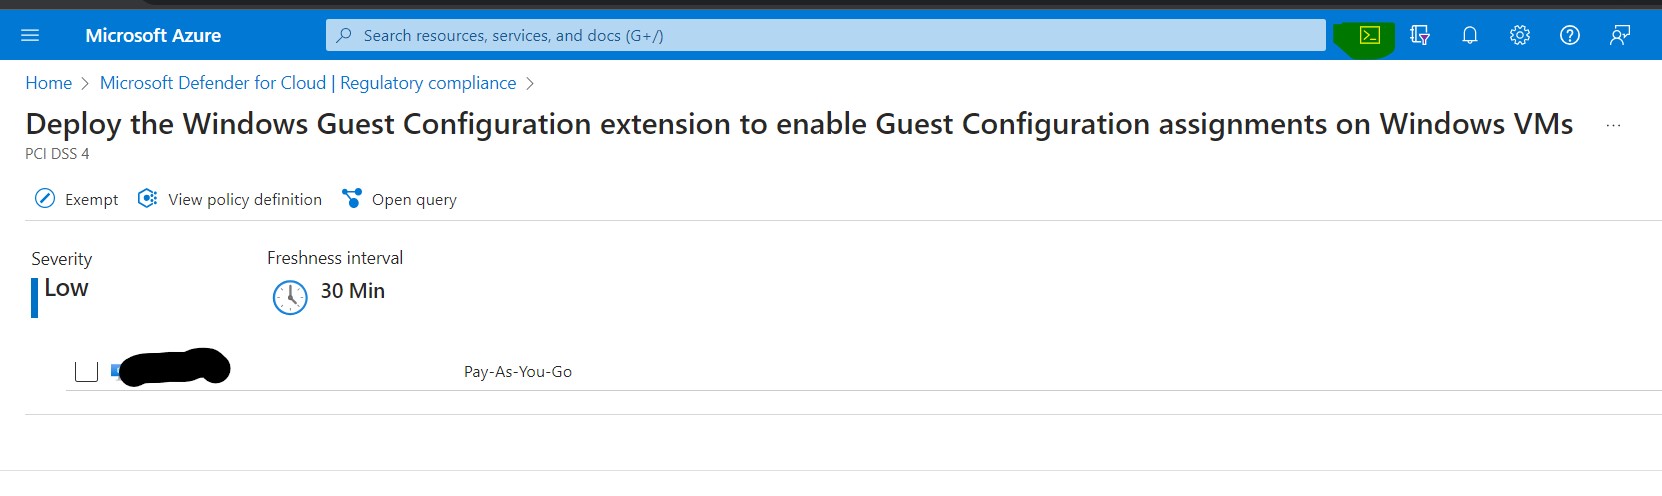
PCI DSS 4.0 point 8.3.6 : Deploy the Windows Guest Configuration extension to enable Guest Configuration assignments on Windows VMs
While I was working on PCI DSS 4.0, I saw a VM under point 8.3.6 Deploy the Windows Guest Configuration extension to enable Guest Configuration assignments on Windows VMs. I identified that the issue to be with Guest configuration not installed on VM. To fix , we need to run open the Shell command from top right corner of the screen next to search as shown in below screenshot
Make sure we have Bash selected and run below command in the Shell. Make sure you replace VMname and resourcename from the command.
az vm extension set --publisher Microsoft.GuestConfiguration --name ConfigurationforWindows --extension-instance-name AzurePolicyforWindows --resource-group 'Resourcename' --vm-name myVM --enable-auto-upgrade true

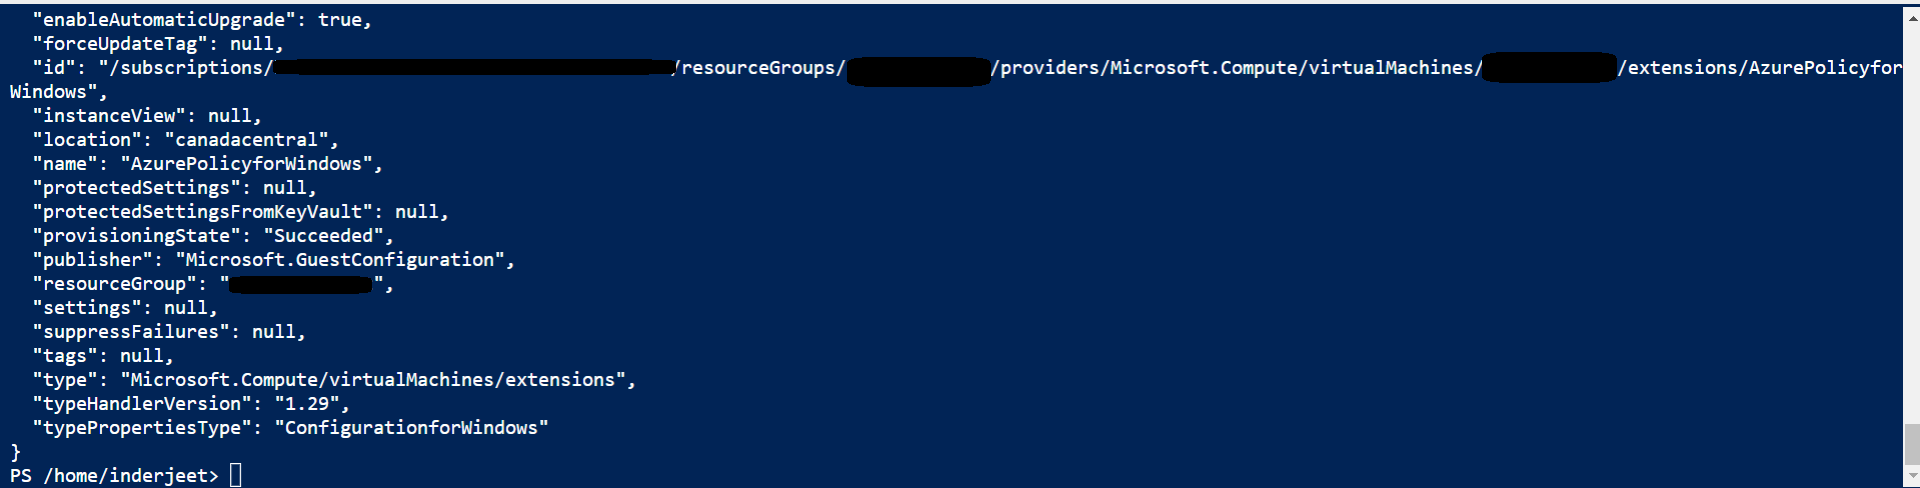
Once command is completed, wait for 24 hrs and this point will be closed in PCI DSS 4.0 Dashboard.
Thanks and Regards,
Inderjeet Singh Jaggi
After disk encryption unable to backup Virtual Machine in Azure
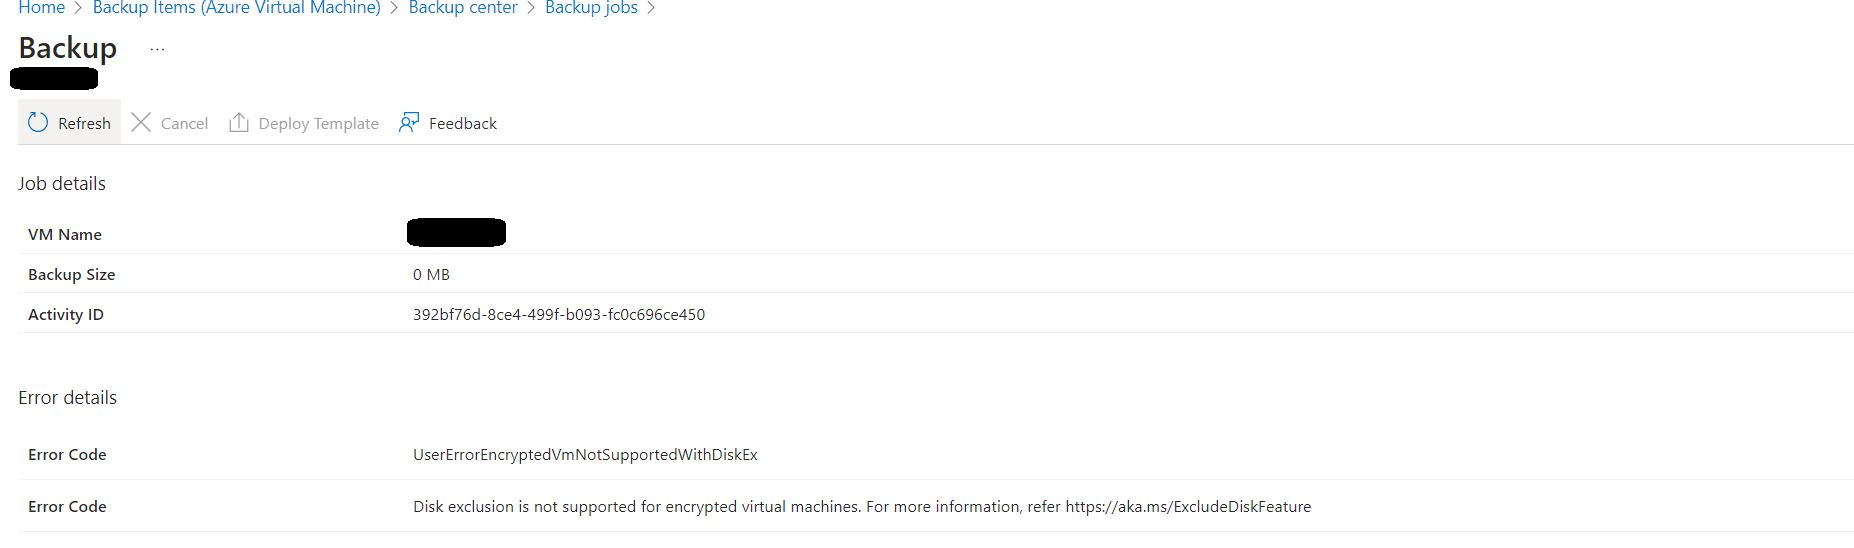
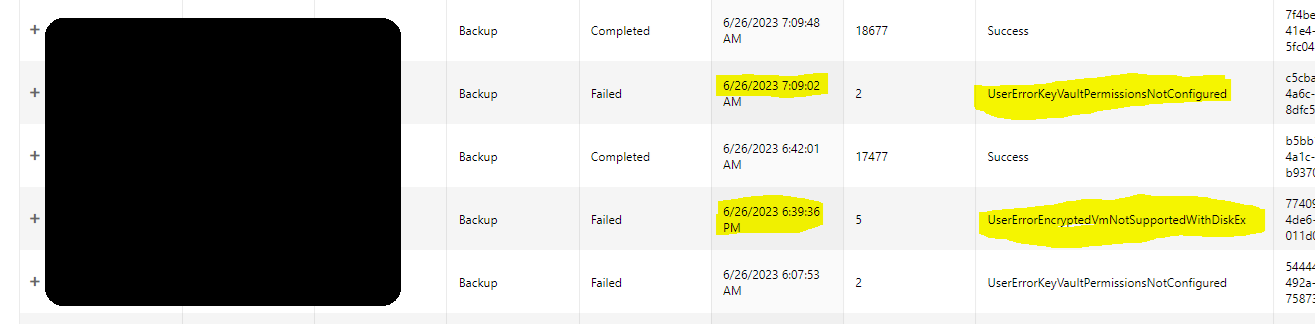
I recently encountered an issue that I believe is worth sharing with you. We encrypted our disk as required by PCI DSS 4.0 compliance. However, after the encryption process was completed, we started receiving an error with the code ‘UserErrorEncryptedVmNotSupportedWithDiskEx’, which indicates that ‘disk exclusion is not supported for encrypted virtual machines‘
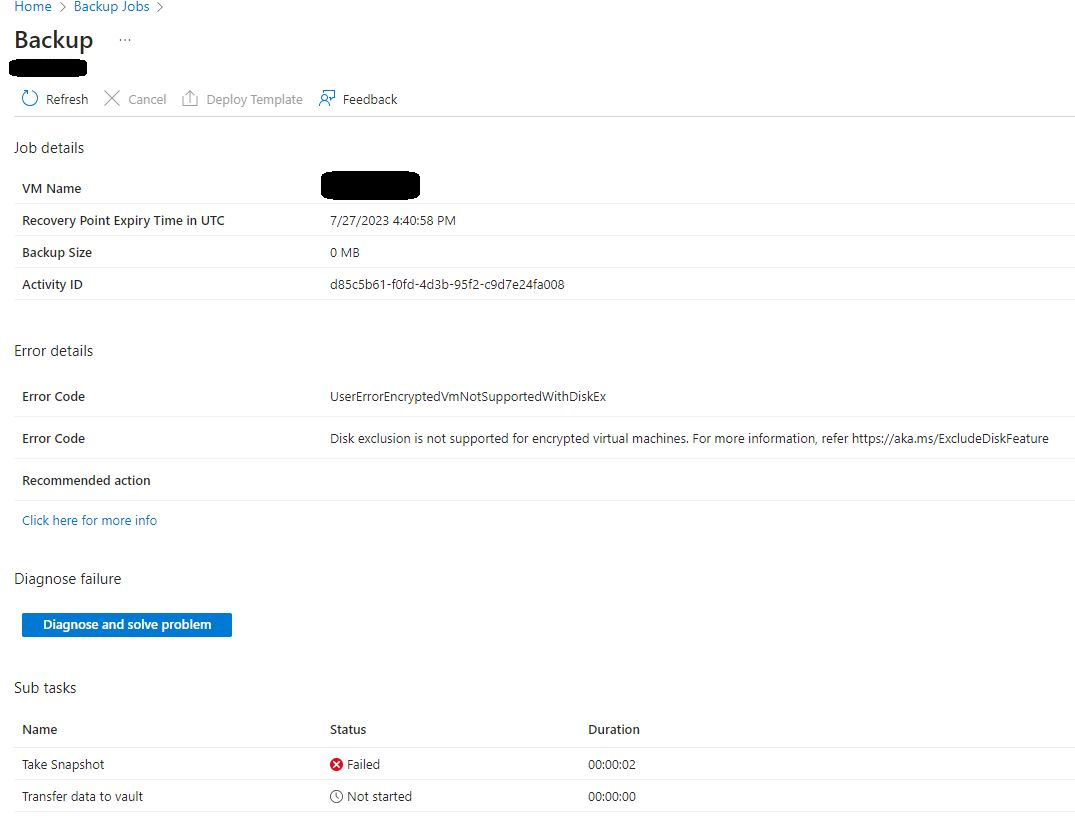
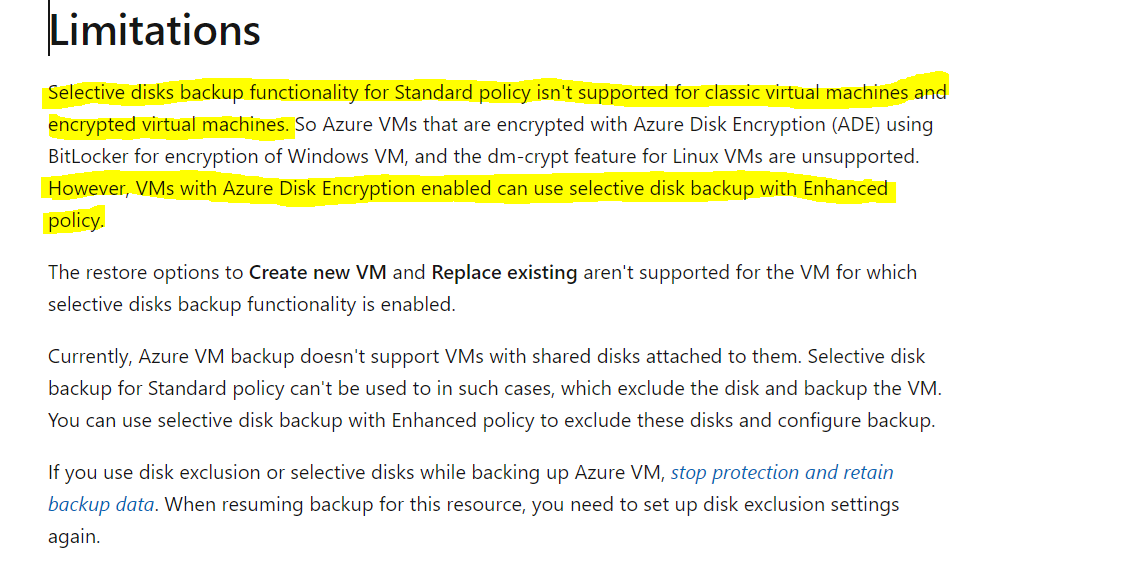
When reviewed the backend log we understood that you tried configuring selective disk backup for encrypted disk backup and this is not supported with standard backup policy, however you can configure backup with enhanced policy. I had only OS disk so this article wasn’t much helpful for me.
https://learn.microsoft.com/en-us/azure/backup/selective-disk-backup-restore#limitations
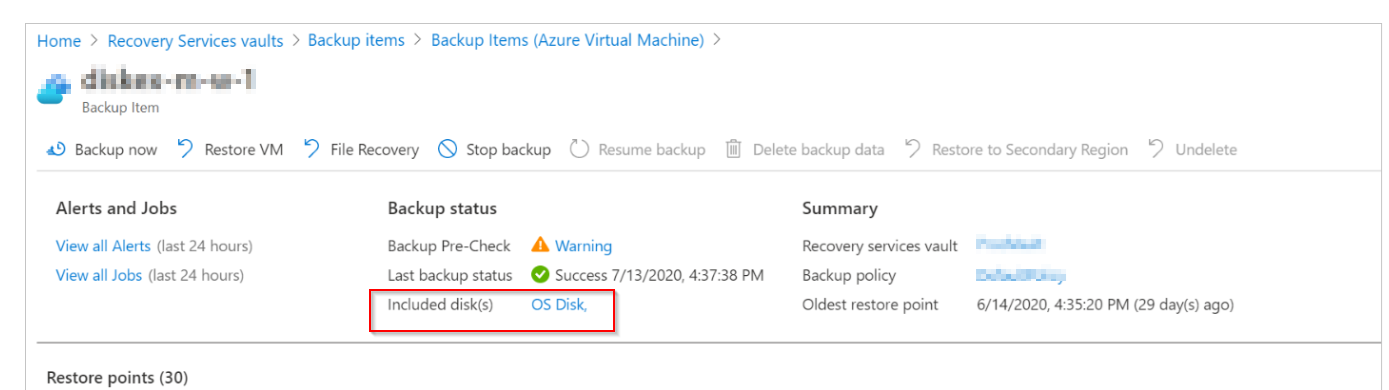
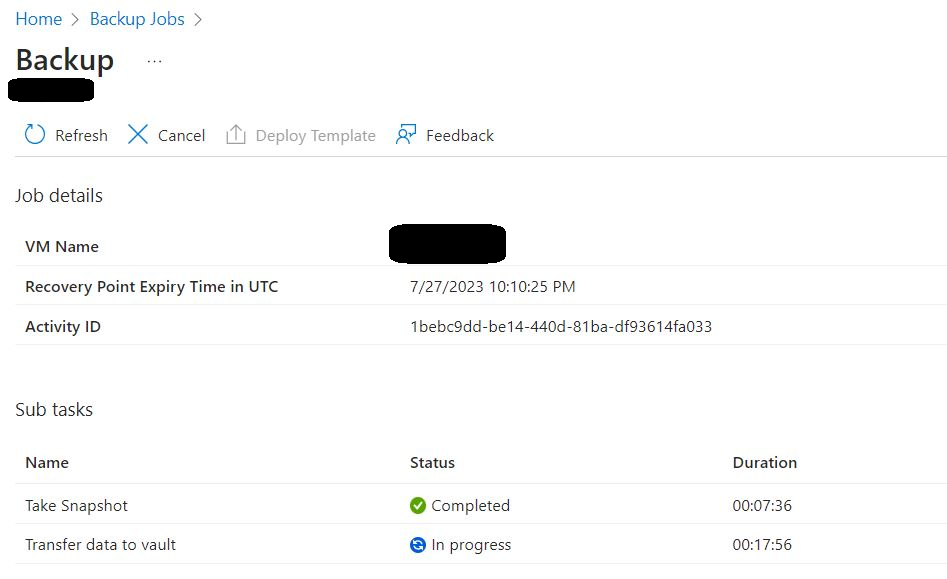
On the backup screen, I could see OS disk as included disks.
But from the log I could see you have enabled backup without selective disk backup option, and it failed with error UserErrorKeyVaultPermissionsNotConfigured
After lot of research, I found we need to run below command to fix the issue and reset the exclusion. This will mainly reset the settings.
az backup protection update-for-vm --resource-group {resourcegroup} --vault-name {vaultname} -c {vmname} -i {vmname} --disk-list-setting resetexclusionsettings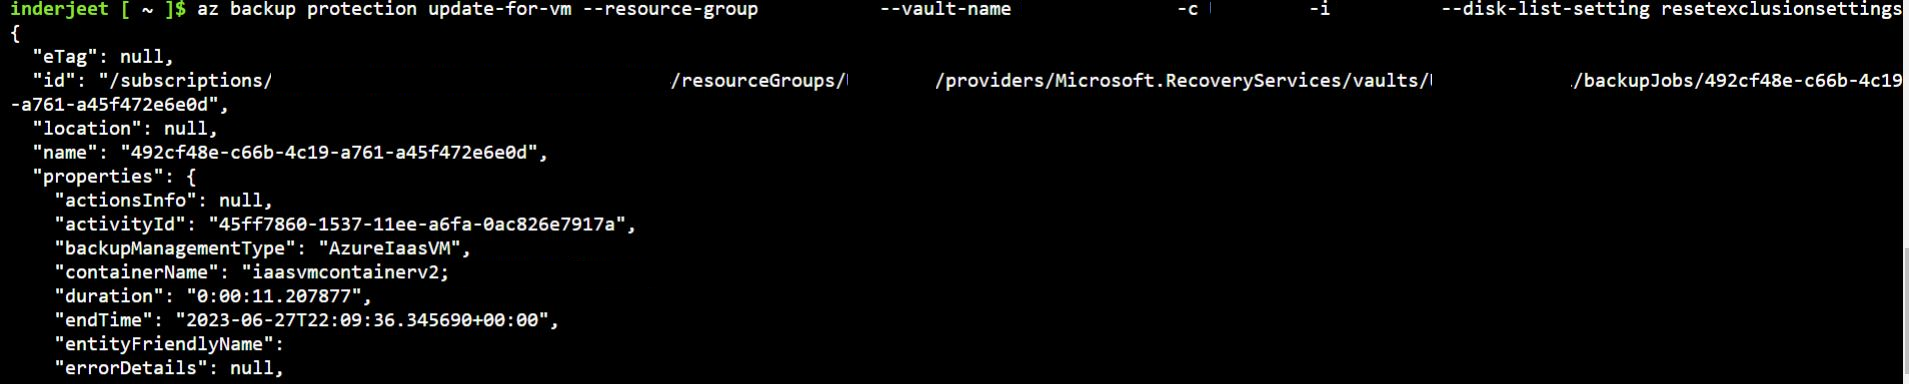
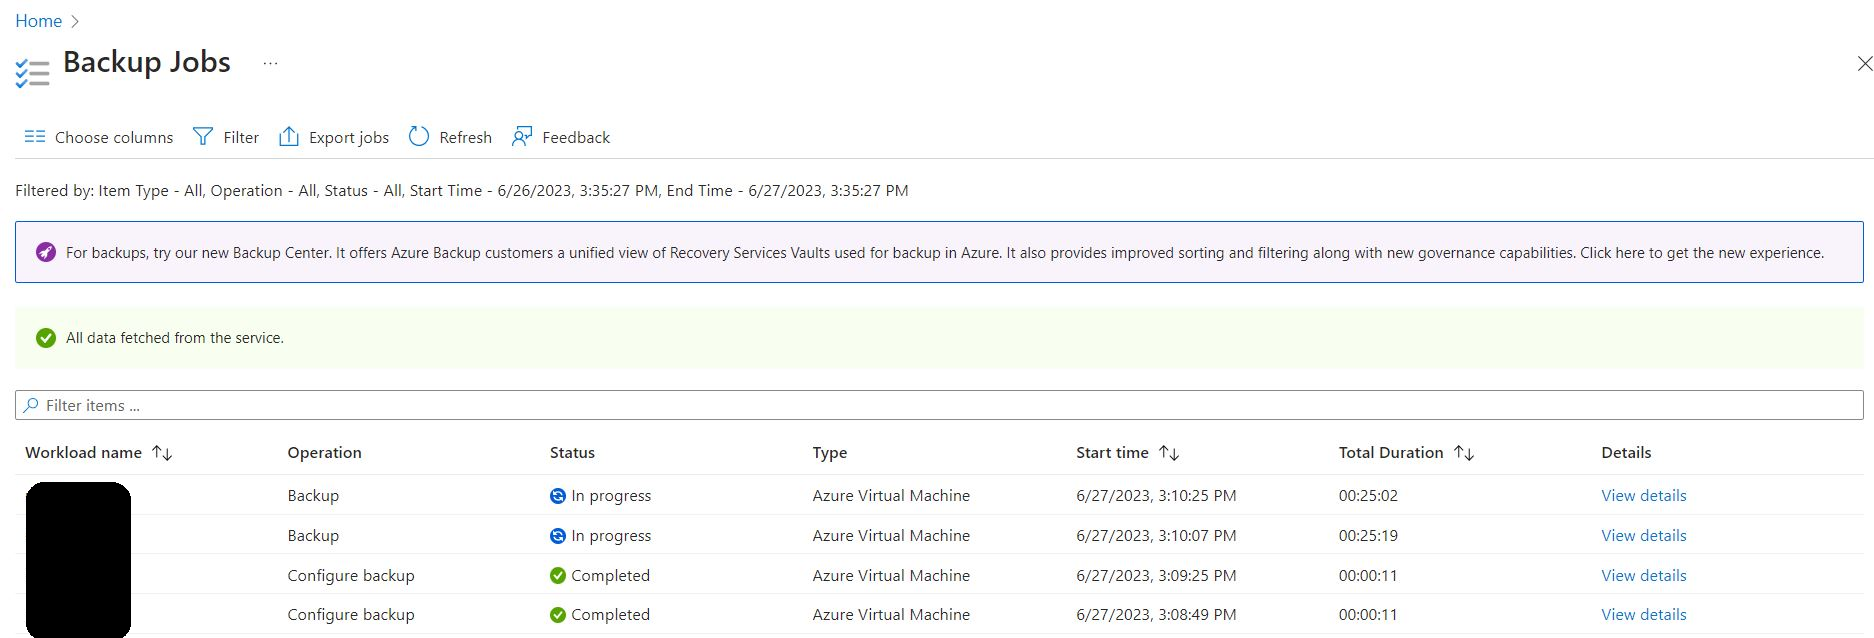
After above command, I was able to start the backup and could see the completed status of the VM’s
Thanks and regards,
Inderjeet Singh Jaggi
Cloud Architect – Golden Five Consulting
[email protected]
What is digital twin? – Part 2
Now lets understand when you should use Digital twin:
- You should use it when you have large number of digital twin to manage
- When there is complexity in relationship
- It would be best if you can existing model instead of creating new once
- You can benefit if it has flexible schema
Couple of things which popularized digital twin in recent days:
- Cheap IOT devices
- Increased number of IOT devices in use
- Affordable internet/connectivity
- Boost in Cloud platforms
If you want to implement Digital Twin, you need to make sure your projects have below characteristics:
- Ability to establish some sort of connection between 2 devices
- Can and should require queries to be executed based on device parameters
- Secure integration
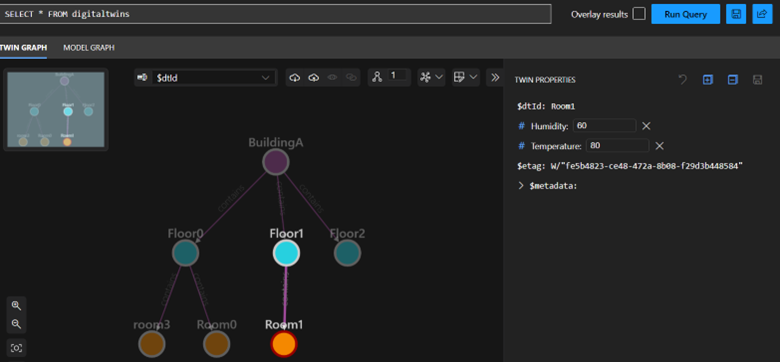
Lets try to build a Digital twin of a Building to understand what is temperature of each room.
In Azure Digital Twin, we have 4 types of interfaces or classes
- Component – Temperature and humidity
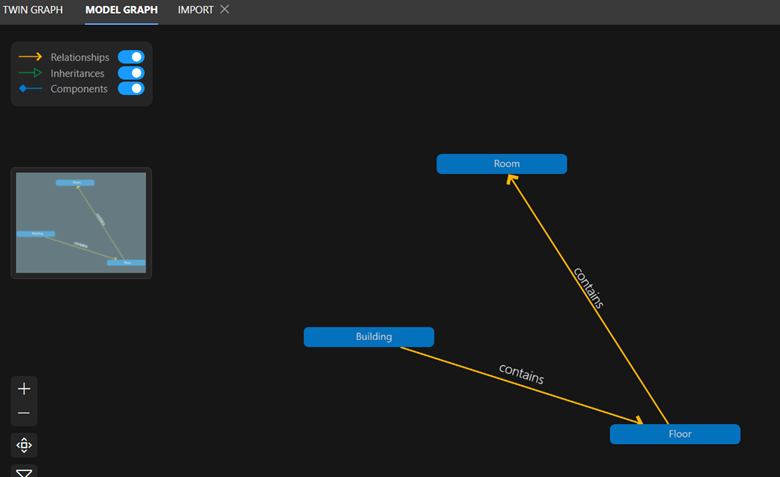
- Relationship – Building has floor and then floor has rooms
- Telemetry – Input data
- Properties – State of entity
You can download the json from MS link below:
Building : https://raw.githubusercontent.com/Azure-Samples/digital-twins-explorer/main/client/examples/Building.json
Floor : https://raw.githubusercontent.com/Azure-Samples/digital-twins-explorer/main/client/examples/Floor.json
Room : https://raw.githubusercontent.com/Azure-Samples/digital-twins-explorer/main/client/examples/Room.json
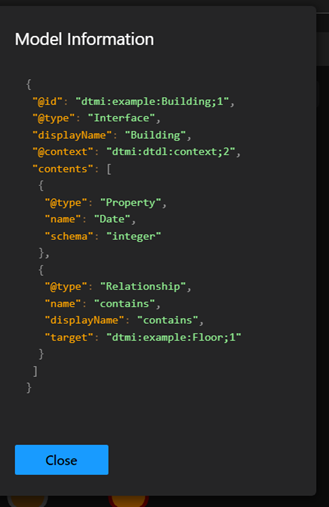
Here Json needs to start with dtmi with displayname as ‘Building’, next the only property of this interface is Date, It has relationship with Floor. Most important is DisplayName.
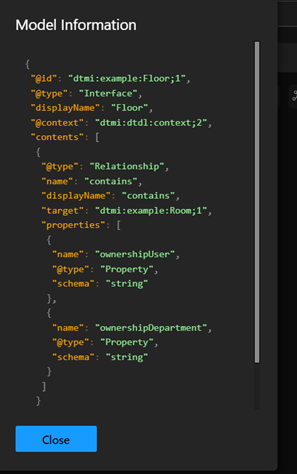
Here Json needs to start with dtmi with displayname as ‘Floor’, next properties of this interface is OwnershipUser and OwnershipDeparment, It has relationship with Room

Here Json needs to start with dtmi with displayname as ‘Room, next the only property of this interface is Temperature and Humidity, It has no further relationship
Make sure you use DTDL validator while creating these Json files
https://learn.microsoft.com/en-us/samples/azure-samples/dtdl-validator/dtdl-validator/
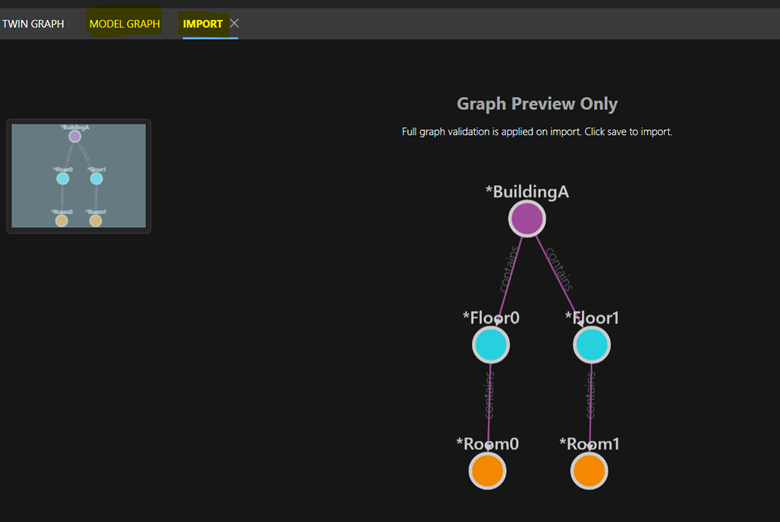
Using this json we have multiple ways to create our scenario’s but we will use below xlsx file which has specified data to start with. You can download the excel for building scenario’s from below path:
https://github.com/Azure-Samples/digital-twins-explorer/raw/main/client/examples/buildingScenario.xlsx

Microsoft understands it will take a lot of efforts for one to create these models and relationships, so to ease the process Microsoft has published a few models such as space, event, document, building, etc so you can reuse them as your start point
https://github.com/WillowInc/opendigitaltwins-building
Here is basic strcture of Azure Digital Twin
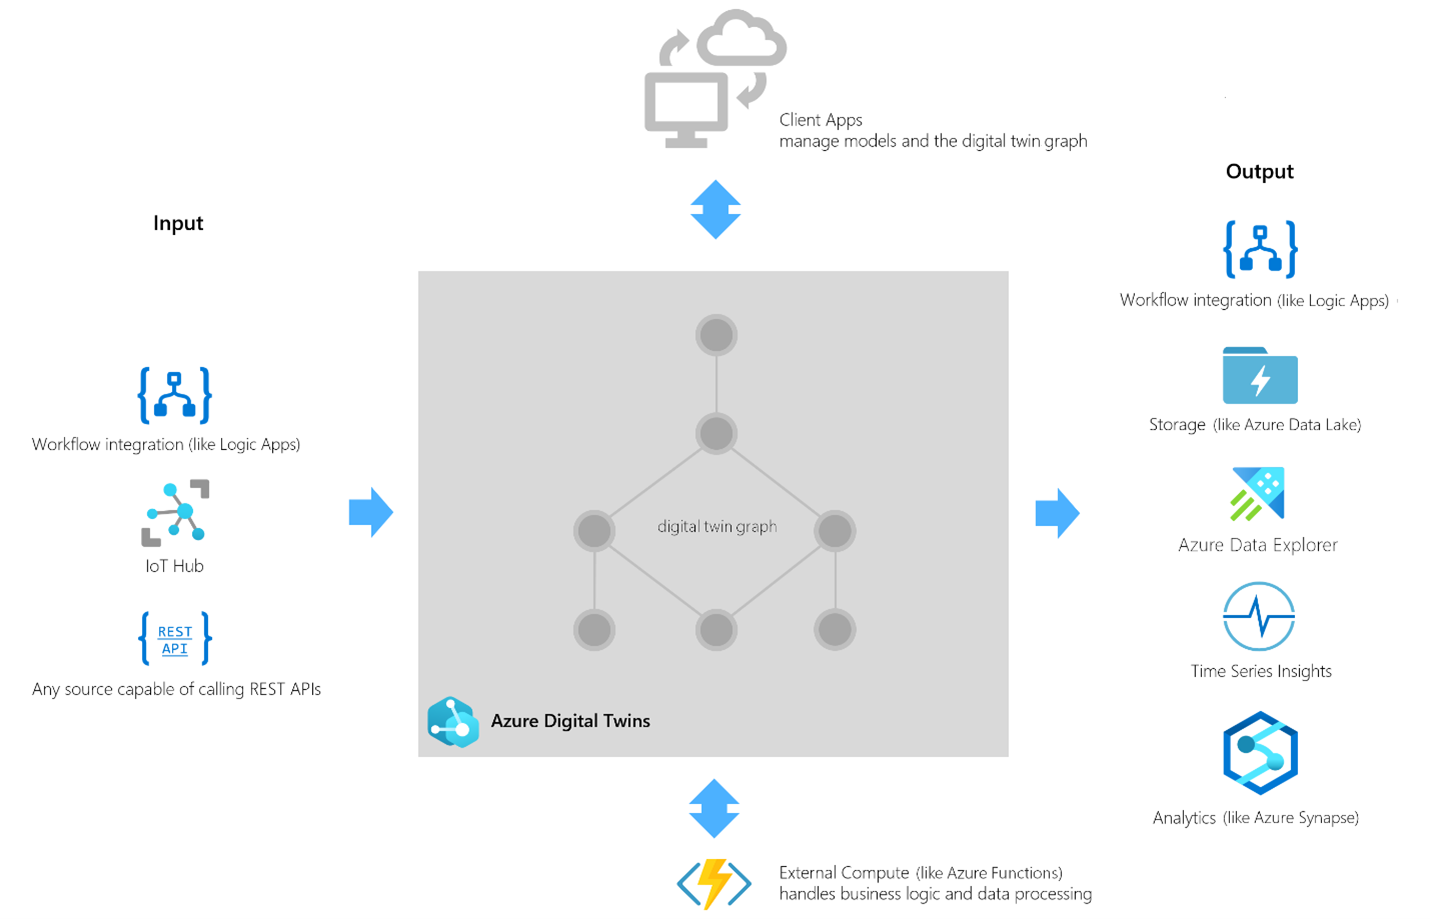
Input : Input can be from Workflows, IOT hub or any rest Api. You can input parameter data manually as well.
Processing : Azure Digital Twin platform process the input based on business logics, understands connections and process data accordingly. Digital twin of real-world sensors can be created to predict and test results based on change in inputs
Output : Using Time Series insights, Azure data explorer and Analytics we can better visualize data and actionable items can be driven from predictions.
Main challenges with ADT are:
- Modelling is difficult and time consuming
- Delay in processing data realtime
- Inter operability between different types of IOT devices and services
- Hard and expensive for existing systems
- Privacy and confidentiality
ChatGPT is back with new Avatar, Try new Bing
Have you taken a peek at the latest iteration of Bing? It’s not just your run-of-the-mill search engine. This revamped version doubles as a conversational companion, capable of fielding inquiries, furnishing comprehensive information, and even igniting your creative flair.
Powered by ChatGPT AI technology, the enhanced Bing delivers top-notch results for everyday queries such as sports scores, stock prices, and weather forecasts. It goes a step further to furnish in-depth explanations as per your preference. The natural language chat interface empowers users to delve into intricate searches, follow up, and fine-tune their queries with startling precision.
Moreover, Bing goes beyond the conventional and acts as a catalyst for creative expression. Leveraging a repertoire of features, it can whip up poems, stories, code snippets, essays, songs, and even celebrity parodies based on your inputs. You are also afforded the opportunity to customize and share these creations with others.
Pairing seamlessly with Microsoft Edge, Bing seamlessly integrates with your virtual browsing companion. Exclusive features such as Collections, Immersive Reader, and Vertical Tabs cater to your organizational needs, while facilitating synchronization of bookmarks, passwords, and settings across your devices.
The new Bing beckons you to bing.com/new, beckoning you to chart a course through its myriad possibilities. With its blend of utility and amusement, this iteration of Bing is poised to guide you in sating your information needs as well as kindling your creative endeavors.
Microsoft AppFabric 1.1 support will end soon but what about its integration in SharePoint 2013
I recently found article which says “Microsoft AppFabric 1.1 for Windows Server Ends Support 4/2/2016“. This was a shocking news for me because SharePoint 2013 uses Microsoft AppFabric 1.1, and this means support for SharePoint will also be effected.
In case if you don’t know what is AppFabric 1.1, AppFabric provides hosting, management and caching capabilities for Web applications and middle-tier services. This application helps us to build, scale and manage applications, in particular those built using ASP.NET, Windows Communication Foundation (WCF) and Windows Workflow Foundation (WF).
Microsoft has recommended all applications using AppFabric 1.1 for Windows Server to migrate off this technology by April 2, 2016. Recommended alternative is Azure Redis cache.
Azure Redis Cache is was build on the popular open source Redis Cache. It provies you access to a secure, dedicated Redis cache, managed and fully supported by Microsoft, so you can focus on your application rather than the infrastructure. We recommend all Microsoft AppFabric customers using Cache to move to Microsoft Azure Redis Cache.
As per my knowledge SharePoint 2013 leverages Workflow Manager and an internal workflow hosting for legacy workflows.
Finally I found a comment by Erica Mohler(Microsoft) which says “SharePoint functionality (including the Distributed Cache feature) will be supported under the Microsoft Support lifecycle for SharePoint 2013” which was a relief moment for me.
Another important point to consider that the next version of SharePoint which is suppose to be SharePoint 2016 will integrate with Azure Redis.
Hope this will help you.
Manage Multiple subscriptions in Microsoft Azure PowerShell
Hi All,
We will try to understand if we have multiple Azure subscription in Azure PowerShell, how we need to manage these subscription.
Let us try to find problems when we have Multiple Azure subscriptions in PowerShell.
1. When we run any command we get results only from current subscription
2. Its difficult to find in which subscription our command are being executed
-
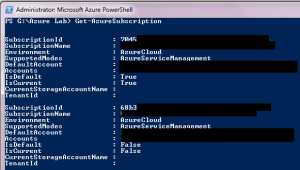
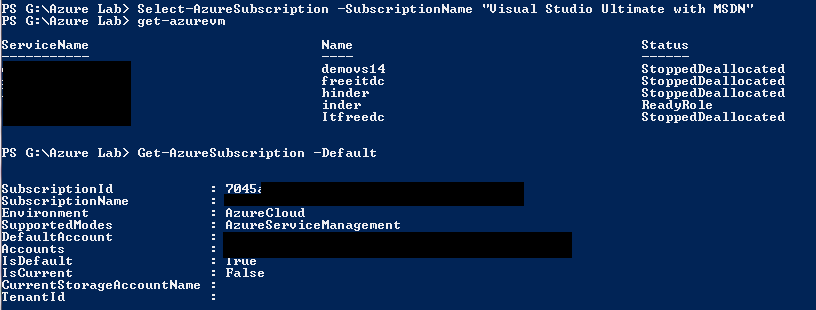
We need to run command “get-azuresubscription” get more details regarding our subscription in PowerShell.
-
You can see that I have 2 subscription with ID 7045 and 68b3. We can see that 7045 subscription status has Isdefault and Iscurrent value marked as True, where as 68b3 is marked as false
-
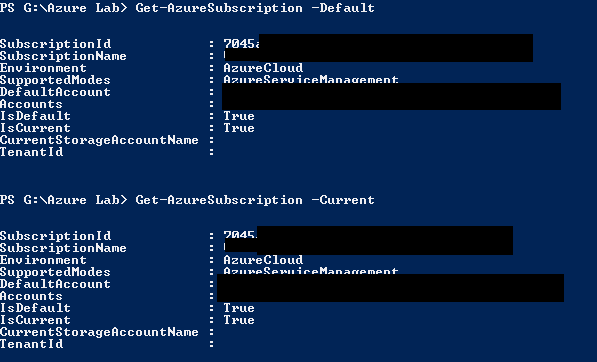
We can get only subscription 7045 when use command “Get-AzureSubscription –Default” and “Get-AzureSubscription –Current”

-
Now when we run command get-azurevm we get details related to current/default subscrption(7045) only.

-
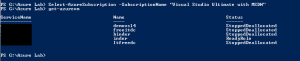
Now I tried below command and see details of other subscriptions
Select-AzureSubscription –SubscriptionName <subscriptionname>
get-azurevm
-
Now if you observe when we run “Get-AzureSubscription –Default” or “Get-AzureSubscription –Current” command we will get 7045 has changed its value to false for Iscurrent.


Creating a Lab on Windows Azure – Install SQL, SharePoint. etc. labs as part of this domain
- Install SQL, SharePoint. etc. labs as part of this domain
Once we are confirmed using script we are able to add new Virtual Machine to domain, we can use the ready to use SharePoint, SQL, etc. VM’s as part of our Lab environment. Let’s see an example of SharePoint server.
- Login to your Azure Subscription Portal site https://manage.windowsazure.com
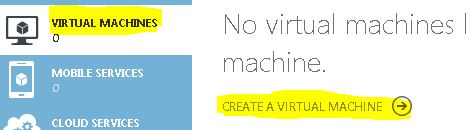
- Select “Virtual Machines” from left menu and select “Create a Virtual Machine”
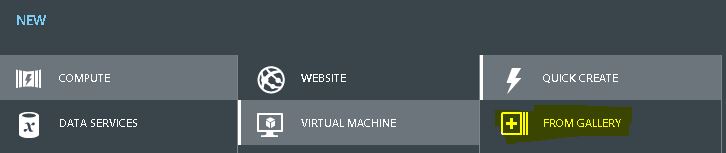
- Under “Virtual Machine” select “From Gallery”
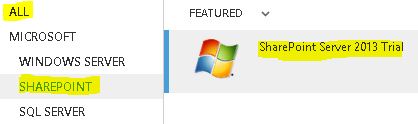
- On the Choose an Image screen select SharePoint server 2013 Trial. This trial works for 180 days.
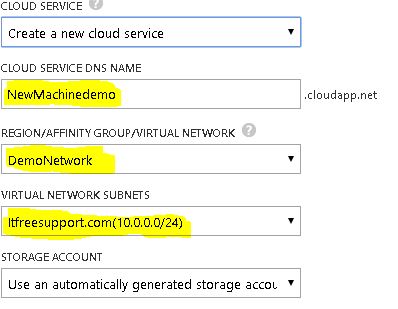
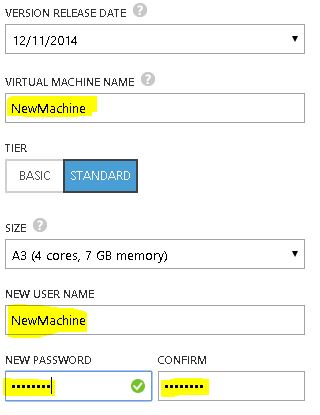
- Type the Machines necessary details like Hardware configuration, Machine name, username and password
- Now we have an important step in the process. Select the DEMONETWORK you created in Region/Affinity Group/Virtual Network. Make sure our Virtual network name is selected in Virtual Network Subnet. Click on Next
- Now comes the most important step, we need to select Custom Script on this page and select the Join.ps1 script we just created. Click Finish

- Now you can see that even SharePoint server is ready within few minutes
- Advantage here is that you have a single credential stored on Active directory using which you manage all the Virtual Machine and work on your lab.
- Below you can see that I have created SQL server, SharePoint server and started using them in just couple of minutes.
Creating a Lab on Windows Azure – When creating a new server it should be part of this domain
We are nearly done with our Domain related activities. Now we need to make sure that all the Virtual Machines we create are part of same Active Directory. This will help us to manage the server and users in domain. In number of Demos we need a domain (AD), so we have met the most important pre-requisites.
- You need to copy below script into a notepad and save it as join.PS1
///// SCRIPT START HERE ////
$domainName = “type domain name here e.g. demo.com. It should be in quotes”
$username = “type domain\username e.g. demo\user1. It should be in quotes”
$password = “type password of above user e.g. 213@jjj. It should be in quotes”
$securePass = ConvertTo-SecureString $password -AsPlainText -Force
$cred = New-Object System.Management.Automation.PSCredential($username, $securePass)
Add-Computer -DomainName $domainName -Credential $cred -Restart –Force
////// SCRIPT END HERE ////
- Login to your Azure Subscription Portal site https://manage.windowsazure.com
- Select “Virtual Machines” from left menu and select “Create a Virtual Machine”
- Under “Virtual Machine” select “From Gallery”
- On the Choose an Image screen select “Windows server 2012 R2” and select Next
- Type the Machines necessary details like Hardware configuration, Machine name, username and password

- Now we have an important step in the process. Select the DEMONETWORK you created in Region/Affinity Group/Virtual Network. Make sure our Virtual network name is selected in Virtual Network Subnet. Click on Next
- Now comes the most important step, we need to select Custom Script on this page and select the Join.ps1 script we just created. Click Finish
- You will observer that your machine will reboot during the initialization process.
- Now when the machine is created, Open Server Manager and you will observe it is already part of Demo domain. On the domain controller in “Active Directory users and computers” you should be able to see the newly added
Note: In some rare scenario, the new computer may not get added to the domain. In that case, please run above PowerShell command line by line and the computer would be added to domain.
Creating a Lab on Windows Azure – Continue
- Update Domain setting on Virtual Network and bind it to Private IP on DC
So far we have created a Virtual Network and a Domain controller in that Virtual network. I hope this process was simple enough for you to follow. It is very important that Domain Controller and DNS have a static IP address so that all other machines know whom to contact to authenticate and resolve computer name. Now we need to make sure that our domain controller has a static IP address and then assign it to DNS on Virtual Network. To do so we will follow below steps:
- Login to your Azure Subscription Portal site https://manage.windowsazure.com
- Select Virtual Machine from left Menu
- Select the Virtual Machine we just created and click on Connect at bottom
- Now RDP to the Virtual Machine we created as a Domain Controller
- Open Windows PowerShell and run command “IPConfig”. Make a note of IP address
- Click on Start and Open DNS manager. Expand Computer name > Forward Lookup Zone > Demo.com > Make sure Ipconfig and DNS has same IP address.
![]()
- Make sure you are connected to Azure PowerShell account by following steps we discussed in section “Connect to your Azure Subscription using PowerShell”
- Run command “Get-AzureVM”. You should be able to see your Azure Virtual Machine name, make a note of same
![]()
- Run below command in Azure PowerShell
Get-AzureVM -ServiceName “Service name from Get-AzureVM command” -Name “name from Get-AzureVM command”| Set-AzureStaticVNetIP -IPAddress “10.0.0.4” | Update-AzureVM
- Now the system will get restarted and a Static IP will be assigned to same. We need to update the same IP in the Virtual Network we created in Azure.
- Login to your Azure Subscription Portal site https://manage.windowsazure.com
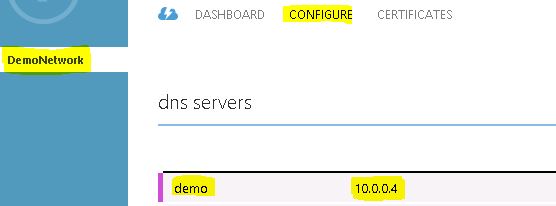
- Select “Network” from left pane > Select the “Demo Network” we created > Click “Configure” on top.
- Update the IP Address of Domain Controller and Domain name. E.g. demo 10.0.0.4. Click on Save at bottom to save these changes