Archive for November, 2022
MySQL server Replication
Hello Everyone,
Today we are doing mysql replication, for Mysql installation you can refer my previous blogs
for this setup we need to VM installed Mysql, server which contain primary DB will be “Master” & server which has replica of the DB know as a “Slave”
lets start the replication.
=====================================================================
Configure MySQL Master
1) Need to edit “/etc/my.cnf”
[mysqld]
server-id = 1
binlog-do-db=otrs #dbname
expire-logs-days=7
relay-log = /var/lib/mysql/mysql-relay-bin
relay-log-index = /var/lib/mysql/mysql-relay-bin.index
log-error = /var/lib/mysql/mysql.err
master-info-file = /var/lib/mysql/mysql-master.info
relay-log-info-file = /var/lib/mysql/mysql-relay-log.info
log-bin = mysql-bin
2) Restart the mysql service
# service mysqld restart
3) create a Slave user and password. For instance
[root@OtrsMaster ~]# mysql -u root -p
Enter password:
Welcome to the MySQL monitor. Commands end with ; or \g.
Your MySQL connection id is 17
Server version: 5.1.73-log Source distribution
Copyright (c) 2000, 2013, Oracle and/or its affiliates. All rights reserved.
Oracle is a registered trademark of Oracle Corporation and/or its
affiliates. Other names may be trademarks of their respective
owners.
Type ‘help;’ or ‘\h’ for help. Type ‘\c’ to clear the current input statement.
mysql>
4)
mysql> STOP SLAVE;
Query OK, 0 rows affected, 1 warning (0.00 sec)
mysql> GRANT REPLICATION SLAVE ON *.* TO ‘centos’@’%’ IDENTIFIED BY ‘centos’;
Query OK, 0 rows affected (0.00 sec)
mysql> FLUSH PRIVILEGES;
Query OK, 0 rows affected (0.00 sec)
5) Applied Read only lock on slave
mysql> FLUSH TABLES WITH READ LOCK;
Query OK, 0 rows affected (0.00 sec)
5)
mysql> SHOW MASTER STATUS;
+——————+———-+————–+——————+
| File | Position | Binlog_Do_DB | Binlog_Ignore_DB |
+——————+———-+————–+——————+
| mysql-bin.000001 | 106 | otrs | |
+——————+———-+————–+——————+
1 row in set (0.00 sec)
6) Note down the file (mysql-bin.000001) and position number (106)
7) Backup Master server database
# mysqldump –all-databases –user=root –password –master-data > masterdatabase.sql
8) After taking the backup Again login to MySQL as root user and unlock the tables
mysql> UNLOCK TABLES;
Query OK, 0 rows affected (0.01 sec)
mysql> quit
Bye
9) Copy the masterdatabase.sql file to your Slave server using SCP
scp masterdatabase.sql root@192.168.0.220:/root
Configure MySQL Slave
1) Need to edit “/etc/my.cnf”
[mysqld]
server-id = 2
master-host=192.168.0.200
master-connect-retry=60
master-user=sk
master-password=centos
replicate-do-db=otrs
relay-log = /var/lib/mysql/mysql-relay-bin
relay-log-index = /var/lib/mysql/mysql-relay-bin.index
log-error = /var/lib/mysql/mysql.err
master-info-file = /var/lib/mysql/mysql-master.info
relay-log-info-file = /var/lib/mysql/mysql-relay-log.info
log-bin = mysql-bin
max_allowed_packet=20M
query_cache_size=32M
innodb_buffer_pool_size = 256M
innodb_log_file_size = 512M
datadir=/var/lib/mysql
socket=/var/lib/mysql/mysql.sock
2) Import the master database:
mysql -u root -p < /root/masterdatabase.sql
3) # service mysqld restart
4) Log in to the MySQL & run the below commands
mysql> SLAVE STOP;
Query OK, 0 rows affected (0.01 sec)
mysql> CHANGE MASTER TO MASTER_HOST=’192.168.2.220′, MASTER_– USER=’centos’, MASTER_PASSWORD=’centos’, MASTER_LOG_FILE=’mysql-bin.000001′, MASTER_LOG_POS=20249;
Query OK, 0 rows affected (0.03 sec)
mysql> SLAVE START;
Query OK, 0 rows affected (0.01 sec)
mysql> SHOW SLAVE STATUS\G
*************************** 1. row ***************************
Slave_IO_State: Waiting for master to send event
Master_Host: 192.168.0.220
Master_User: centos
Master_Port: 3306
Connect_Retry: 60
Master_Log_File: mysql-bin.000001
Read_Master_Log_Pos: 20249
Relay_Log_File: mysql-relay-bin.000002
Relay_Log_Pos: 4941
Relay_Master_Log_File: mysql-bin.000001
Slave_IO_Running: Yes
Slave_SQL_Running: Yes
Replicate_Do_DB:
Replicate_Ignore_DB:
Replicate_Do_Table:
Replicate_Ignore_Table:
Replicate_Wild_Do_Table:
Replicate_Wild_Ignore_Table:
Last_Errno: 0
Last_Error:
Skip_Counter: 0
Exec_Master_Log_Pos: 20249
Relay_Log_Space: 5096
Until_Condition: None
Until_Log_File:
Until_Log_Pos: 0
Master_SSL_Allowed: No
Master_SSL_CA_File:
Master_SSL_CA_Path:
Master_SSL_Cert:
Master_SSL_Cipher:
Master_SSL_Key:
Seconds_Behind_Master: 0
Master_SSL_Verify_Server_Cert: No
Last_IO_Errno: 0
Last_IO_Error:
Last_SQL_Errno: 0
Last_SQL_Error:
1 row in set (0.00 sec)
mysql>
If your application & DB server are the same then installed the application on slave server before adding in to it Mysql Slave.
& rsync your application folders with slave server in scenario you will get Mysql replication as well as application server
[root@OtrsMaster ~]# crontab -l
*/10 * * * * /usr/bin/rsync -avr –progress –delete //var/article/* root@192.168.0.220:/opt/var/article/
Fail-over Master to slave
1)flush log if server was master after booting you have to run below command
mysql> flush logs;
Query OK, 0 rows affected (0.01 sec)
2)
mysql> SLAVE STOP;
Query OK, 0 rows affected (0.01 sec)
mysql> RESET MASTER;
Query OK, 0 rows affected (0.01 sec)
3)
mysql>CHANGE MASTER TO MASTER_HOST=’192.168.0.220′;
Query OK, 0 rows affected (0.01 sec)
mysql> SHOW MASTER STATUS;
+——————+———-+————–+——————+
| File | Position | Binlog_Do_DB | Binlog_Ignore_DB |
+——————+———-+————–+——————+
| mysql-bin.000001 | 20425 | | |
+——————+———-+————–+——————+
1 row in set (0.00 sec)
mysql>exit
After doing all these settings restart the applications services
[root@OtrsMaster ~]# /etc/init.d/httpd restart
Stopping httpd: [ OK ]
Starting httpd: [ OK ]
To make failed server (after rebuilding) again MySQL slave please follow “Configure MySQL Slave” section.
–Sachin.
Configure Office Web App 2013 Farm with SharePoint 2013 Farm
Hi Friends,
Today we will discuss on how to configure Multi Server Office Web Apps farm with a SharePoint farm. Also the specialty of this OWA configuration is that it can work inside and outside of firewall. Normally OWA farms are setup HTTP inside the firewall network(Internal network) and HTTPS outside the network(External world) but using this configuration we will configure HTTPS for both inside and outside network. This will not only decrease additional overhead and configuration but also is recommended by Microsoft to use HTTPS for production environment.
We need to meet below pre-requisites before we proceed further:
1. SharePoint farm configured and ready to use
2. Two or more Office Web Apps servers with setup files
3. One certificate for Office Web App
4. If you are using Windows server 2012 R2 then you would need to install latest update for Office Web Apps
5. FQDN name for your Office web app farm e.g.(owa.domain.com) and its DNS entry with Round Robin(You can also configure Windows NLB or a Load Balancer entry for same)
Installation of Office Web App is very simple, You just need to download the installable and execute it on all OWA servers.
Install Office Web apps on all Office Web Apps servers. If you are using Office Web App on Windows Server 2012 R2, you should install latest update for Office Web Apps. You would need an Office Web app certificate imported to IIS
Now Let’s configure Office Web App, Open Windows PowerShell and execute below command
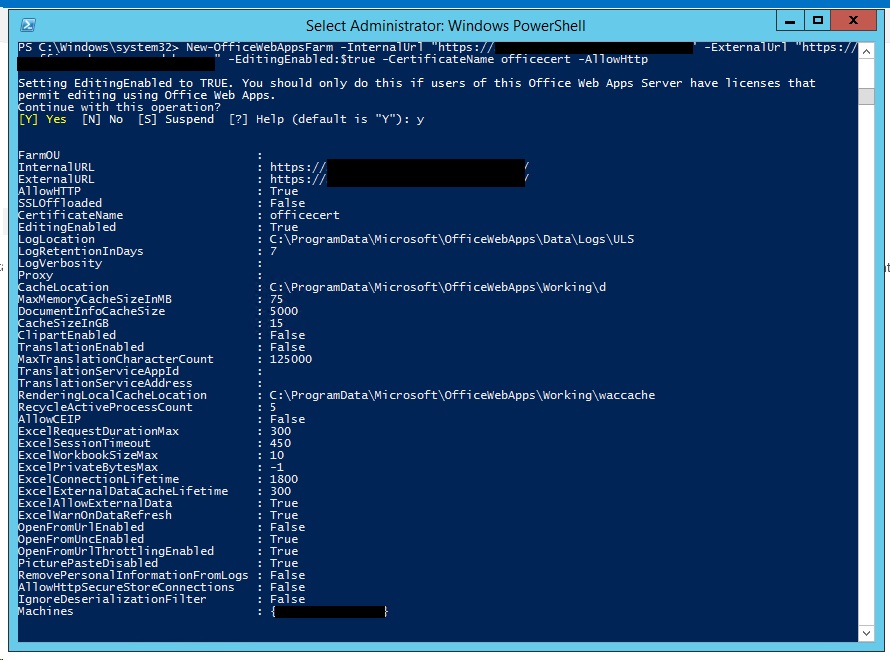
Once the Office Web App farm is configured, open IIS and make sure SSL binding for site HTTP80 has proper certificate attached.
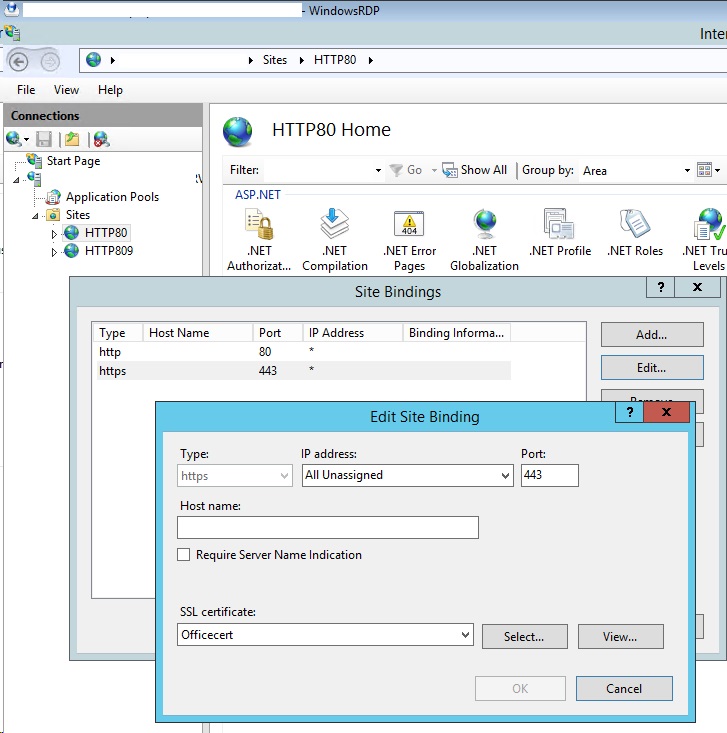
From IIS binding select the certificate and export the .cer file.
You need to import it to central admin manage trust.
To Attach this Office web app farm to SharePoint farm, you need to create a WOPI connection. Open SharePoint PowerShell on SharePoint server and execute below command:
New-SPWOPIBinding -ServerName “officewebapp.domain.com”
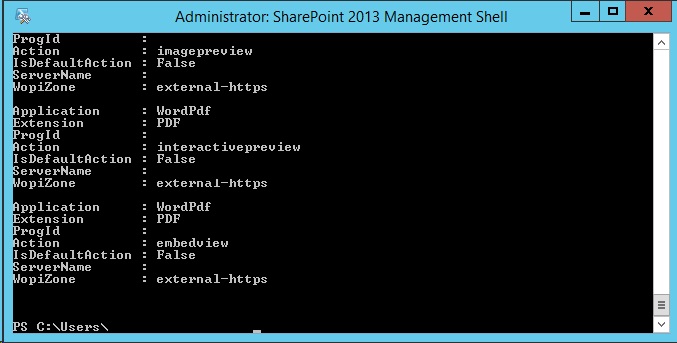
Set Wopi zone
![]()
Now if you want to add other Office Web App Server to OWA farm, you need to execute below command on existing OWA server
new-officewebappsmachine -machinetojoin “owa2server.domain.com”
![]()
Hope this will help you
Configure Workflow Manager 1.0 with SharePoint Server 2013/2016/2019
Hi Friends,
Today we will discuss on how to configure Multi Server Workflow farm with SharePoint farm. Just of your information, you need to access Workflow farm only from WFE and Application servers. This means just like your database server, even workflow servers are not exposed to end users.
We need to meet below pre-requisites before we proceed further:
A. SharePoint farm configured and ready to use
B. Two or more Workflow servers with setup files
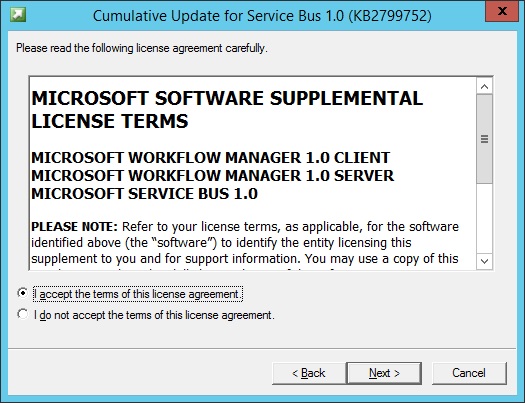
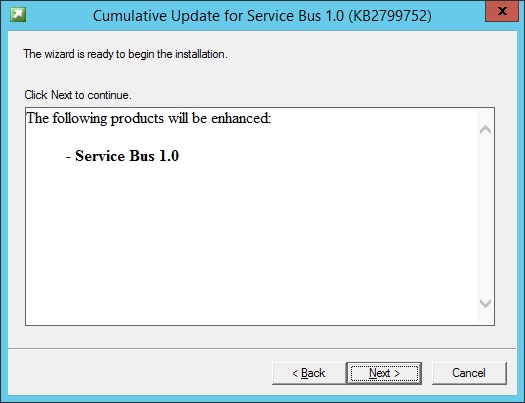
C. If you are using Windows server 2012 R2 then you would need update KB2799752(Service bus hotfix) and KB2799754(Workflow manager hotfix)
D. FQDN name for your workflow farm e.g.(Workflow.domain.com) and its DNS entry with Round Robin(You can also configure Windows NLB or a Load Balancer entry for same)
- Let’s get started with installation of Workflow Manager 1.0 on Workflow servers. We need installable as shown below
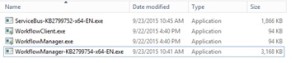
-
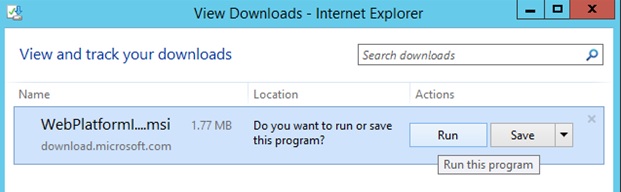
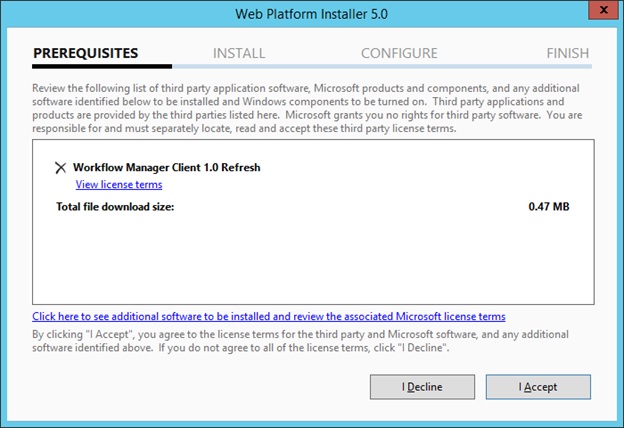
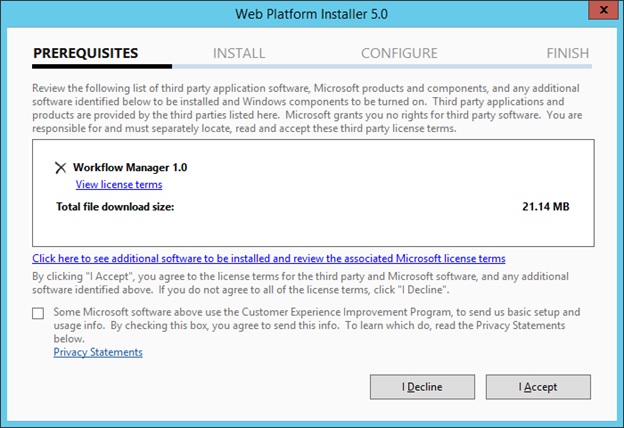
When you will try to install the workflow.exe file you will be asked to download and install WebPlatformInstaller.exe. Now all the updates and most components are installed through WebPlatforminstaller.

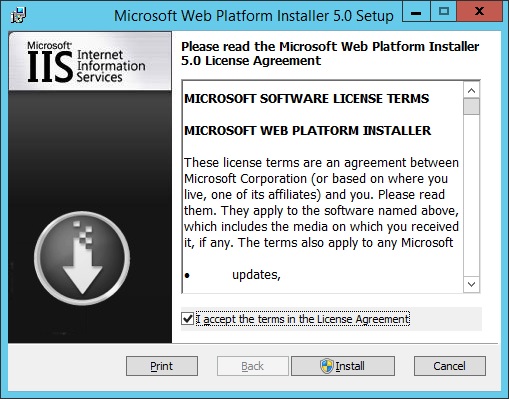
- Once the WebPlatforminstaller is installed, you need to search for Workflow manager and Workflow manager client and install the same.
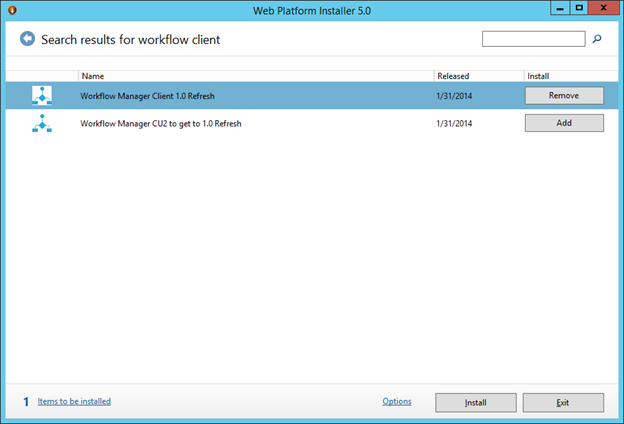


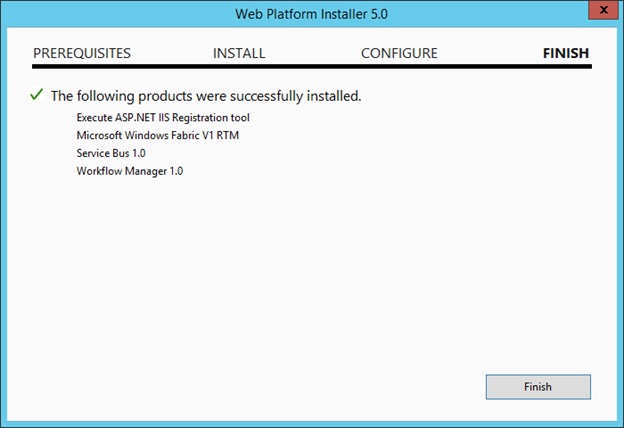
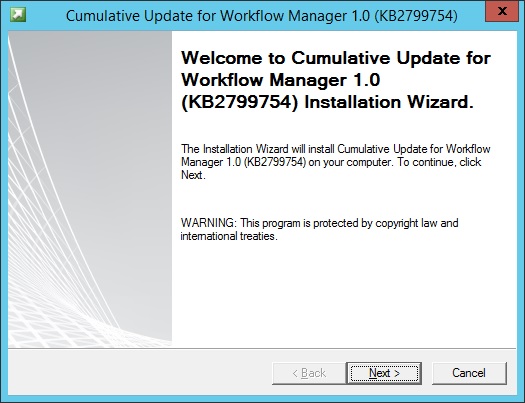
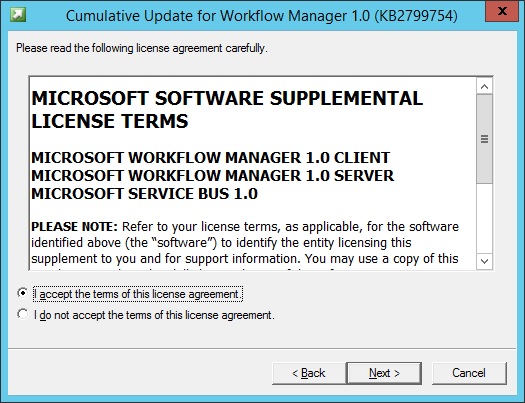
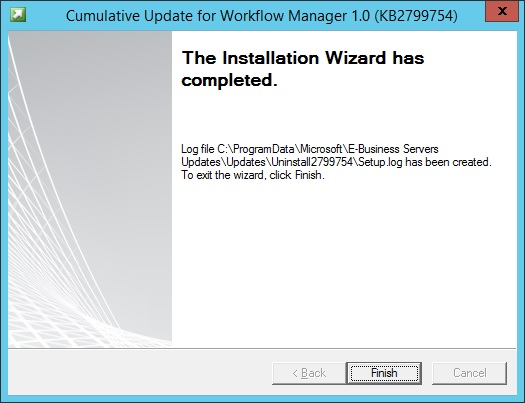
- Once Workflow Manager and client is installed, I would suggest you to install the updates as well.


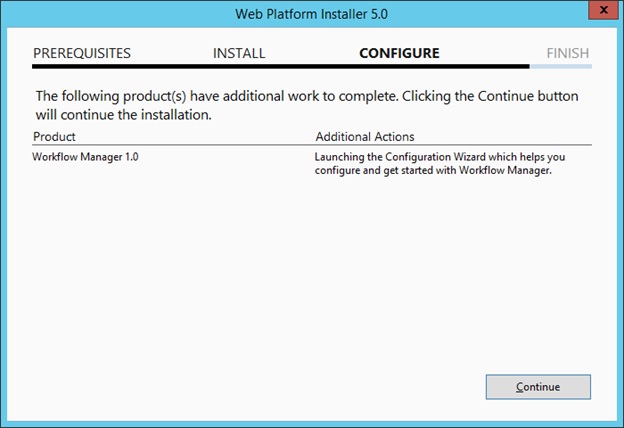
- Now let’s configure Workflow Server farm. This is very important so please follow steps carefully.
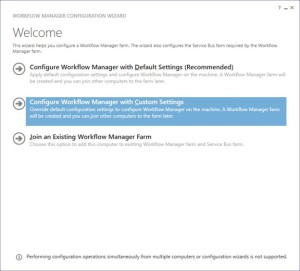
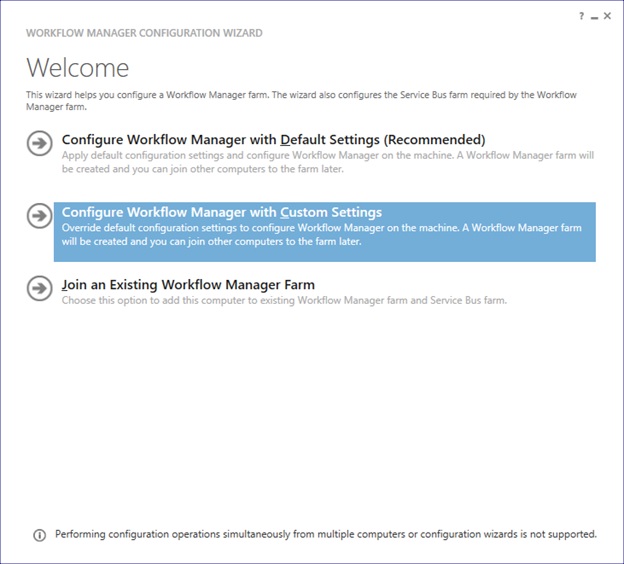
- Lets execute the Workflow Manager Configuration Wizard
- Select “Configure Workflow Manager with Custom Settings”
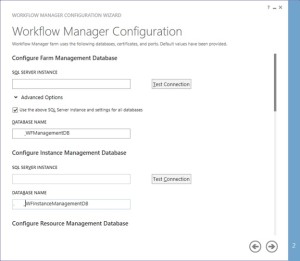
-
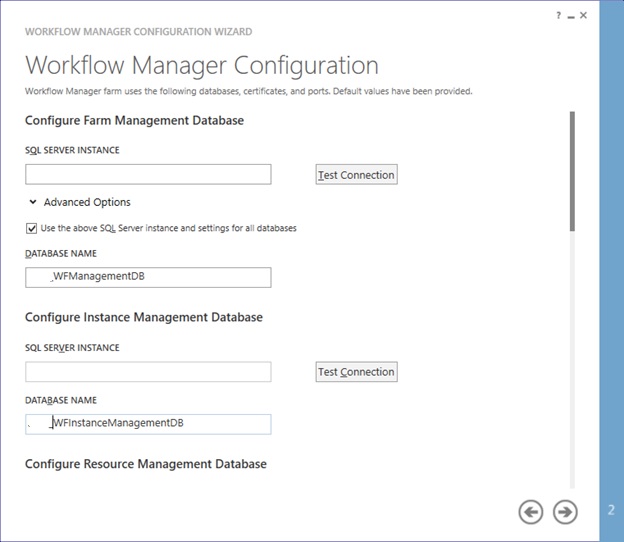
Now provide the SQL server instance name, Authentication, Certificate and SQL Workflow database names
-
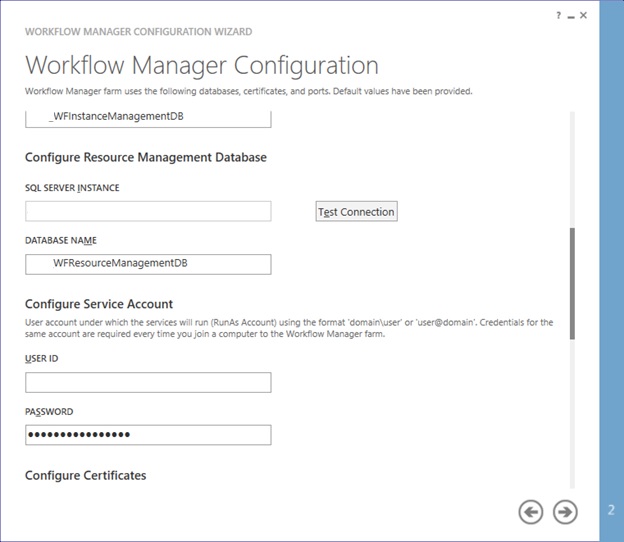
You need to provide the Workflow service account credentials which will be used to connect to SQL server and for workflow IIS Application pool.
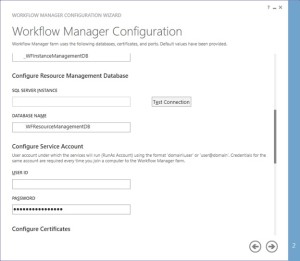
-
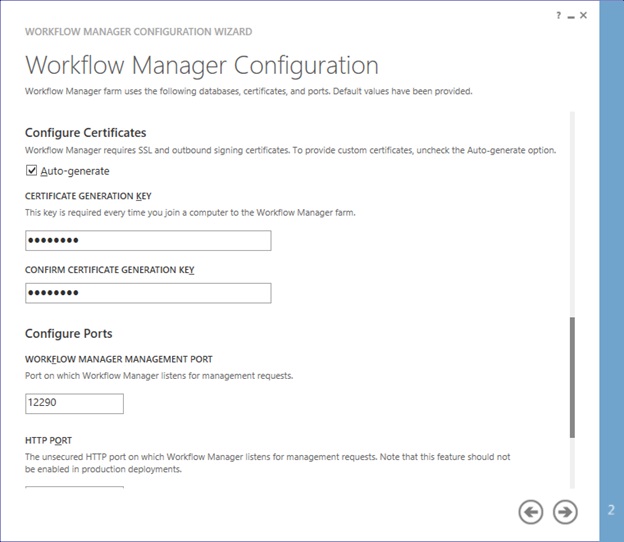
You would need to provide a Certificate Generation Key. It is just like Passphrase for your SharePoint farm
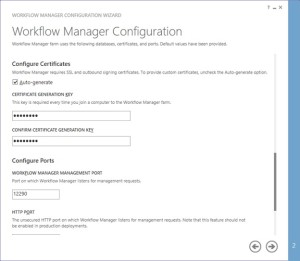
-
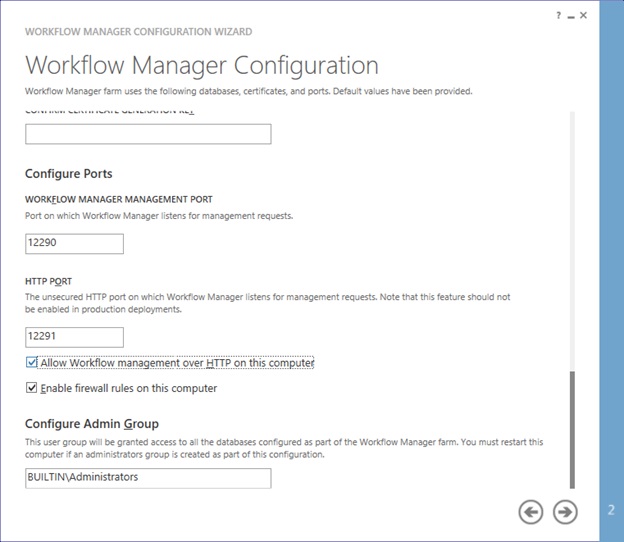
Make sure you select “Allow workflow management over http on this computer”
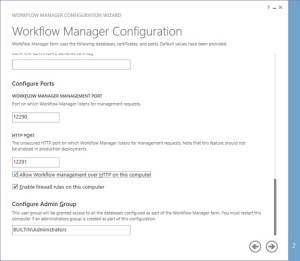
-
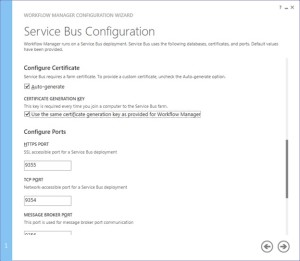
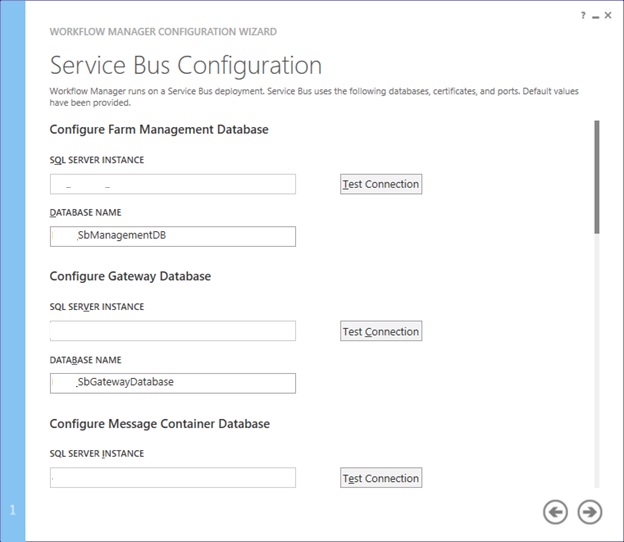
Along with Workflow Management, you need to configure Service Bus required by Workflow manager
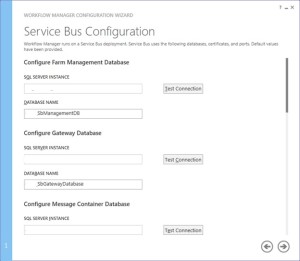
-
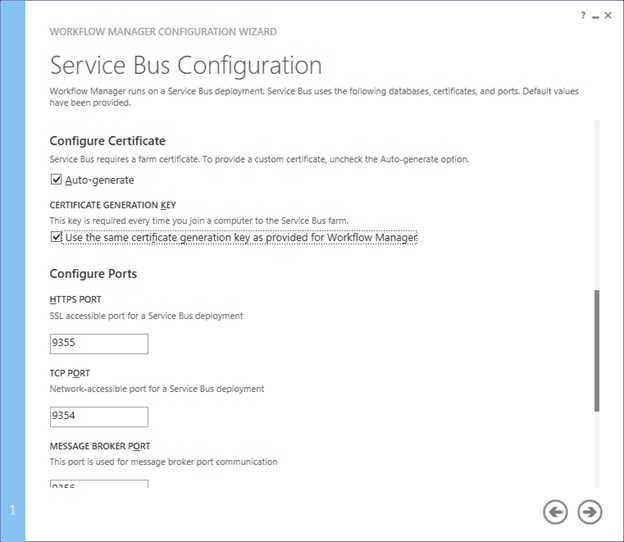
Make sure you select “use the same certificate generation key as provided for workflow manager”

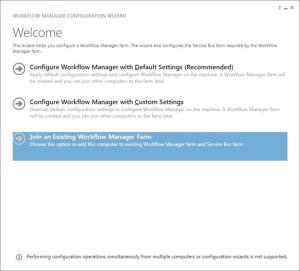
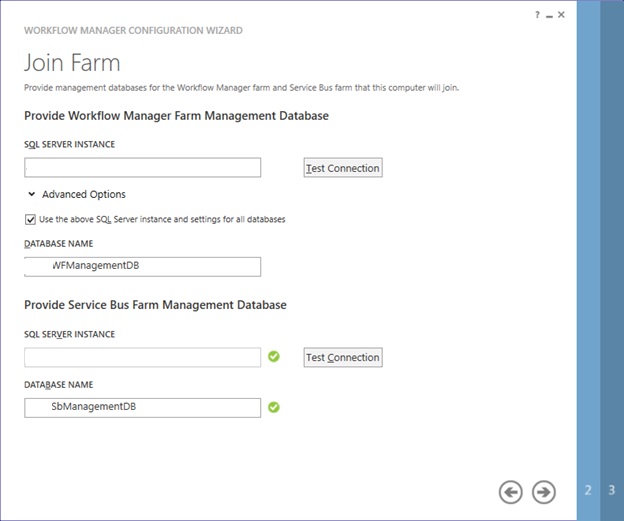
- Once the Workflow Farm is created, you need to join other Workflow server to the farm. To do so execute the same Workflow configuration wizard and select “Join an Existing Workflow Manager Farm”
-
Provide the existing Workflow Farm SQL server instance name, Workflow database name and Service Bus farm database name

-
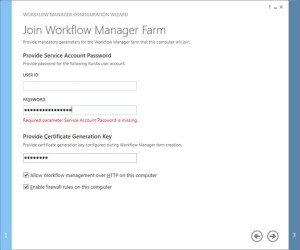
Provide the workflow service account and Certificate generation key used while creating workflow farm.
-
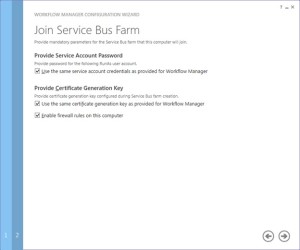
Select “use the same service account credentials as provided for Workflow Manager”, then select next
-
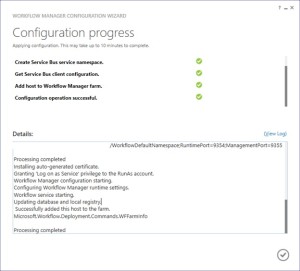
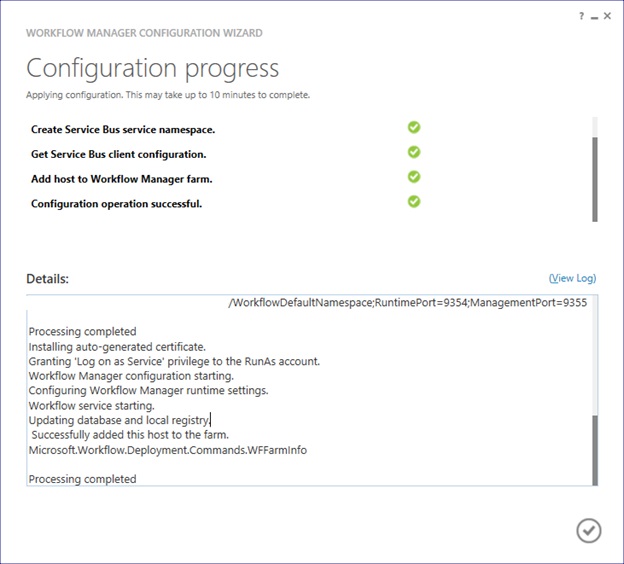
Once farm other server is joined to workflow farm you will see below
-
Once workflow is configured, you need to attach Workflow Farm to SharePoint farm. Make sure you have DNS entry(Workflow.domain.com) for your Workflow farm. If not DNS, you should at least have Host entry for same. Try to browse http://workflow.domain.com:12291 on WFE and Application server, you might see Authentication error.

-
Add the URL to Local Intranet and set the Local Intranet zone to “Automatically login with current username and password”
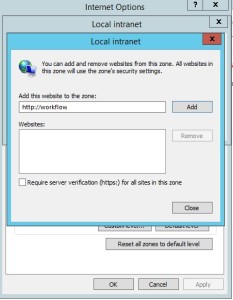


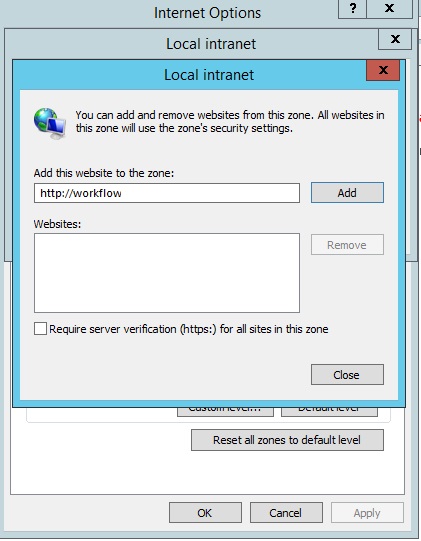
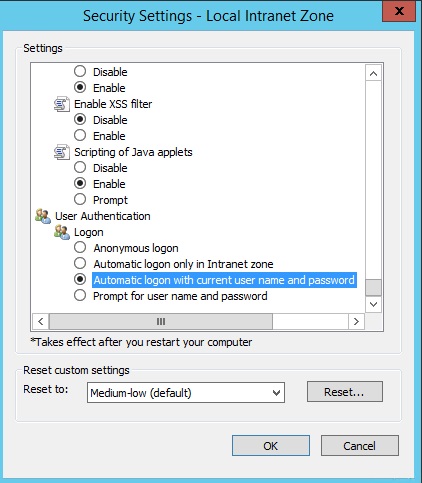
-
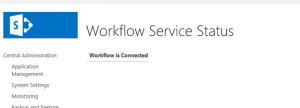
Now you should be able to browse the workflow farm details, this shows you can connect to workflow farm and it is working fine.
-
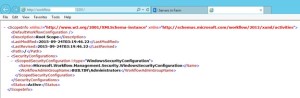
Now execute below command in SharePoint Powershell
Register-SPWorkflowService -SPSite “http://sharepointsite” -workflowHostUri “http://workflow.domain.com:12291/” -AllowOauthHttp -ScopeName SharePoint –force

-
Now you need to activate the workflow feature on site
Enable-SPFeature -Identity WorkflowServiceStore –Url http://sharepointsite -
In Central Admin > Manage Service Application > Workflow Service Application Proxy
-
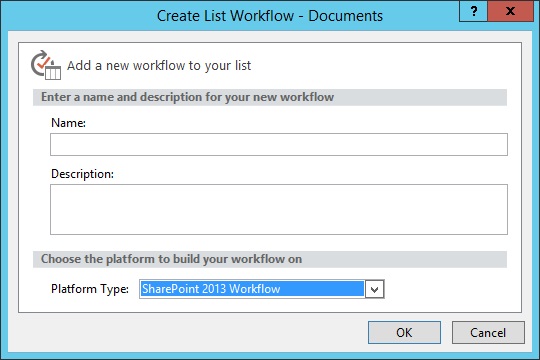
Open site in SharePoint designer – Select workflow from left pane – select new workflow

Note:
A. Workflow farm can co-locate on SharePoint servers
B. As per Microsoft articles, for high availability you need to have at least 3 Workflow Server in farm. You cannot have 2 workflow servers in a farm. It has to be 1 or 3.