Archive for the ‘Active Directory’ Category
Simplifying Role and Permission Management with Authorization Manager (AzMan)
Also explained in my youtube video :
Introduction
Authorization Manager (AzMan) is a powerful access control framework that simplifies managing roles and permissions within your application. Whether you’re building a web application or a smart client, AzMan provides a flexible way to define operations and group them into tasks. These operations represent actions that users can perform.
Key Features
- Role-Based Framework: AzMan allows you to manage roles by granting permissions for various operations. Users are assigned roles, and permissions are then associated with those roles.
- Microsoft Management Console (MMC): AzMan provides a user-friendly management console for defining operations, roles, and permissions. You can configure the policy store either in Active Directory or as an XML file.
- Integration with Active Directory: AzMan seamlessly integrates with Active Directory, allowing you to directly configure AD groups for specific permissions.
Getting Started with AzMan
1. Installation
- AzMan is available by default in the most recent version of Windows servers
2. Creating an AzMan Policy Store
- You can create the policy store in either Active Directory or as an XML file.
- In the MMC, ensure you’re in “Developer Mode” to create a new policy.
- Create a new authorization store with the “XML” type and define your policies.
3. Managing Applications
- Create a new application (e.g., “SampleApplication”).
- Maintain groups, users, roles, and permissions specific to your application.
- Apply policies to multiple applications, each with its own mappings of roles, users, and permissions.
4. Defining Tasks and Operations
- Under the policy, select your application (e.g., “SampleApplication”).
- Expand “Definitions” and choose “Operation Definitions.”
- Create new operation definitions to represent tasks that users can perform.
5. Groups
Groups : We can create different type of groups. We can create a Basic Application Group which is much like a local group. We can add users/groups from Active Directory or another group from Authorization Manager. We can even exclude users/group as well. Say you have a group of 200 users in AD where you want to add all the users but one user. We could add the group then go in and exclude the one user.
An LDAP Query Application Group could be created that determine who is a member by running a LDAP query. If the user matches the query then the user is deemed to be a member of the group. You could use a simple LDAP query or you could make it more complex to fit your needs.
Business Rule Application Group is the third type of group that can be created. In this type of group you will need to have a script that defines the members of this type of group. The script will need to be constructed either in VB or Java.
Role Definitions : A role definition is defined as a set of permissions that a user must have to perform a job or task. A role can have lower level tasks, roles and operations associated with it.
Task Definitions: A task definition is smaller than a role definition and can be use to define other roles and tasks.
Operation Definitions: This can only be seen in Developer mode. Operation definitions are small computer level actions that are used to define tasks and usually are not relevant to an administrator.
For more details do refer article : AzMan MMC with a sample application – Microsoft Community Hub
Difference between Beta/me/profile and v1.0/me
Also explained in my Youtube video: https://www.youtube.com/watch?v=_XKrZvCIG98
The difference between the two endpoints is that https://graph.microsoft.com/beta/me/profile is in the beta version of the Microsoft Graph API, while https://graph.microsoft.com/v1.0/me is in the v1.0 version of the API . The beta version is used for testing new features and is not recommended for production use. The v1.0 version is the stable version of the API and is recommended for production use.
The https://graph.microsoft.com/beta/me/profile endpoint is used to retrieve information about a given user or yourself, such as the user’s profile information, interests, languages, skills, and more. To call this API, your app needs the appropriate permissions, such as User.Read.
On the other hand, the https://graph.microsoft.com/v1.0/me endpoint is used to retrieve information about the signed-in user, such as the user’s display name, email address, job title, and more. To call this API, your app needs the appropriate permissions, such as User.Read.
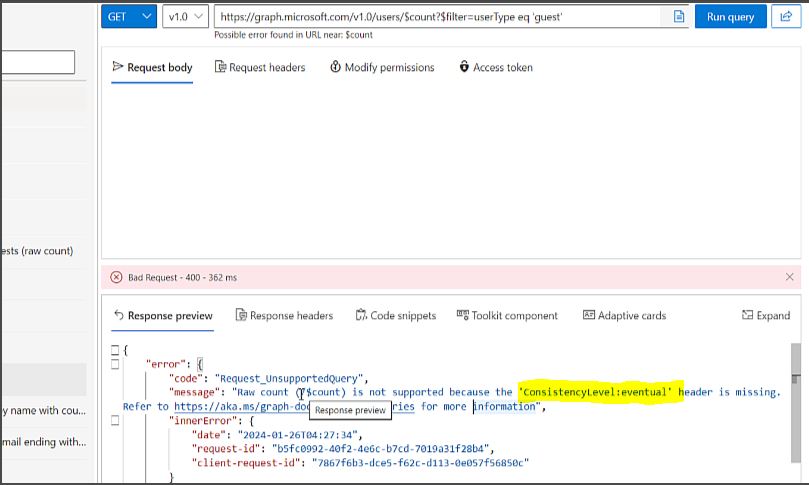
ConsistencyLevel:eventualError when using graphs API ‘count the guest users in your organization’
Explained the same in Youtube Video : https://youtu.be/TFcIbOKApwE
Add Google Chrome group policy to Active Directory
Today, I got a very unique requirement to push a group policy for Google Chrome which I did long time back. So 1st I searched for link to download the Google Chrome group policies. It took me sometime to hunt it so I have shared direct links below:
https://chromeenterprise.google/browser/download/?sjid=6066941226709070174-NA#download
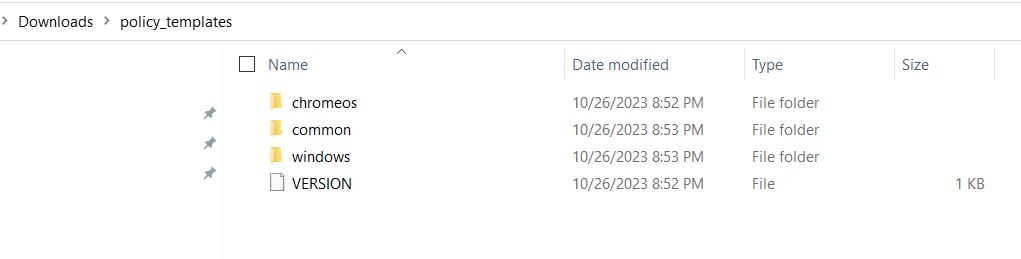
Once download the zip file, we have extracted the folder, and we see 3 folders.
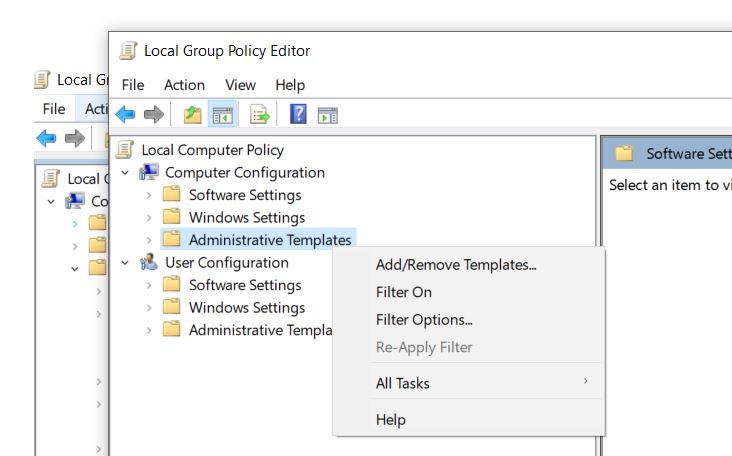
Now, we need to open the Group Policy editor window, Expand Computer configuration > Administrative Templates > Add/Remove Templates
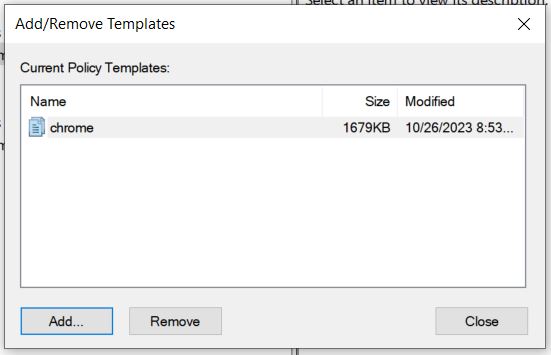
Now select Add > browse to Windows > Adm > En-US > Select Chrome.adm file and select Open
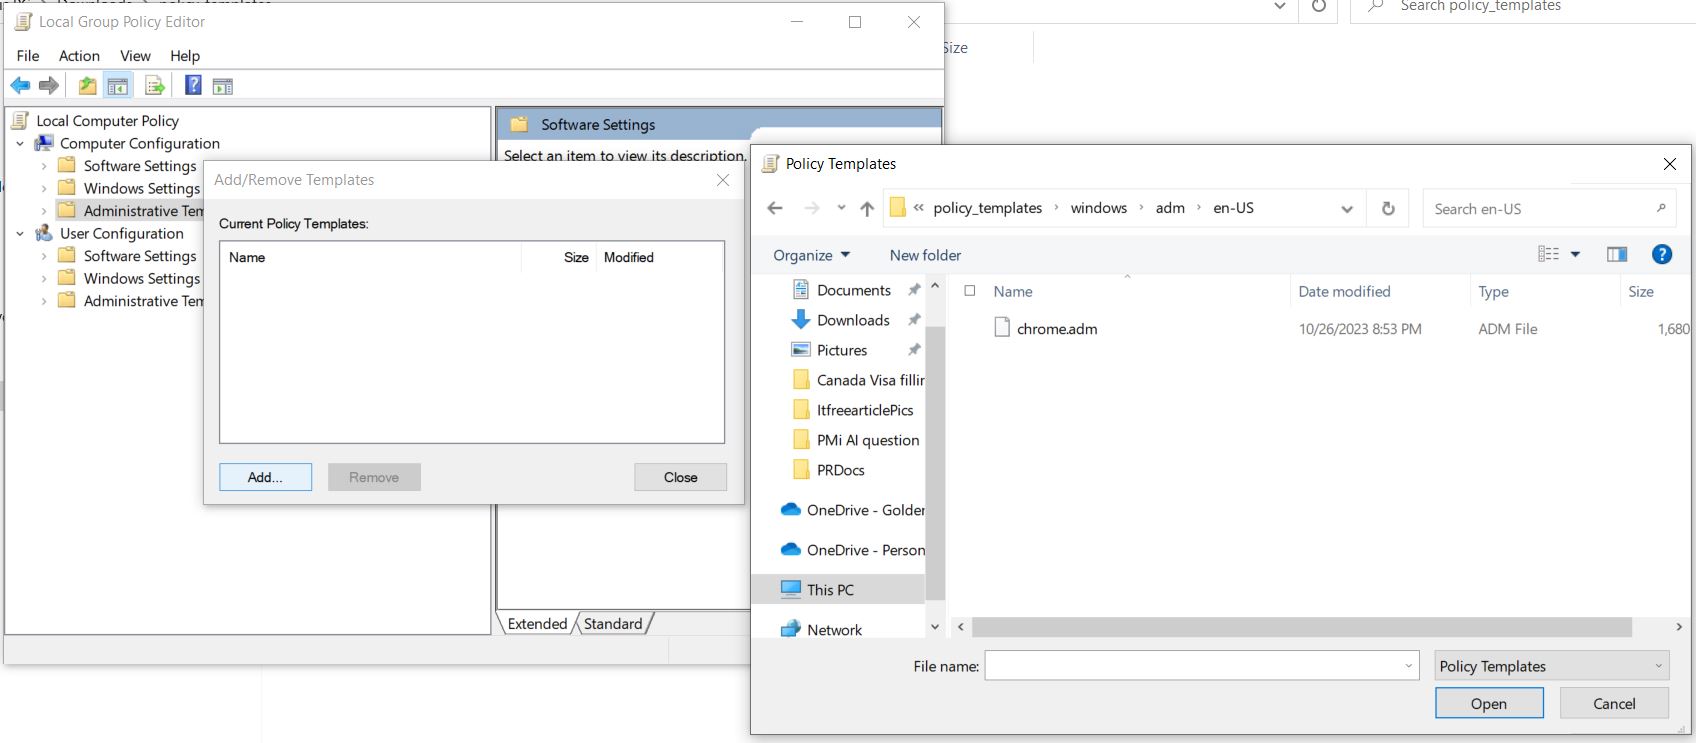
You will see the Name, Size and date of the policy, Click Close
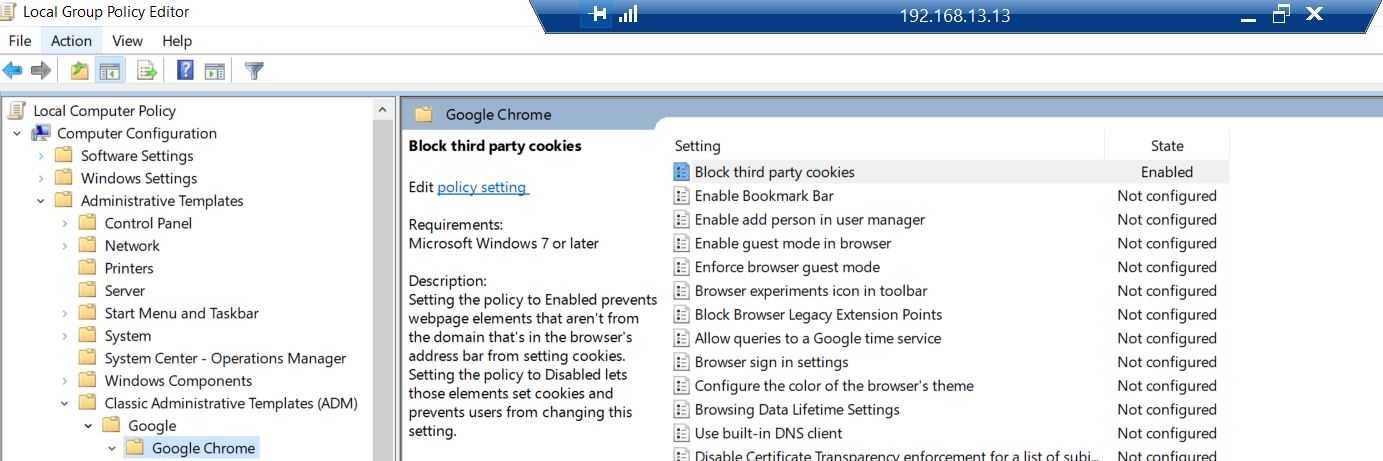
Now when we expand Computer Configuration > Administrative Templates > Classic Administrative Templates(ADM) > Google > Google Chrome
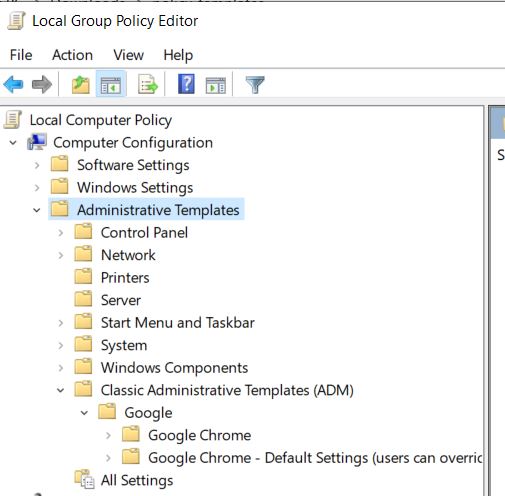
Here we can see all the Google Chrome policies
ADFS signout issue for SharePoint site in IE browser due to FedAuth Cookie
Hi All,
Today we will discuss on a very famous SharePoint ADFS sign Out issue. Let me start with some background on the issue. I have configured SharePoint with ADFS authentication, everything(login, logout, claims, etc) works except when I try to logout, I am redirected to a page similar to https://your_sts_server/adfs/ls/?wa=wsignout1.0.
Now without closing the browser windows(Logout message says “Sign out: Close browser to complete sign out”) type the SharePoint site URL in address bar, I won’t be asked to login and SharePoint site will be accessible. This shows that Signout was incomplete.
This is a known issue with SharePoint site working with ADFS authentication. This is is caused due to ADFS FedAuth Cookie. In order to have correct sign out behaviour we need to make the FedAuth cookies as session based. We can achieve this by running the following SharePoint Powershell command:
$sts = Get-SPSecurityTokenServiceConfig
$sts.UseSessionCookies = $true
$sts.Update()
You need to run above command on a single server but you need to perform iisreset on all SharePoint servers.
To understand more about the FedAuth Cookie check below article:
https://msdn.microsoft.com/en-us/library/office/hh147183(v=office.14).aspx
Hope this will help you all.
Create a Active Directory Forest on a Windows Azure VM
- Create a new domain
Now let’s configure this server to be a Domain Controller. As discussed earlier Domain controller manage DNS, AD Users, etc. and are normally the 1st and most important server in a company.
- Login to your Azure Subscription Portal site https://manage.windowsazure.com
- Select Virtual Machine from left Menu
- Select the Virtual Machine we just created and click on Connect at bottom
- Now RDP to the Virtual Machine we created and click on Server Manager

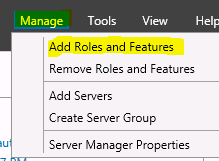
- Select Manager > Add Roles and Features
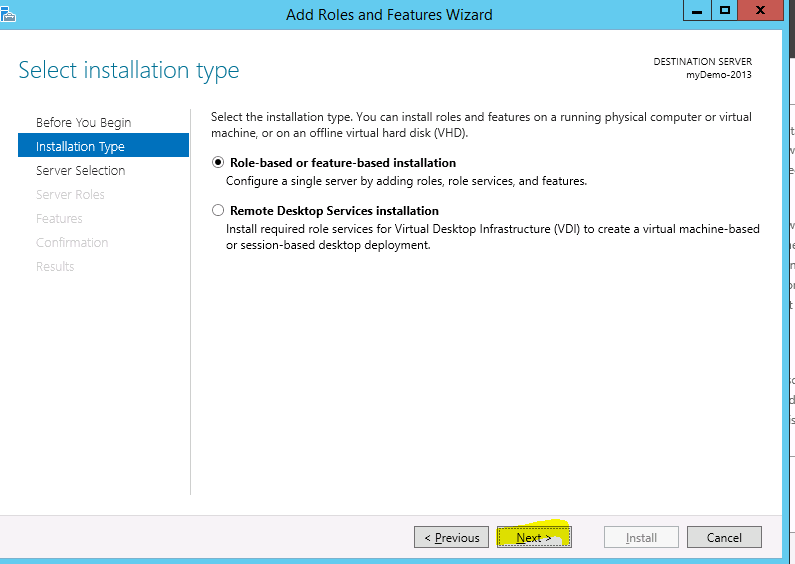
- Select “Next” on Installation Type screen
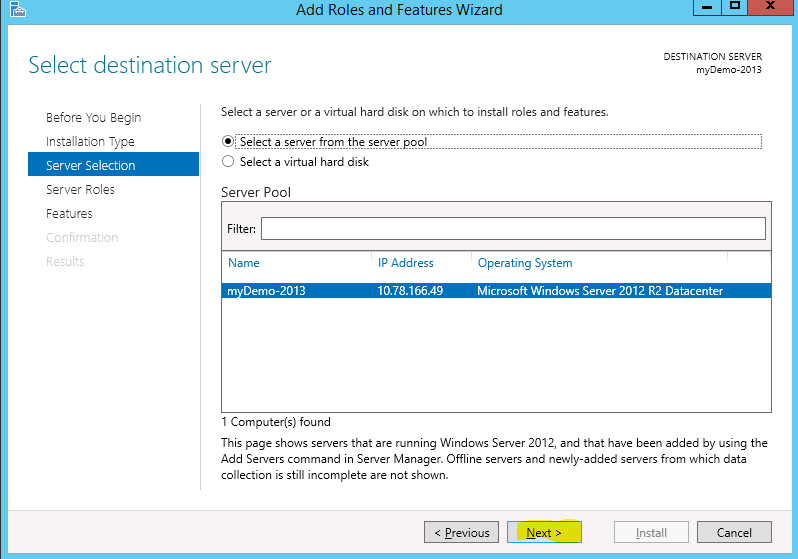
- Select “Next” on Destination Server screen
- Check Box “Active Directory Domain servers”
![]()
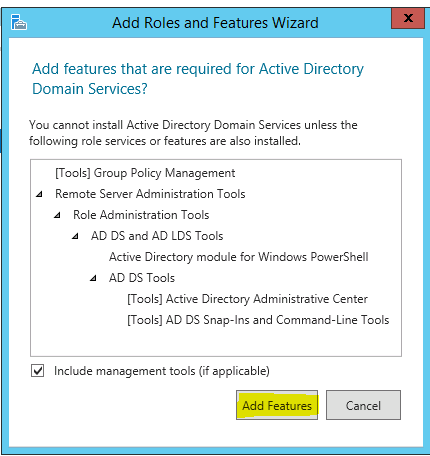
- Click on “Add Feature” on pop-up screen
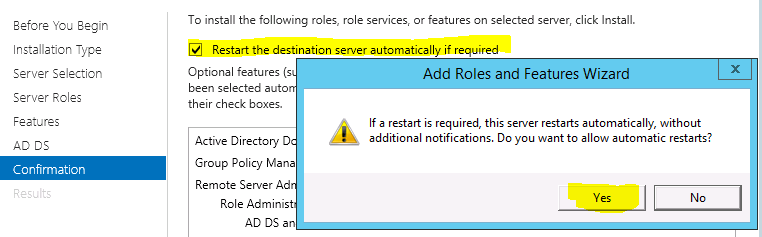
- Select the check box “Restart the destination server if required” > Click OK
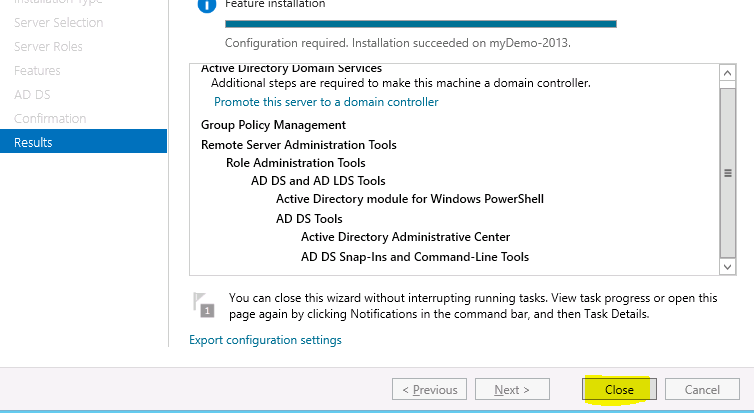
- Once it is installed, Click on Close
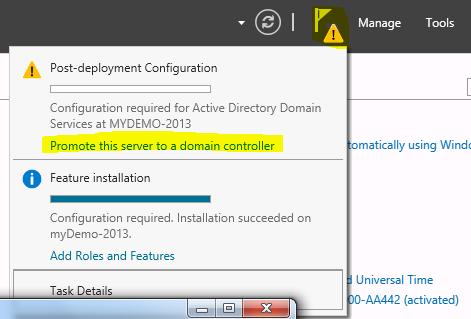
- Open the Server Manager again, Click on Flag at top and select “Promote this server to a Domain Controller”
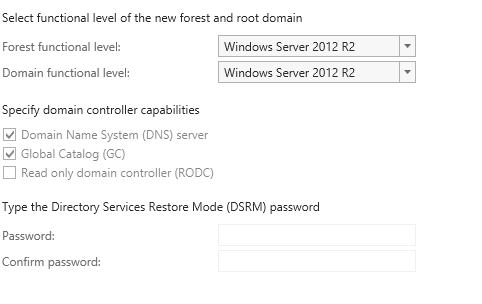
- Select “Add a New forest”, type domain name
- Type the DSRM password and click “Next” (Note: this is required when you try to recover your active directory)
- Now you will have to select your domain name. For example. Demo.com
- The NetBIOS Name screen will remove .com and you will see only demo.
- Select the Default location of installation and click “Next”
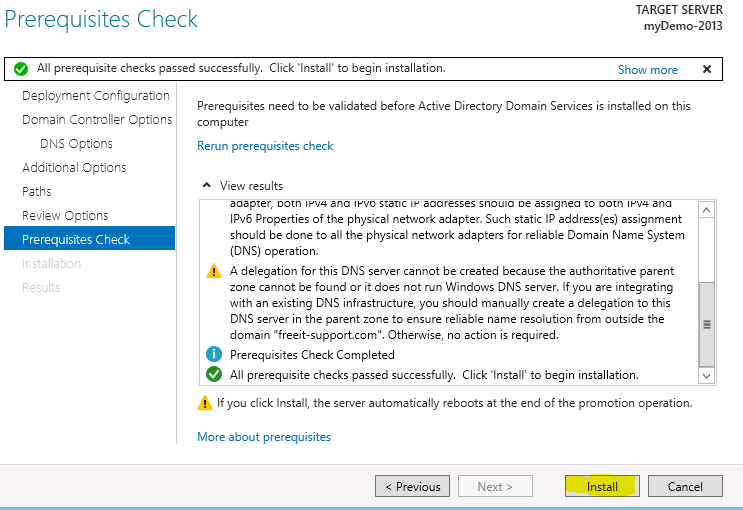
- Click on “Install”
- Once the Computer is restarted, your Domain Controller would be ready.
Note: From now on when you logon to server you need use your domain name along with username we just created to authenticate to server. Example: demo\user1