- An error has occurred, which probably means the feed is down. Try again later.
Posts Tagged ‘Configure’
Configure Office Web App 2013 Farm with SharePoint 2013 Farm
Hi Friends,
Today we will discuss on how to configure Multi Server Office Web Apps farm with a SharePoint farm. Also the specialty of this OWA configuration is that it can work inside and outside of firewall. Normally OWA farms are setup HTTP inside the firewall network(Internal network) and HTTPS outside the network(External world) but using this configuration we will configure HTTPS for both inside and outside network. This will not only decrease additional overhead and configuration but also is recommended by Microsoft to use HTTPS for production environment.
We need to meet below pre-requisites before we proceed further:
1. SharePoint farm configured and ready to use
2. Two or more Office Web Apps servers with setup files
3. One certificate for Office Web App
4. If you are using Windows server 2012 R2 then you would need to install latest update for Office Web Apps
5. FQDN name for your Office web app farm e.g.(owa.domain.com) and its DNS entry with Round Robin(You can also configure Windows NLB or a Load Balancer entry for same)
Installation of Office Web App is very simple, You just need to download the installable and execute it on all OWA servers.
Install Office Web apps on all Office Web Apps servers. If you are using Office Web App on Windows Server 2012 R2, you should install latest update for Office Web Apps. You would need an Office Web app certificate imported to IIS
Now Let’s configure Office Web App, Open Windows PowerShell and execute below command
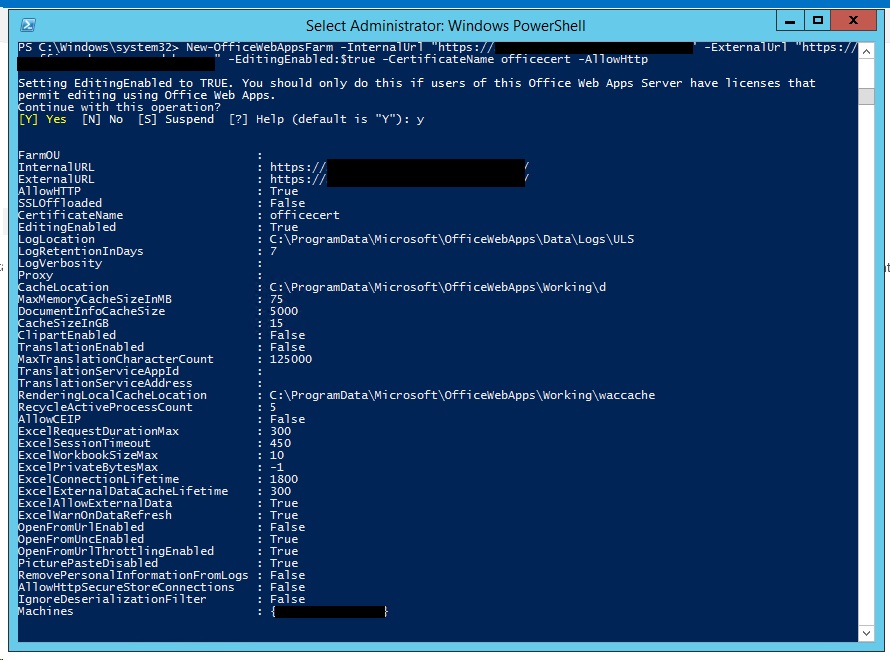
Once the Office Web App farm is configured, open IIS and make sure SSL binding for site HTTP80 has proper certificate attached.
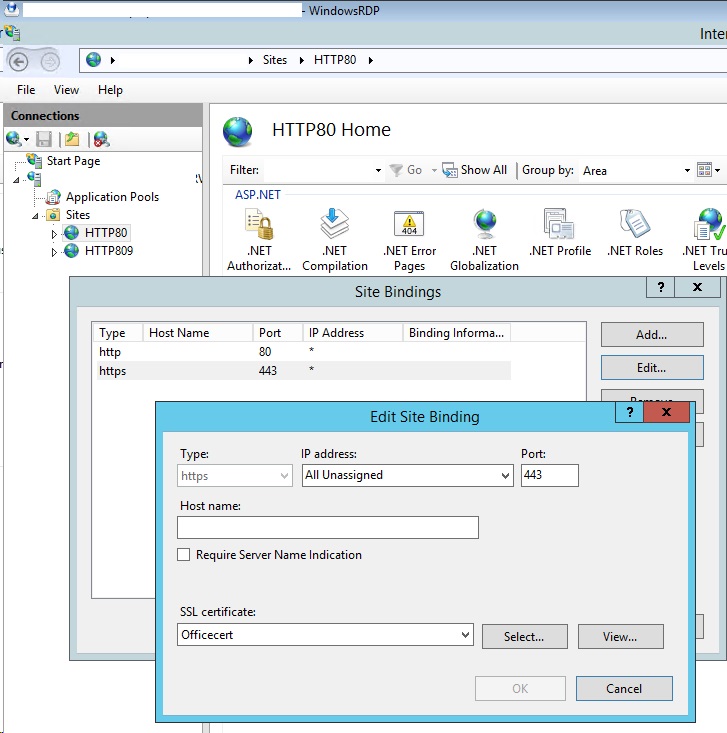
From IIS binding select the certificate and export the .cer file.
You need to import it to central admin manage trust.
To Attach this Office web app farm to SharePoint farm, you need to create a WOPI connection. Open SharePoint PowerShell on SharePoint server and execute below command:
New-SPWOPIBinding -ServerName “officewebapp.domain.com”
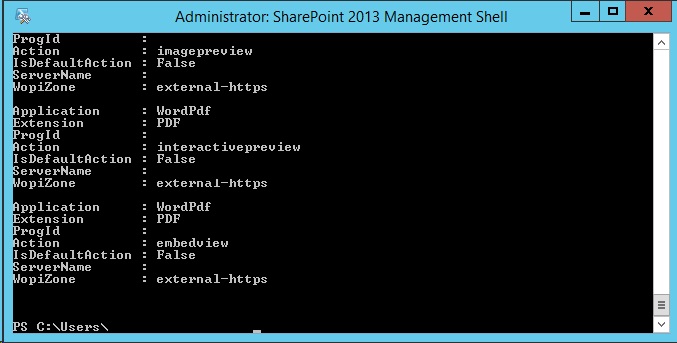
Set Wopi zone
![]()
Now if you want to add other Office Web App Server to OWA farm, you need to execute below command on existing OWA server
new-officewebappsmachine -machinetojoin “owa2server.domain.com”
![]()
Hope this will help you
Configure Workflow Manager 1.0 with SharePoint Server 2013/2016/2019
Hi Friends,
Today we will discuss on how to configure Multi Server Workflow farm with SharePoint farm. Just of your information, you need to access Workflow farm only from WFE and Application servers. This means just like your database server, even workflow servers are not exposed to end users.
We need to meet below pre-requisites before we proceed further:
A. SharePoint farm configured and ready to use
B. Two or more Workflow servers with setup files
C. If you are using Windows server 2012 R2 then you would need update KB2799752(Service bus hotfix) and KB2799754(Workflow manager hotfix)
D. FQDN name for your workflow farm e.g.(Workflow.domain.com) and its DNS entry with Round Robin(You can also configure Windows NLB or a Load Balancer entry for same)
- Let’s get started with installation of Workflow Manager 1.0 on Workflow servers. We need installable as shown below
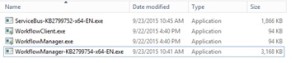
-
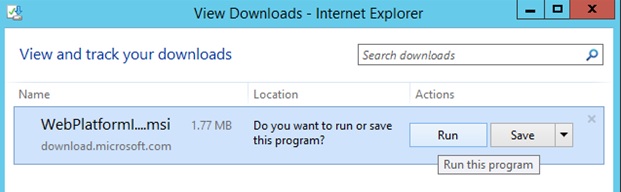
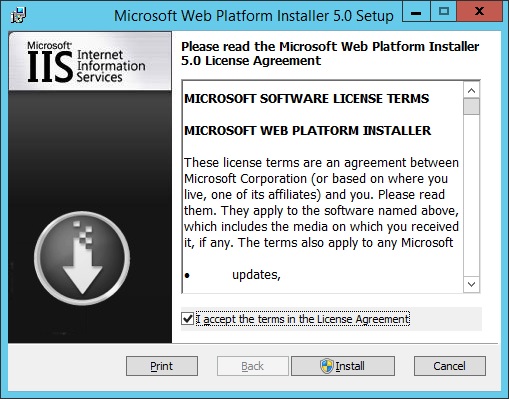
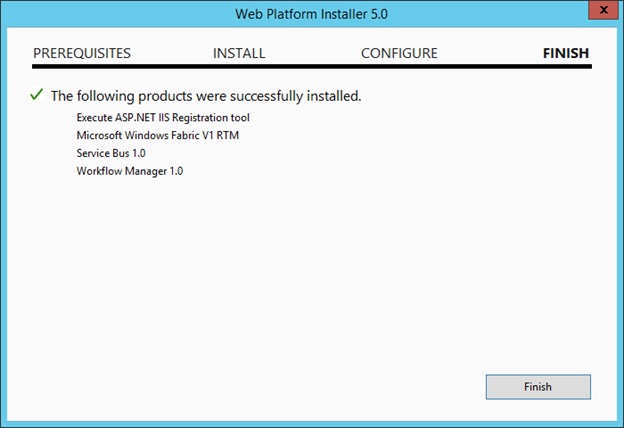
When you will try to install the workflow.exe file you will be asked to download and install WebPlatformInstaller.exe. Now all the updates and most components are installed through WebPlatforminstaller.

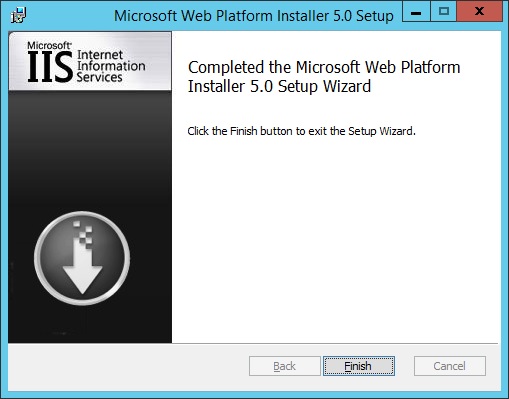
- Once the WebPlatforminstaller is installed, you need to search for Workflow manager and Workflow manager client and install the same.
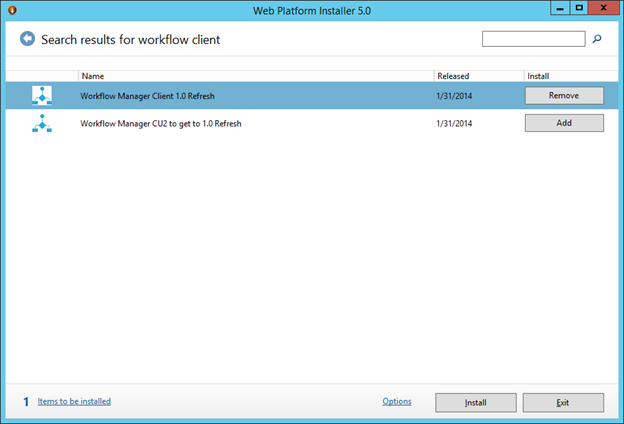
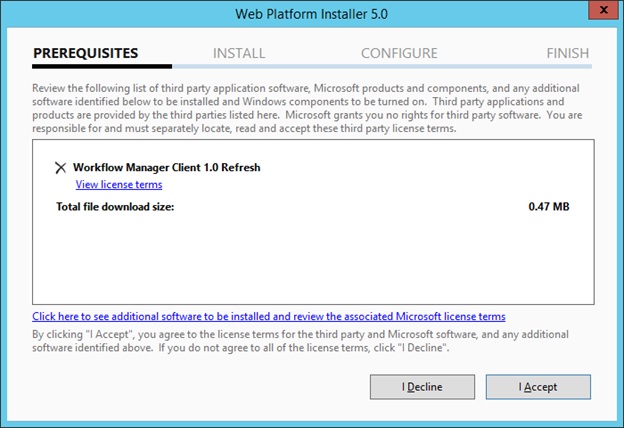


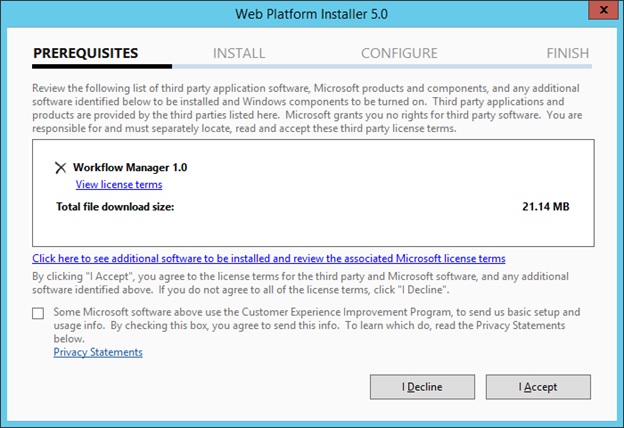
- Once Workflow Manager and client is installed, I would suggest you to install the updates as well.


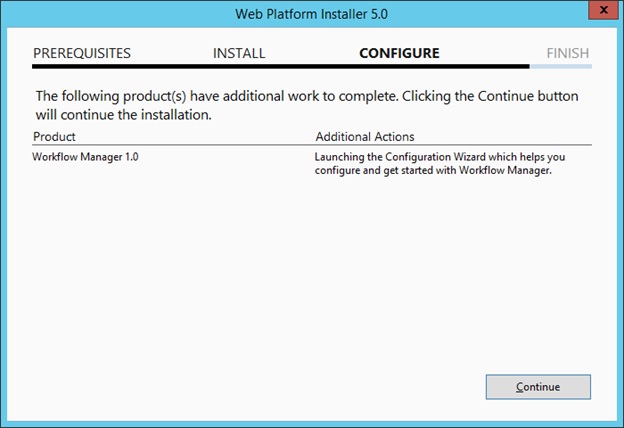
- Now let’s configure Workflow Server farm. This is very important so please follow steps carefully.
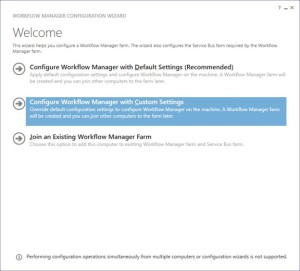
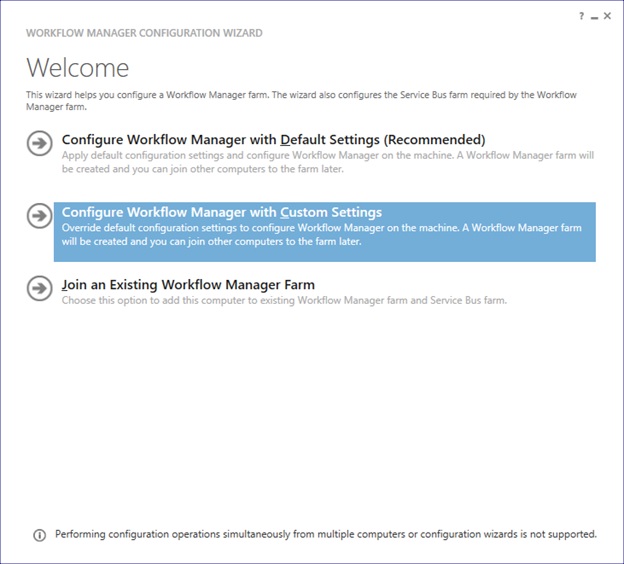
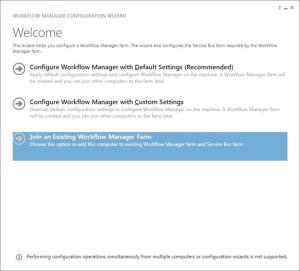
- Lets execute the Workflow Manager Configuration Wizard
- Select “Configure Workflow Manager with Custom Settings”
-
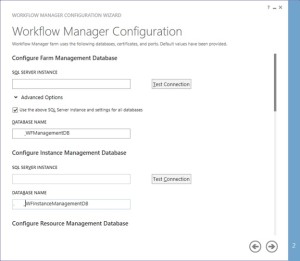
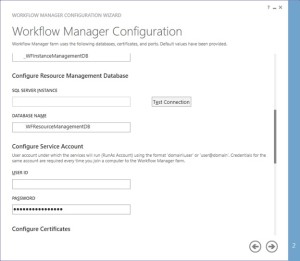
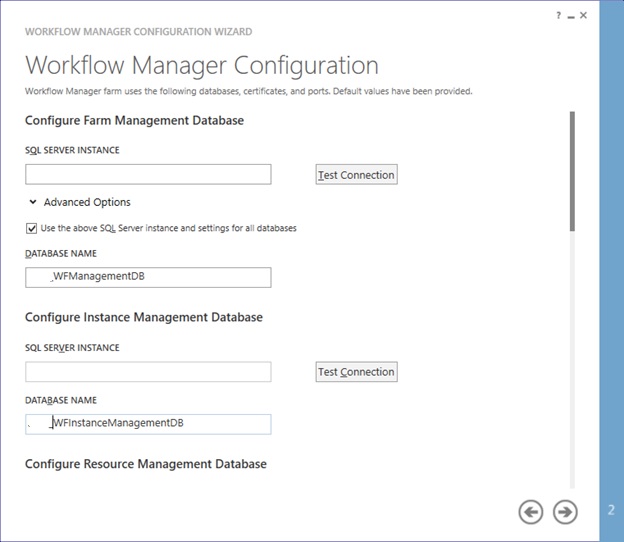
Now provide the SQL server instance name, Authentication, Certificate and SQL Workflow database names
-
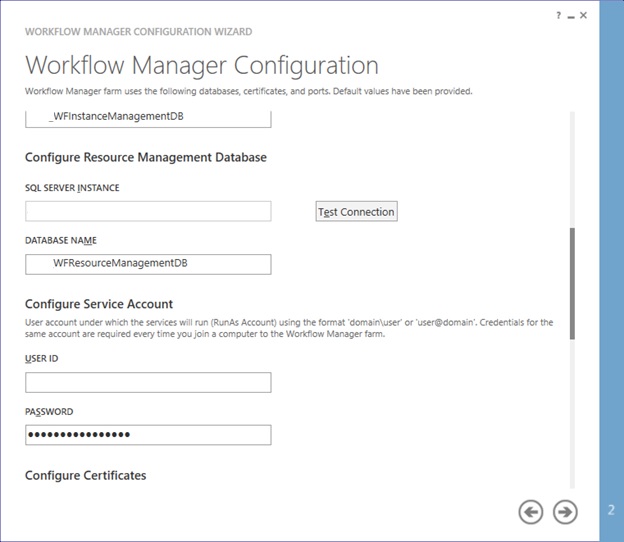
You need to provide the Workflow service account credentials which will be used to connect to SQL server and for workflow IIS Application pool.
-
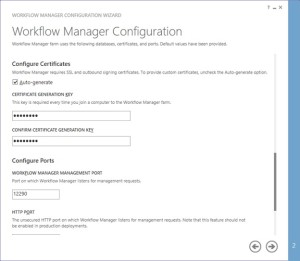
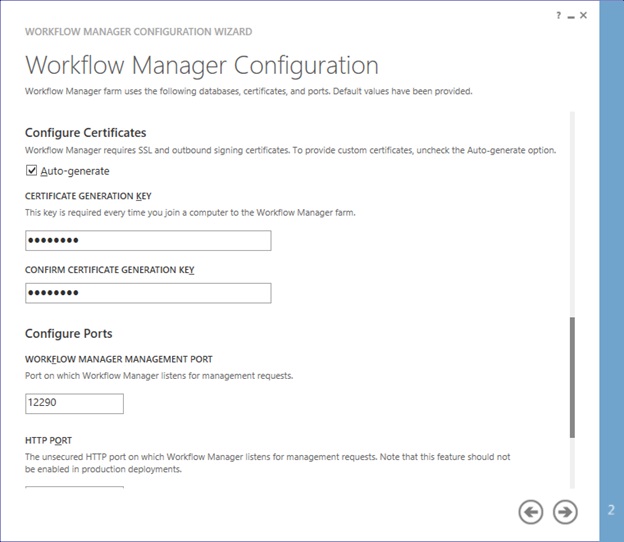
You would need to provide a Certificate Generation Key. It is just like Passphrase for your SharePoint farm
-
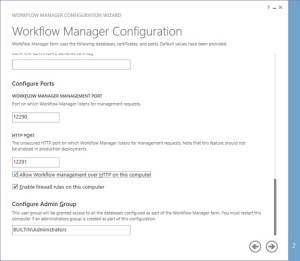
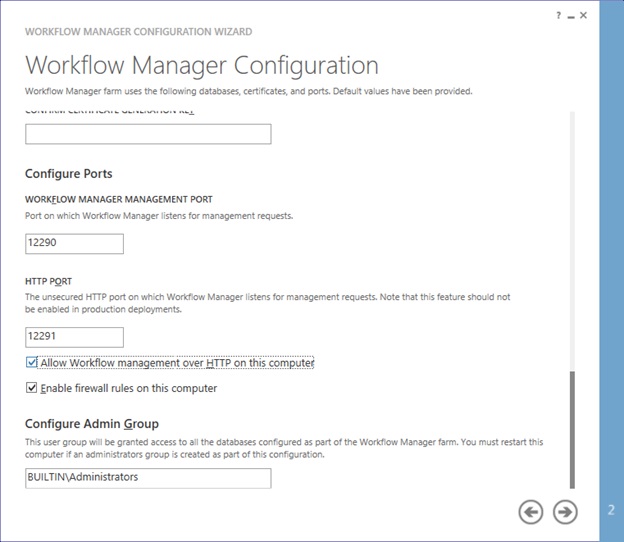
Make sure you select “Allow workflow management over http on this computer”
-
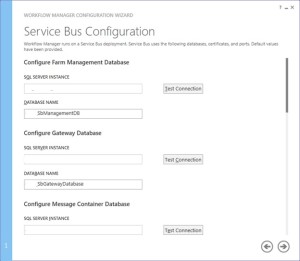
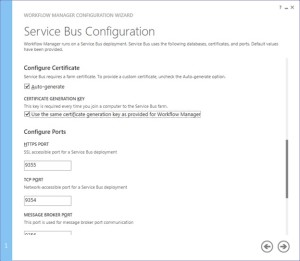
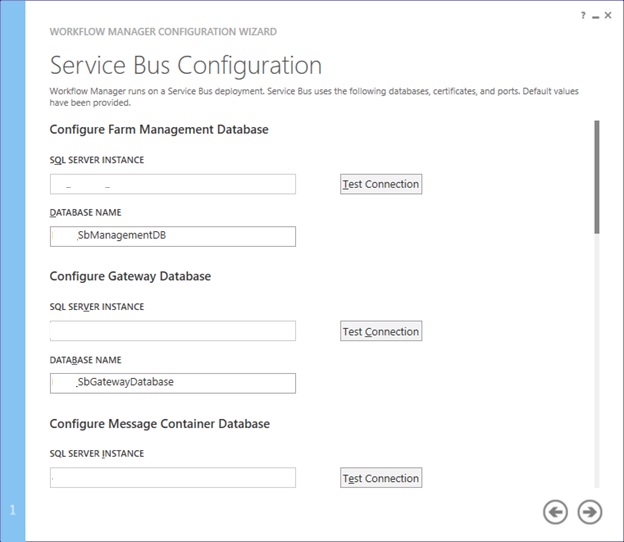
Along with Workflow Management, you need to configure Service Bus required by Workflow manager
-
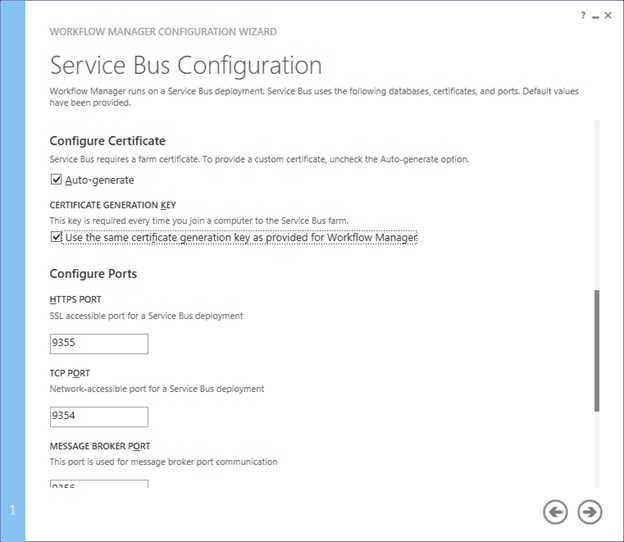
Make sure you select “use the same certificate generation key as provided for workflow manager”

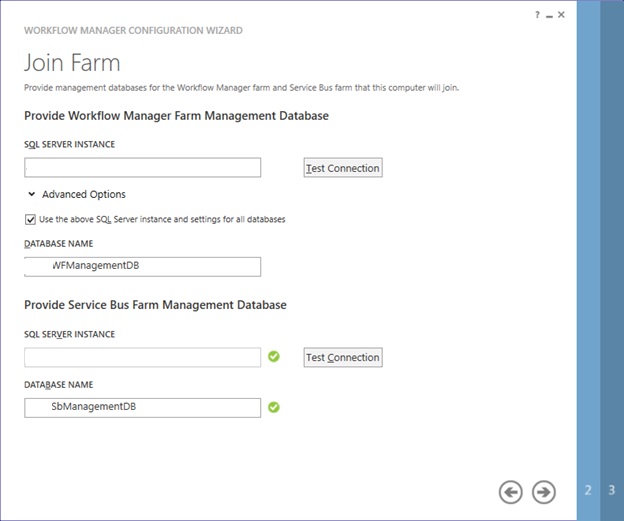
- Once the Workflow Farm is created, you need to join other Workflow server to the farm. To do so execute the same Workflow configuration wizard and select “Join an Existing Workflow Manager Farm”
-
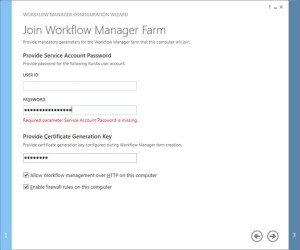
Provide the existing Workflow Farm SQL server instance name, Workflow database name and Service Bus farm database name

-
Provide the workflow service account and Certificate generation key used while creating workflow farm.
-
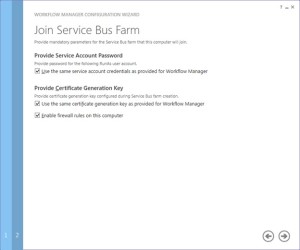
Select “use the same service account credentials as provided for Workflow Manager”, then select next
-
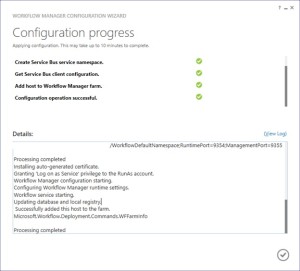
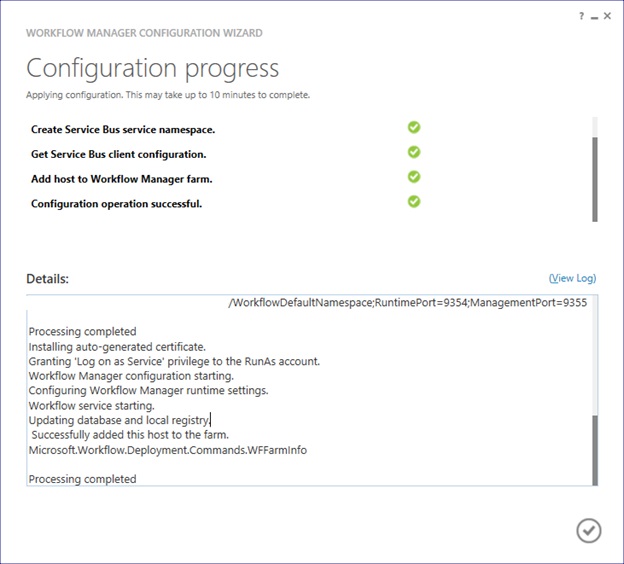
Once farm other server is joined to workflow farm you will see below
-
Once workflow is configured, you need to attach Workflow Farm to SharePoint farm. Make sure you have DNS entry(Workflow.domain.com) for your Workflow farm. If not DNS, you should at least have Host entry for same. Try to browse http://workflow.domain.com:12291 on WFE and Application server, you might see Authentication error.

-
Add the URL to Local Intranet and set the Local Intranet zone to “Automatically login with current username and password”
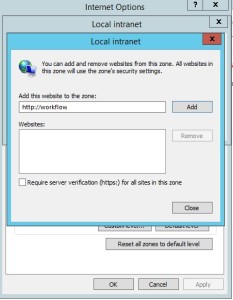


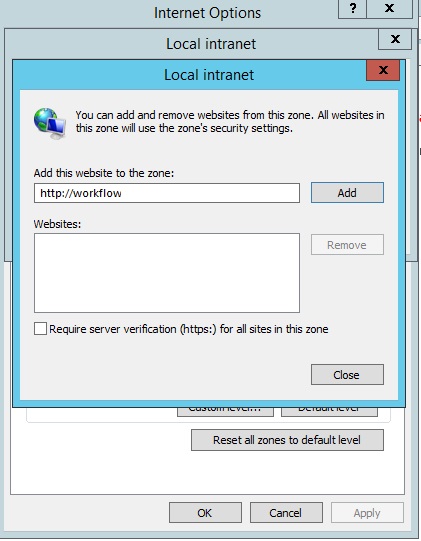
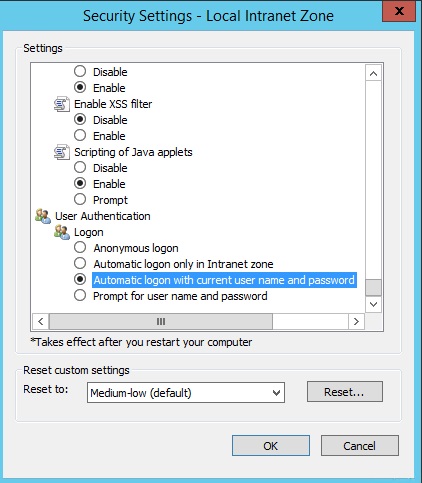
-
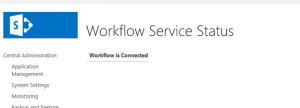
Now you should be able to browse the workflow farm details, this shows you can connect to workflow farm and it is working fine.
-
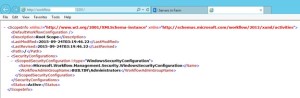
Now execute below command in SharePoint Powershell
Register-SPWorkflowService -SPSite “http://sharepointsite” -workflowHostUri “http://workflow.domain.com:12291/” -AllowOauthHttp -ScopeName SharePoint –force

-
Now you need to activate the workflow feature on site
Enable-SPFeature -Identity WorkflowServiceStore –Url http://sharepointsite -
In Central Admin > Manage Service Application > Workflow Service Application Proxy
-
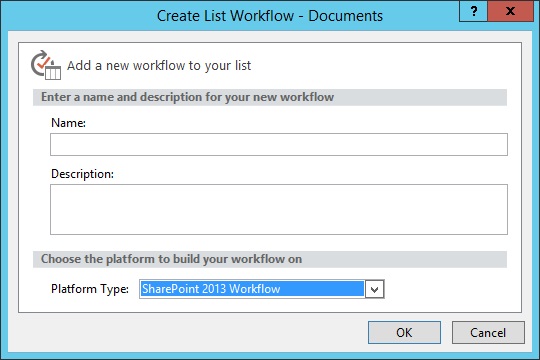
Open site in SharePoint designer – Select workflow from left pane – select new workflow

Note:
A. Workflow farm can co-locate on SharePoint servers
B. As per Microsoft articles, for high availability you need to have at least 3 Workflow Server in farm. You cannot have 2 workflow servers in a farm. It has to be 1 or 3.


Configure a SharePoint server in non domain(Workgroup) environment
Hi All,
Lets try to configure a SharePoint farm in a workgroup environment. Normally if we have to configure a SharePoint on a Workgroup environment only option available for us is Standalone environment. Now lets us try to understand how we can configure a SharePoint farm environment in a Workgroup environment. We need to run below powershell commands. Make sure you update passphase and SQL server name in below powershell. We have SharePoint and SQL installed on same machine. Make sure account used during FarmAccount does have access to SQL server.
$FarmAccount = Get-Credential
$PassPhrase = “FarmPassphrase”
$FarmPassphrase = (ConvertTo-SecureString $PassPhrase -AsPlainText -force)
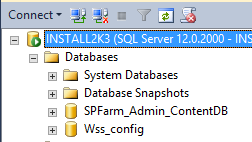
$FarmConfigDatabase = “Wss_config_2”
$AdminContentDatabase = “SPFarm_Admin_ContentDB_2”
$CentralAdminPort = 8080
New-SPConfigurationDatabase -DatabaseServer (SQLservername) -DatabaseName $FarmConfigDatabase -AdministrationContentDatabaseName $AdminContentDatabase -Passphrase $FarmPassphrase -FarmCredentials $FarmAccount
Now let’s move a steps ahead and try to use different server for SharePoint and SQL server. Here we created a SQL user account and updated credentials in dbcredential.
$dbcredential = New-Object –typename System.Management.Automation.PSCredential –argumentlist “SQLuser”, (ConvertTo-secureString “SQLpassword” –AsPlainText –Force)
$PassPhrase = “FarmPassphrase”
$FarmPassphrase = (ConvertTo-SecureString $PassPhrase -AsPlainText -force)
$FarmConfigDatabase = “Wss_config”
$AdminContentDatabase = “SPFarm_Admin_ContentDB”
$CentralAdminPort = 8080
$FarmAccount = Get-Credential
New-SPConfigurationDatabase -DatabaseServer “SQLservername” -DatabaseName $FarmConfigDatabase -AdministrationContentDatabaseName $AdminContentDatabase -Passphrase $FarmPassphrase -FarmCredentials $FarmAccount -DatabaseCredentials $dbcredential

Note: We still cannot create a Multiple SharePoint server farm in Workgroup environment. Using above script you can connect only 1 SharePoint server with a SQL server.
This script works for both SharePoint 2010 and SharePoint 2013
Create a Active Directory Forest on a Windows Azure VM
- Create a new domain
Now let’s configure this server to be a Domain Controller. As discussed earlier Domain controller manage DNS, AD Users, etc. and are normally the 1st and most important server in a company.
- Login to your Azure Subscription Portal site https://manage.windowsazure.com
- Select Virtual Machine from left Menu
- Select the Virtual Machine we just created and click on Connect at bottom
- Now RDP to the Virtual Machine we created and click on Server Manager

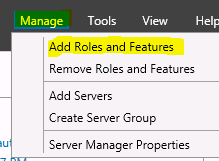
- Select Manager > Add Roles and Features
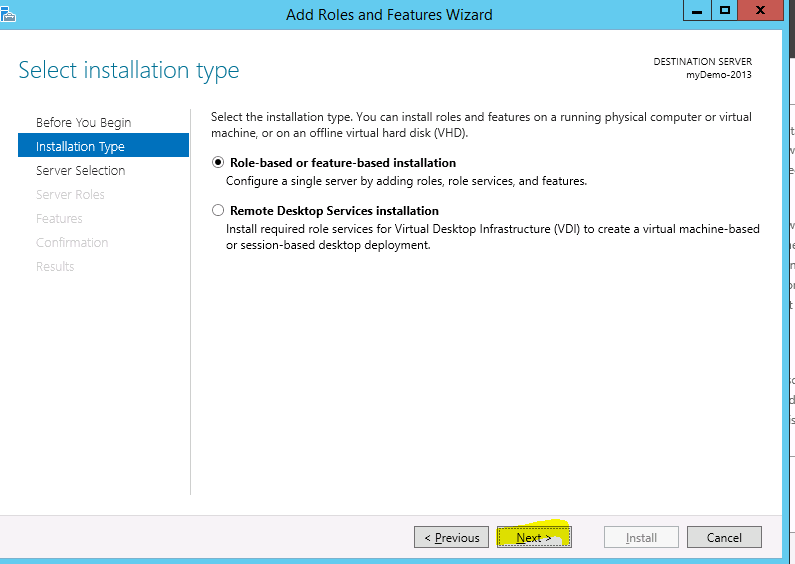
- Select “Next” on Installation Type screen
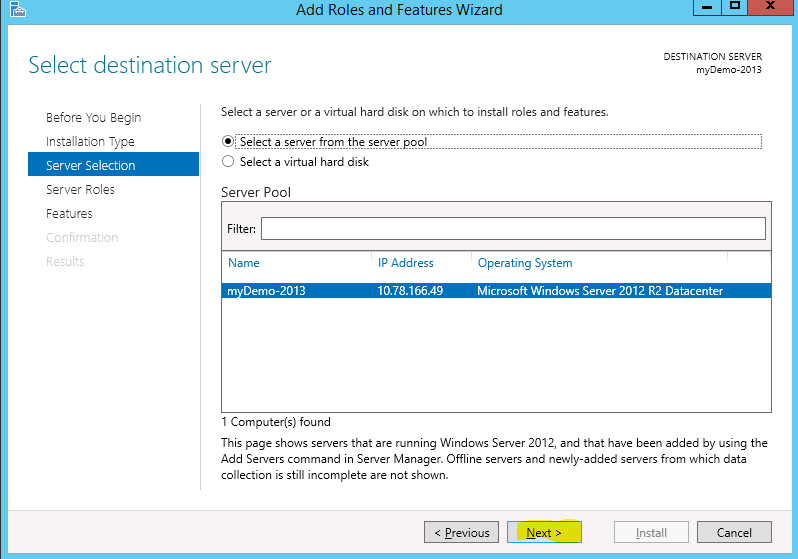
- Select “Next” on Destination Server screen
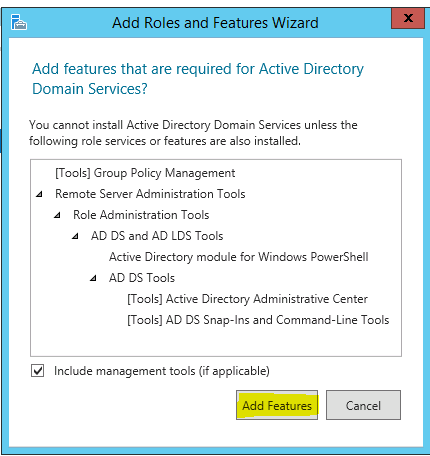
- Check Box “Active Directory Domain servers”
![]()
- Click on “Add Feature” on pop-up screen
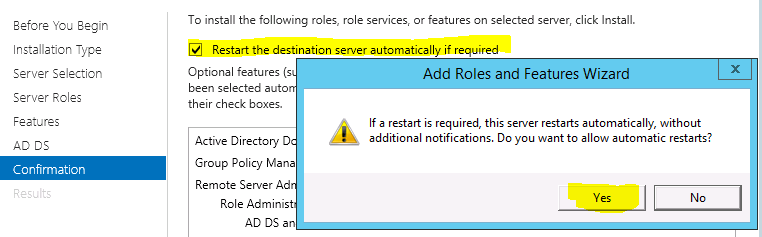
- Select the check box “Restart the destination server if required” > Click OK
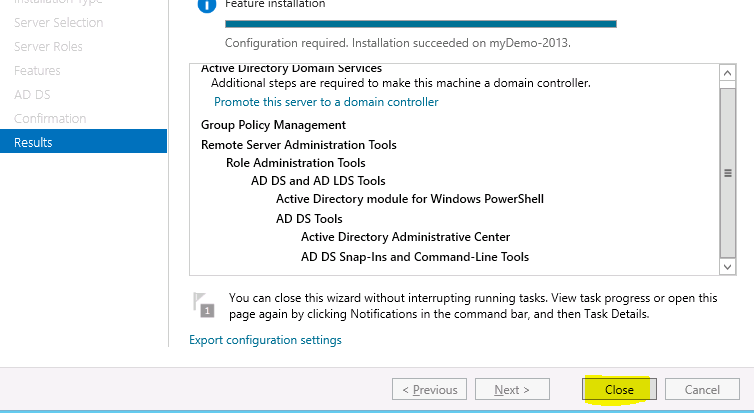
- Once it is installed, Click on Close
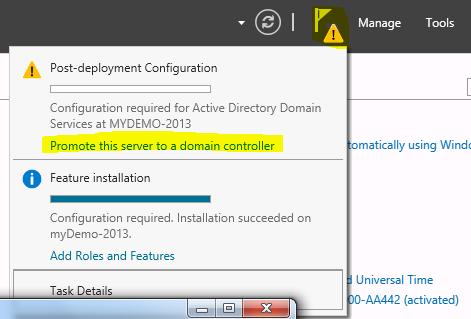
- Open the Server Manager again, Click on Flag at top and select “Promote this server to a Domain Controller”
- Select “Add a New forest”, type domain name
- Type the DSRM password and click “Next” (Note: this is required when you try to recover your active directory)
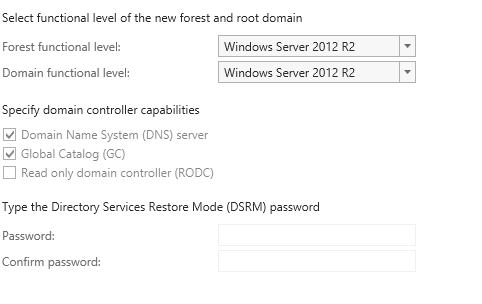
- Now you will have to select your domain name. For example. Demo.com
- The NetBIOS Name screen will remove .com and you will see only demo.
- Select the Default location of installation and click “Next”
- Click on “Install”
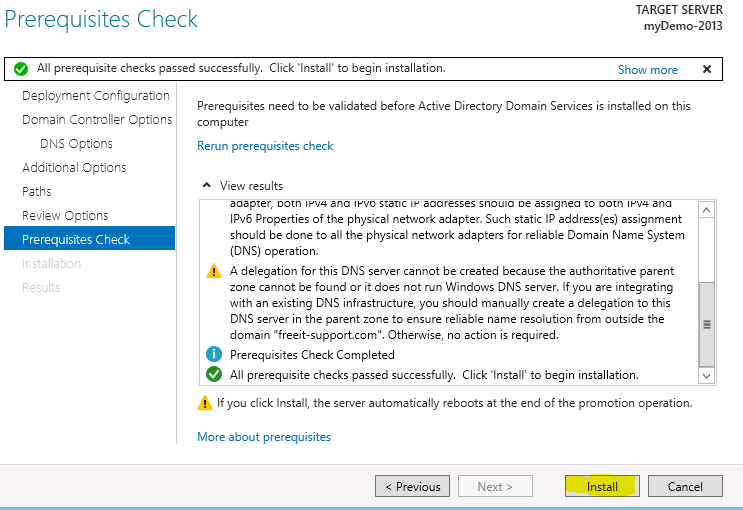
- Once the Computer is restarted, your Domain Controller would be ready.
Note: From now on when you logon to server you need use your domain name along with username we just created to authenticate to server. Example: demo\user1
Configure App service Application \ App catalog in SharePoint 2013
App service Application is a new Service Application in 2013 required to download and use APPS from SharePoint App store. To do so we will follow below
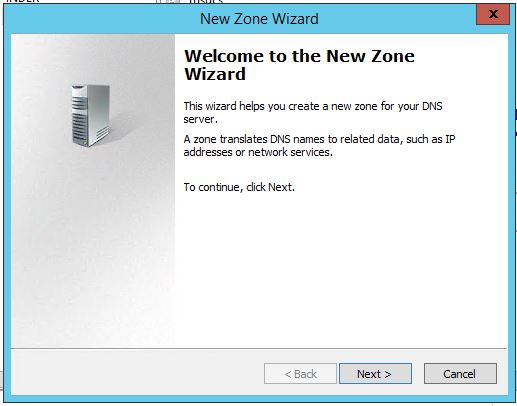
- New New DNS zone OR if you using same DNS namespace you can just create new wildcard(*) DNS entry as shown below:

Create new Zone
- Under your DNS management console, first create a forward Lookup zone for the app domain name
-
Now Click on DNS on top > Right click select new Zone
- Now Select Primary Zone and click Next

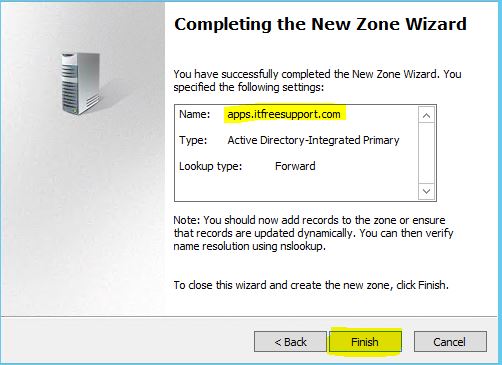
- Add new Zone URL here.

- Select the default option

- Review the details and hit Finish
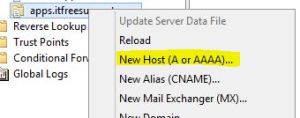
- Now create the Host entry for APP URL

8.
Now we will create Subscription Settings Service Application using Powershell (This option is not available in GUI).
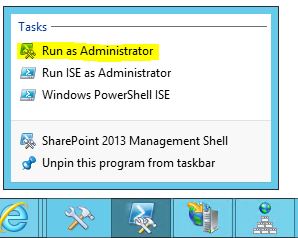
- Open Powershell as Admin.
- Lets pull managed account into a variable $account:
$acc = Get-SPManagedAccount domain\user -
Now we will create application pool for Subscription Settings service application
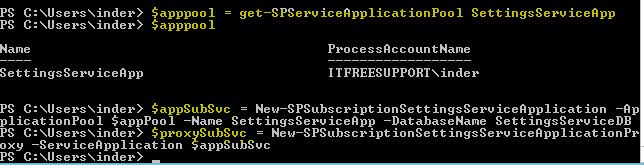
$appPool = New-SPServiceApplicationPool -Name SettingsServiceApp -Account $acc -
Create Subscription Settings service application using the variable to associate it with the application pool that was created above
$appSubSvc = New-SPSubscriptionSettingsServiceApplication –ApplicationPool $appPool –Name SettingsServiceApp –DatabaseName SettingsServiceDB -
Creates proxy for Subscription Settings service application
$proxySubSvc = New-SPSubscriptionSettingsServiceApplicationProxy –ServiceApplication $appSubSvc
Now we will create App management Service Application using Powershell
1. Create Instance name to be used in future.
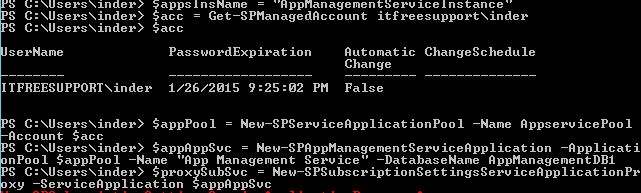
$appsInsName = “AppManagementServiceInstance”
- Lets pull managed account into a variable $account:
$acc = Get-SPManagedAccount domain\user -
Now we will create application pool for App management service application
$appPool = New-SPServiceApplicationPool -Name AppservicePool -Account $acc -
Create App management service application using the variable to associate it with the application pool that was created above
$appAppSvc = New-SPAppManagementServiceApplication -ApplicationPool $appPool -Name “App Management Service” -DatabaseName AppManagementDB1 -
Creates proxy for App management service application
$proxySubSvc = New-SPAppManagementServiceApplicationProxy -ServiceApplication $appAppSvc -Name “App Management Service proxy”
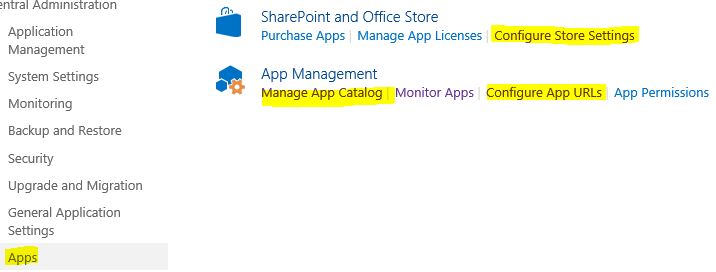
Configure App Domain
Set-spappdomain -appdomain “apps.itfreesupport.com”
Set-spappSiteSubscriptionName -Name “prefix”
Or
Go to “Configure app URLs” on Apps menu and update details accordingly
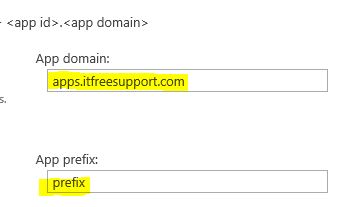
In Manage App Catalog, you will be asked to create a Apps Site collection. Please create a new site collection.

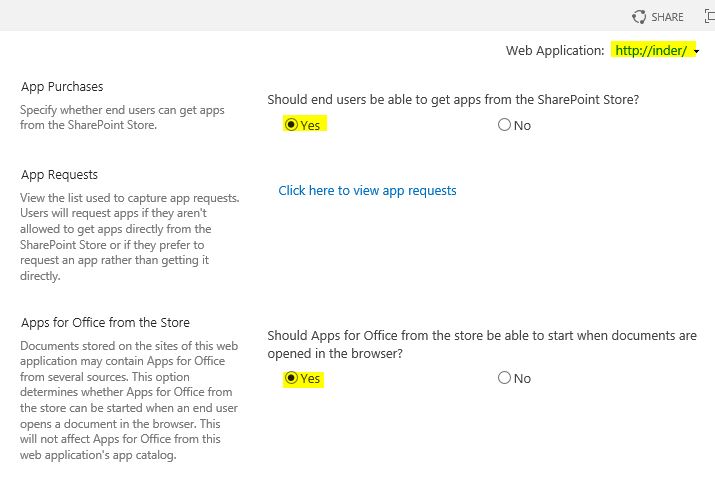
Now you will be able to download and use APP from APP store.. Enjoy……………….