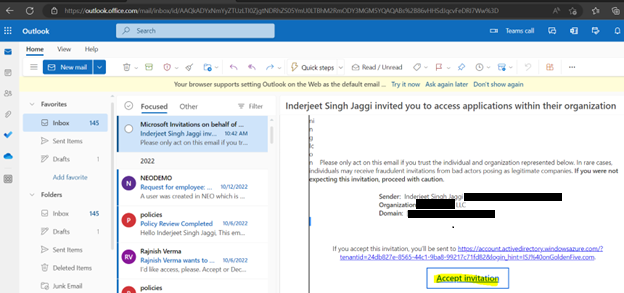
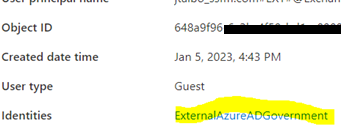
Onboard External GCCHigh or commercial User to commercial AD tenant
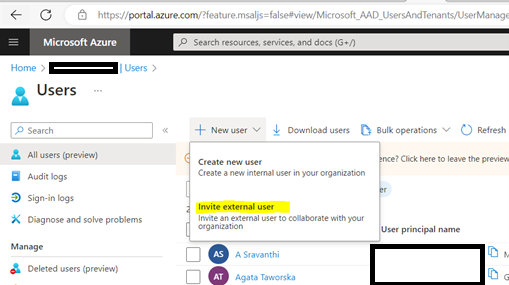
- Add users as External User in Azure AD. If You are adding a GCC or GCChigh user, you need to follow step 11 before you start step 1.
![](https://itfreesupport.com/wp-content/uploads/2023/02/Picture12.png)
![](https://itfreesupport.com/wp-content/uploads/2023/02/Picture13.png)
![](https://itfreesupport.com/wp-content/uploads/2023/02/Picture14.png)
![](https://itfreesupport.com/wp-content/uploads/2023/02/Picture15.png)
![](https://itfreesupport.com/wp-content/uploads/2023/02/Picture16.png)
![](https://itfreesupport.com/wp-content/uploads/2023/02/Picture17.png)
![](https://itfreesupport.com/wp-content/uploads/2023/02/Picture18.png)
![](https://itfreesupport.com/wp-content/uploads/2023/02/Picture19.png)
![](https://itfreesupport.com/wp-content/uploads/2023/02/Picture20.png)
![](https://itfreesupport.com/wp-content/uploads/2023/02/Picture21.png)
![](https://itfreesupport.com/wp-content/uploads/2023/02/Picture22.png)
![](https://itfreesupport.com/wp-content/uploads/2023/02/Picture23.png)
![](https://itfreesupport.com/wp-content/uploads/2023/02/Picture24.png)
![](https://itfreesupport.com/wp-content/uploads/2023/02/Picture25.png)
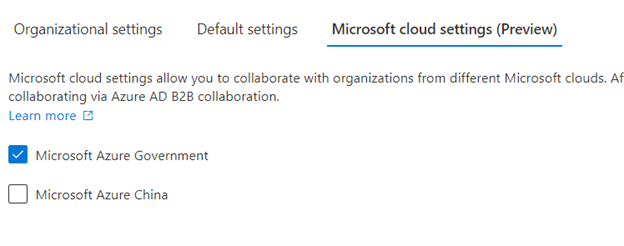
11. For GCCHigh, below tenant level setting is additionally needed before you follow step 1
![](https://itfreesupport.com/wp-content/uploads/2023/02/Picture1.png)
![](https://itfreesupport.com/wp-content/uploads/2023/02/Picture2.png)
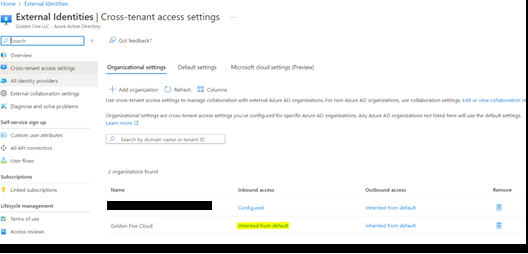
- Once added, click on ‘Inherited from default’
![](https://itfreesupport.com/wp-content/uploads/2023/02/Picture3.png)
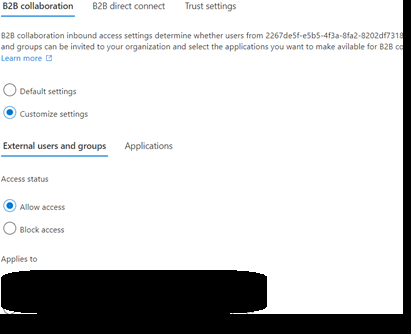
- Select ‘Customize Settings’ for B2B collaboration > ‘Allow access’ under external users and group. Set ‘Allow access’ under Applications
![](https://itfreesupport.com/wp-content/uploads/2023/02/Picture4.png)
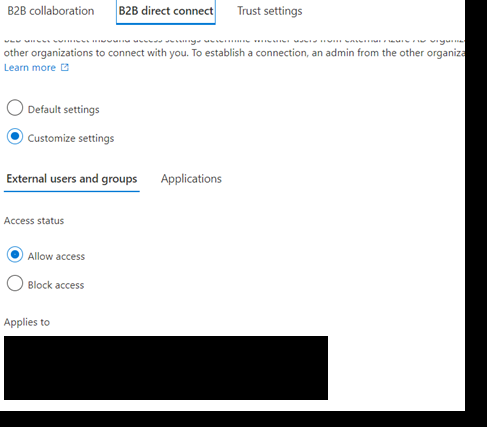
- Select ‘Customize Settings’ for B2B Direct Connect > ‘Allow access’ under external users and group. Set ‘Allow access’ under Applications
![](https://itfreesupport.com/wp-content/uploads/2023/02/Picture5.png)
- Under Microsoft cloud settings select ‘Microsoft Azure Government’
![](https://itfreesupport.com/wp-content/uploads/2023/02/Picture7.png)
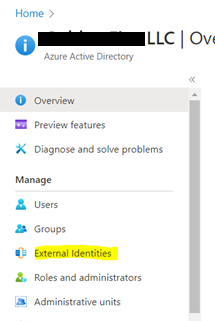
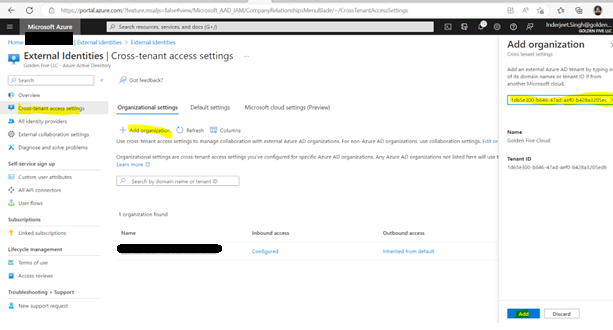
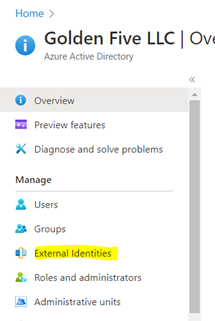
- Now from GCCHigh, go to Access Poratl.azure.com, search Azure Active Directory > ‘External Identities’ from left navigation > Add the GCCHigh tenant ID and then select Add at bottom.
![](https://itfreesupport.com/wp-content/uploads/2023/02/Picture8.png)
![](https://itfreesupport.com/wp-content/uploads/2023/02/Picture9.png)
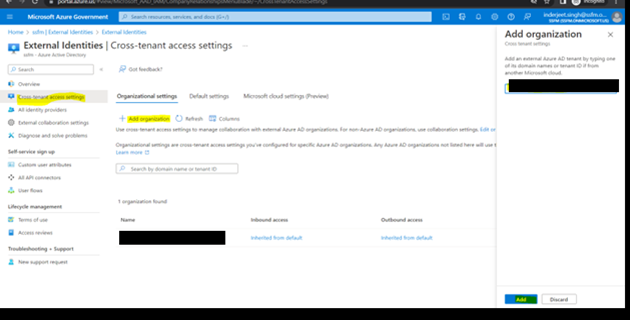
- For GCCHigh we should leave ‘Inherited from default’
![](https://itfreesupport.com/wp-content/uploads/2023/02/Picture10.png)
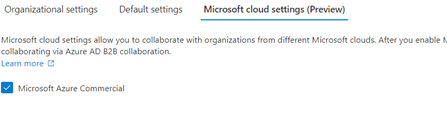
- Under Microsoft cloud settings select ‘Microsoft Azure Commercial’
![](https://itfreesupport.com/wp-content/uploads/2023/02/Picture11.png)