Using Microsoft Teams for virtual meetings and collaboration
“Connect with your team, wherever you are, with Microsoft Teams!”
Introduction
Microsoft Teams represents a robust tool for collaboration and communication, facilitating virtual meetings and cooperation among users, whether they be colleagues, partners, or customers. It furnishes a secure and dependable space for sharing documents, engaging in real-time communication, and jointly working on projects. Its user-friendly interface simplifies the organization and administration of virtual meetings, enabling users to sustain connectivity and productivity irrespective of physical proximity. Furthermore, Teams encompasses an array of functionalities, encompassing audio and video conferencing, file distribution, and task administration, making it an optimal platform for virtual meetings and teamwork. With Microsoft Teams, users can seamlessly maintain connections and foster collaboration with their associates, allies, and clientele, regardless of their locations.
Leveraging Microsoft Teams for Effective Virtual Meetings and Collaboration
In the current business landscape, virtual meetings and collaboration play a pivotal role. The surge in remote work makes it crucial for teams to adeptly interact and work together in a virtual environment. Microsoft Teams stands out as a robust tool enabling teams to maintain connectivity and efficiency, irrespective of their physical locations.
Functioning as a cloud-based collaboration platform, Microsoft Teams facilitates seamless real-time communication and cooperation. Teams can use the platform to host virtual meetings, share files, and work together on projects. Teams can also use the platform to chat, share documents, and create virtual workspaces.
Microsoft Teams revolutionizes the management of virtual meetings, offering a versatile platform to effortlessly orchestrate gatherings, extending seamless scheduling, participant invitation, and document dissemination. Furthermore, it empowers users with the ability to capture meetings, exhibit screens, and engage in synchronous document collaboration.
Beyond meeting management, the platform facilitates agile project collaboration, establishing virtual workspaces for seamless task allocation and progress monitoring. Users leverage the platform to engage in dynamic conversations, partake in file sharing, and provide insights through document commentary.
Microsoft Teams emerges as a formidable ally, bridging the gap for interconnected and productive teams, transcending physical boundaries. Its intuitive interface promotes organizational efficiency and superior collaborative potential in the virtual realm.
How to Use Microsoft Teams to Facilitate Collaboration Among Remote Teams
Microsoft Teams, a robust collaboration tool, empowers remote teams to effectively collaborate. The platform offers a secure environment for team members to communicate, exchange files, and engage in joint project endeavors. Its user-friendly interface facilitates seamless connectivity and sustained productivity, particularly in remote work settings.
To enhance collaboration among remote teams via Microsoft Teams, consider the following strategies:
1. Establish a Team: Commence by creating a secure Team within Microsoft Teams, providing a dedicated space for communication, file sharing, and project collaboration.
2. Invite Team Members: Once the Team is set up, extend invitations to team members, either through email or direct addition to the Team.
3. Configure Channels: Organize discussions and files within the Team by creating distinct channels for specific subjects or projects, ensuring streamlined and focused conversations.
4. Leverage Video Conferencing: Utilize Microsoft Teams’ video conferencing features to enable face-to-face connections, fostering interpersonal relationships and maintaining connectivity with remote colleagues.
5. Facilitate File Sharing: Seamlessly share files with team members using Microsoft Teams, ensuring universal access and project relevance.
6. Utilize Chat Functionality: Engage in real-time communication via Microsoft Teams’ chat feature, fostering swift idea exchange and sustained connectivity.
By implementing these tips, remote teams can harness the full potential of Microsoft Teams to bolster collaboration and productivity.
With its intuitive user interface and powerful features, Microsoft Teams makes it easy for teams to stay productive and connected, even when working remotely.
Best Practices for Hosting Virtual Meetings with Microsoft Teams
1. Prior Preparations: Prior to convening a virtual assembly using Microsoft Teams, meticulous planning and arrangement are imperative. This encompasses crafting a precise agenda, extending invitations to pertinent individuals, and verifying that all attendees possess the essential technology and entry to the assembly.
2. Establishment of Protocols: Instituting guidelines for the assembly is crucial for facilitating a seamless progression. This encompasses delineating expectations for engagement, such as muting microphones when not speaking, and stipulating a timeline for the assembly.
3. Leverage the Array of Functions: Microsoft Teams offers an extensive array of functions that can be harnessed to enrich the virtual meeting encounter. These comprise features such as screen sharing, whiteboarding, and video conferencing. Employing these functions can foster sustained engagement among participants and potentiate the meeting’s productivity.
4. Oversee Engagement: It is imperative to oversee the active involvement of all attendees throughout the meeting. This encompasses validating that each individual is actively engrossed and that their inputs are being duly acknowledged.
5. Conduct Follow-Up: Subsequent to the meeting, it is crucial to conduct follow-up with participants to ensure that they are equipped with the requisite information and resources to execute any tasks delineated during the meeting.
By adhering to these optimal methodologies, you can ascertain that your virtual meetings facilitated via Microsoft Teams are efficacious and triumphant.
Tips for Optimizing Microsoft Teams for Virtual Meetings and Collaboration
1. Harness the “Meet Now” functionality provided by Microsoft Teams, enabling swift initiation of meetings without prior scheduling, particularly beneficial for virtual collaboration dynamics.
2. Embrace the versatility of video conferencing within Microsoft Teams, which encompasses diverse meeting formats including one-on-one, group sessions, and seamless screen sharing, fostering continual engagement with team members.
3. Capitalize on the chat feature embedded in Microsoft Teams, streamlining communication channels for prompt sharing of concepts and documents, thus enhancing virtual teamwork efficiencies.
4. Leverage the real-time collaboration potential of the whiteboard feature in Microsoft Teams, particularly advantageous for spontaneous idea exchange, troubleshooting, and sharing of visual content within the team.
5. Capitalize on the seamless file-sharing capabilities facilitated by Microsoft Teams, optimizing the exchange of documents and diverse digital content among team members, thus augmenting virtual collaborative endeavors.
6. Optimize the calendar feature inherent in Microsoft Teams to orchestrate virtual gatherings with finesse, furnishing a comprehensive toolset for seamless meeting coordination and scheduling, thereby fortifying collaborative efforts with team members.
7. Leverage the Task Management Tool: Harness the tasks feature in Microsoft Teams to effortlessly delegate assignments to your team. This valuable functionality is particularly beneficial for fostering virtual teamwork, enabling quick and efficient task delegation and progress monitoring.
8. Take Advantage of the Mobile App: Microsoft Teams offers a mobile app that allows you to stay connected with your team members on the go. This feature is especially useful for virtual collaboration, as it allows you to quickly and easily access your team’s documents and other files from your mobile device.
How to Get Started with Microsoft Teams for Virtual Meetings and Collaboration
Microsoft Teams serves as an influential platform for collaboration and virtual meetings, enabling seamless real-time communication and cooperation among colleagues, partners, and clients. Users can swiftly initiate virtual meetings, exchange files, and engage in project collaborations through this platform.
Embarking on your Microsoft Teams journey involves these essential steps:
1. Procure and install the Microsoft Teams application, which is compatible with Windows, Mac, iOS, and Android devices.
2. Establish a Microsoft account; existing accounts can be utilized as well.
3. Access the application and form a team, tailored for organizational purposes or specific projects.
4. Extend invitations to members for team inclusion, either through email or direct name entry.
5. Institute channels dedicated to distinct subjects or projects, resembling virtual communication centers for team members.
6. Initiate conversations or meetings, whether it involves textual exchanges or multimedia engagements.
7. Foster file sharing and real-time project collaboration within the team framework.
Harness the potential of Microsoft Teams, unlocking the capability to seamlessly organize virtual meetings, share files, and engage in collaborative endeavors with associates, allies, and clientele. Seize this opportunity today and leverage the dynamic collaborative and virtual meeting capabilities inherent in Microsoft Teams.
Conclusion
Microsoft Teams represents a formidable tool for virtual meetings and collaboration. It furnishes a secure and dependable platform for users to communicate and cooperate. Furthermore, it boasts a diverse array of features and tools that simplify the management and organization of virtual meetings and collaboration. Thanks to its intuitive interface, Microsoft Teams stands as an optimal selection for businesses and organizations seeking to enhance their virtual meeting and collaboration capabilities.
Managing and organizing email in Outlook
Revamp Your Email Organization with Microsoft Outlook: Master Your Inbox!
Introduction
In the realm of contemporary communication, email stands as a vital instrument, yet its management and organization pose a formidable challenge. Nevertheless, fear not, for Microsoft Outlook boasts a formidable arsenal of tools adept at aiding you in this endeavor. Harness the capability to craft folders for email storage, establish rules for automatic email sorting, and deploy search resources for swift email retrieval. This instructional tour will shed light on optimizing Outlook for email management and organization.
How to Use Outlook Search to Quickly Find Emails
Beyond question, Outlook Search is a formidable asset, facilitating rapid email retrieval within your Outlook inbox. This feature allows for efficient email pinpointing through keyword, sender name, or alternative criteria search. Herein lies a step-by-step manual on leveraging Outlook Search for expedited email retrieval.
Step 1: Initiate Outlook and designate the target folder for exploration.
Step 2: Direct your attention to the apex of the window and engage the Search tab.
Step 3: Input your specified keyword or search criteria into the designated search box.
Step 4: Launch the search operation by selecting the magnifying glass icon.
Step 5: A compilation of emails aligned with your search parameters will materialize within Outlook.
Step 6: For further refinement, access the “More” option to introduce supplementary criteria.
Step 7: Upon completion, seal your search forays with a click on the “Done” button. By adhering to these instructions, you can deftly harness the prowess of Outlook Search to unearth emails with ease and pace. Whether scouring for keywords, sender names, or any other stipulated criteria, Outlook Search stands as a trusted ally in the pursuit of email management proficiency.
Best Practices for Keeping Your Outlook Inbox Clean and Tidy
1. Opt out of Superfluous Emails: Liberating yourself from emails that have outlived their utility is an effective method to maintain a pristine and orderly inbox. This liberating action can streamline your inbox, facilitating the retrieval of crucial communication amidst the clutter.
2. Establish Categorization Systems: Implementing a framework of folders and labels can significantly enhance email organization and overall inbox cleanliness. By designating folders for distinct subjects or initiatives and labeling correspondences accordingly, you can swiftly locate pertinent emails when required.
3. Utilizing filters and rules can streamline your email management by automatically categorizing incoming messages into specific folders or labels. This facilitates the maintenance of an orderly and structured inbox, easing the burden of manual sorting.
4. Eliminate Excessive Emails: To maintain a pristine and orderly inbox, it is prudent to remove superfluous emails that no longer serve a purpose. This proactive approach aids in decluttering your digital space and streamlines your ability to pinpoint pivotal communications.
5. Employ Email Archiving: The practice of archiving emails offers an effective mechanism for fostering a well-maintained and structured inbox. By relocating emails from the primary inbox to an archive repository, this method significantly contributes to the uncluttered and systematic organization of essential correspondence.
6. Harness Search Features: Harnessing the search functionality inherent in your email platform is instrumental in expediting the retrieval of specific emails as needed. This capability facilitates a streamlined and well-ordered inbox, alleviating the need to sift through a jumbled array of messages.
How to Use Outlook Categories to Organize Your Inbox
Managing your inbox with Outlook Categories can enhance your email efficiency and task management. Follow these steps to optimize your workflow:
1. Establish Diverse Categories: Initiate by formulating diversified categories tailored to your inbox needs. Tailor categories for work, personal correspondence, and familial communication. Additionally, consider crafting categories for specific projects or tasks to streamline organization.
2. Allocate Categories: Once you have defined your categories, allocate them to relevant emails. Access an email and select the “Categorize” button to assign the appropriate category to the email.
3. Implement Color-Coding: Enhance categorization visibility by employing color-coding. Utilize the “Categorize” button and navigate to “All Categories” to designate a distinct color for each category, simplifying visual recognition.
4. Utilize Filtering Tools: Employ filtering mechanisms to swiftly retrieve emails within specific categories. Opt for the “Filter” button and select the desired category to streamline email navigation.
By leveraging Outlook Categories, you can streamline inbox management and prioritize essential tasks. Through these straightforward procedures, you can ensure your emails are systematically organized and readily accessible.
Tips for Managing Email Overload in Outlook
1. Employ the Focused Inbox in Outlook to intelligently categorize vital emails from the vast influx of messages. This tool enables swift identification and prioritization of emails that demand immediate attention.
2. Leverage Outlook’s Rules and Filters functionality to autonomously organize emails into distinct folders according to specific criteria tailored to your needs.
3. Harness the Power of Quick Steps: In the realm of Outlook, Quick Steps serve as a nifty tool enabling the swift execution of multiple email actions with just a single click. This efficiency booster facilitates speedy email processing, minimizing the time spent managing your inbox.
4. Opt Out of Unnecessary Emails: Liberating yourself from the shackles of superfluous emails plays a pivotal role in curbing the influx of your daily email haul.
5. Embrace the Functionality of Search Folders: These nifty folders empower you with the ability to swiftly unearth emails that align with your predetermined criteria, sparing you the arduous task of manually sifting through your deluge of emails.
6. Exploit the Flag Feature: By swiftly flagging emails that demand your attention, Outlook’s Flag feature accentuates your capacity to distinguish and prioritize those crucial emails requiring immediate action.
7. Employ the Delay Delivery Feature: This attribute within Outlook affords you the liberty to schedule emails for dispatch at a later, more opportune time, consequently boosting your email management proficiency.
8. Make Use of the Archive Feature: Leveraging Outlook’s Archive feature to seamlessly relocate emails from your primary inbox to an archive folder can effectively declutter your main workspace and streamline the retrieval of pertinent emails.
How to Create Rules and Filters to Automatically Organize Your Outlook Inbox
Effectively managing your Outlook inbox can seem like a formidable challenge. Nonetheless, leveraging the appropriate rules and filters empowers you to adeptly maintain a clutter-free and well-organized inbox. By delegating the task of sorting incoming emails to rules and filters, you streamline the process of locating specific emails. Here are the steps to establish rules and filters for automating the organization of your Outlook inbox.
1. Establish categorization folders. Preceding the creation of rules and filters, it is imperative to institute folders to facilitate the sorting of your emails. Commence by launching Outlook and navigating to the “Folder” tab. Subsequently, click on “New Folder” and assign a name to the folder. It is permissible to generate multiple folders as per your requirements.
2. Institute rules. Rules furnish the capability to automatically categorize emails predicated on the specified criteria. To set up a rule, access the “Rules” tab and initiate the process by clicking on “Create Rule.” Proceed to select the criteria that will govern the email sorting process, such as sender, subject, or date. Conclusively, designate the folder for the sorted emails.
3. Establish filters to efficiently categorize emails by specific keywords or phrases. Initiate the process by accessing the “Filters” tab and opting for “Create Filter.” Subsequently, input the designated keyword or phrase to streamline email sorting. Conclude the process by specifying the desired folder for the organized emails.
Harness the power of rules and filters to maintain a streamlined Outlook inbox. Through uncomplicated procedures, swiftly allocate incoming emails to designated folders, facilitating easy access to pertinent information.
Conclusion
Effective email management in Outlook is essential for maintaining productivity and organization. Leveraging its tools, users can efficiently categorize emails into folders and establish automated rules to streamline their inbox management. Additionally, Outlook empowers users to schedule reminders and notifications, bolstering their ability to proactively address incoming correspondence. Embracing these functionalities enables users to optimize their time and enhance their overall organization.
Using Office 365 to meet compliance requirements (e.g. GDPR, HIPAA)
“Stay Compliant with Office 365: Securely Manage Your Data and Meet Your Requirements.”
Introduction
The formidable cloud-based platform, Office 365, serves as a robust tool for aiding organizations in fulfilling their compliance obligations. Leveraging a comprehensive array of tools and services, it empowers organizations to adhere to stringent regulations like the General Data Protection Regulation (GDPR) and the Health Insurance Portability and Accountability Act (HIPAA). Office 365 furnishes a secure milieu for data storage and management, along with mechanisms for scrutinizing and auditing user activities. Additionally, it incorporates pivotal features including encryption, data loss prevention, and multi-factor authentication, thereby fortifying organizations in safeguarding their data and satisfying their compliance imperatives. This discourse will expound on how Office 365 lends assistance to organizations in meeting their compliance prerequisites.
How Office 365 Can Help You Manage and Monitor Compliance Requirements
Office 365 offers a robust array of cloud-based resources geared towards aiding organizations in handling and overseeing compliance necessities. Within the framework of Office 365, entities are empowered to effortlessly create, store, and distribute documents, emails, and other information in a secure, compliant setting.
The suite encompasses a comprehensive arsenal of compliance instruments, pivotal in aiding organizations to fulfill their regulatory obligations. For instance, it boasts elements like data loss prevention (DLP) and encryption, pivotal in safeguarding sensitive information and ensuring adherence to data privacy statutes. Moreover, it encompasses cutting-edge auditing and reporting capabilities, instrumental in scrutinizing user activity and enforcing conformity with internal protocols.
Furthermore, Office 365 encompasses an array of tools aimed at helping entities manage their compliance requisites efficiently. Notably, it incorporates a Compliance Manager, serving as a guide for entities in pinpointing and addressing compliance vulnerabilities. Additionally, it avails an assortment of tools designed to automate compliance procedures, encompassing the creation and administration of policies, monitoring user activity, and generating compliance reports.
Lastly, Office 365 equips organizations with an array of tools to keep abreast of the latest compliance mandates. For instance, the Compliance Center within Office 365 acts as a hub for organizations to remain informed about the most recent regulatory alterations and ensure that their compliance mechanisms are current. Furthermore, it provides an array of resources, including webinars and tutorials, to assist organizations in comprehending and integrating the latest compliance requirements.
Overall, Office 365 is a powerful suite of tools that can help organizations manage and monitor compliance requirements. With Office 365, organizations can easily create, store, and share documents, emails, and other data in a secure, compliant environment. Additionally, Office 365 provides a range of tools that can help organizations identify and address compliance risks, automate compliance processes, and stay up-to-date on the latest compliance requirements.
Best Practices for Using Office 365 to Ensure Compliance with Data Protection Regulations
1. Formulate a comprehensive Data Governance Plan to guarantee adherence to data protection laws. This plan must encompass protocols for data categorization, user access management, data longevity, and data fortification.
2. Implement a Robust Multi-Factor Authentication System: Multi-factor authentication (MFA) is a critical security protocol that necessitates users to furnish two or more pieces of evidence to verify their identity. This serves as a formidable barrier against unauthorized access to vital Office 365 data.
3. Vigilantly Monitor User Activity: The meticulous tracking of user activity plays a pivotal role in ensuring strict adherence to data protection mandates. Office 365 offers sophisticated tools for scrutinizing user activity, notably through the Office 365 Security & Compliance Center.
4. Employ Stringent Data Encryption Measures: The deployment of data encryption stands as a fundamental safeguard for shielding sensitive information. Office 365 furnishes robust tools for data encryption, exemplified by the Azure Information Protection feature.
5. Utilize Data Loss Prevention (DLP) Measures: Data loss prevention (DLP) mechanisms provide a bulwark against inadvertent or deliberate leakage of sensitive data. Office 365 boasts comprehensive tools for implementing DLP, prominently showcased in the Office 365 Security & Compliance Center.
6. Enforce Granular Access Controls: Rigorous access controls serve as a linchpin in ensuring that only authorized personnel can access sensitive data. Office 365 offers advanced tools for instituting access controls, notably exemplified by Azure Active Directory.
7. Scrutinize Third-Party Access: Diligently monitoring third-party access is pivotal for upholding compliance with stringent data protection regulations. Office 365 is equipped with sophisticated tools for overseeing third-party access, notably through the Office 365 Security & Compliance Center.
8. Provide Robust Employee Training: Furnishing comprehensive training to employees on data protection regulations and best practices is foundational for upholding compliance. Office 365 features powerful tools for employee training, notably exemplified by Microsoft Teams.
9. Conduct Routine Data Audits: The regular auditing of data stands as a cornerstone for ensuring adherence to data protection regulations. Office 365 provides a suite of tools for conducting data audits, prominently highlighted through the Office 365 Security & Compliance Center.
Understanding the Security Features of Office 365 to Meet Compliance Requirements
Office 365, a cloud-based productivity suite, furnishes organizations with a dependable platform for collaboration. As more data shifts to the cloud, understanding Office 365’s security features is critical for compliance.
The suite offers a wide array of security measures to aid compliance. These encompass data loss prevention (DLP), multi-factor authentication (MFA), encryption, and identity/access management (IAM).
Data Loss Prevention (DLP) shields sensitive data from unauthorized access or accidental loss. It can detect and block transmission of highly sensitive information like credit card or Social Security numbers via email or other channels.
Multi-Factor Authentication (MFA) is a security feature that requires users to provide two or more pieces of evidence to prove their identity. This helps to ensure that only authorized users can access sensitive data and applications.
Encryption is a security feature that helps protect data from unauthorized access by scrambling it so that it can only be read by authorized users. Office 365 provides encryption for data at rest and in transit, helping to ensure that data is secure even if it is intercepted by an unauthorized user.
Identity and Access Management (IAM) is a feature that helps organizations manage user access to data and applications. IAM can be used to control who has access to what data and applications, as well as to set up rules for how users can access and use the data.
By understanding the security features of Office 365, organizations can ensure that their data is secure and compliant with applicable regulations. These features help organizations protect their data from unauthorized access and accidental loss, while also providing a secure platform for collaboration and communication.
How Office 365 Can Help You Meet HIPAA Compliance Requirements
Office 365, a suite of cloud-based services, is instrumental in enabling organizations to adhere to the stringent regulations of the Health Insurance Portability and Accountability Act (HIPAA). This federal law establishes rigorous standards for safeguarding the confidentiality of delicate patient health data, mandating that organizations implement robust measures to ensure its privacy and security.
Among the arsenal of features offered by Office 365, encryption takes the lead, providing protection for data both at rest and in transit, thereby thwarting unauthorized access attempts. In addition, access control functionalities empower organizations to selectively permit access to sensitive data, mitigating the risk of unauthorized personnel breaching the privacy of such information.
Furthermore, Office 365 boasts robust auditing and reporting capabilities, allowing meticulous tracking of user activities and swift identification of potential security vulnerabilities. To counteract the inadvertent or deliberate loss of sensitive data, Office 365 offers data loss prevention features, further bolstering the protective infrastructure.
Notably, the implementation of multi-factor authentication, a feature wherein users are required to furnish additional authentication factors such as a mobile device-generated code or a biometric scan, plays a pivotal role in fortifying access controls.
With Office 365 at their disposal, organizations can confidently ensure their compliance with HIPAA regulations, thus fortifying the sanctity and security of sensitive patient health information.
How Office 365 Can Help You Meet GDPR Compliance Requirements
The General Data Protection Regulation (GDPR) stands as a formidable framework designed to safeguard the personal data of European Union (EU) citizens. Absorbing its implications into your business practices is essential. Luckily, Office 365 emerges as a valuable ally in meeting GDPR compliance standards, furnishing a secure foundation for data storage and management.
Within Office 365, data finds refuge in a fortified environment. Encryption fortifies all stored data while multi-factor authentication stands as an impenetrable barrier against unauthorized access. Moreover, a rich array of tools empowers users to exert authority over data access and institute policies governing its usage and distribution.
Office 365 also provides a number of features that can help you meet GDPR compliance requirements. For example, Office 365 provides a Data Loss Prevention (DLP) feature that can help you detect and prevent the unauthorized sharing of sensitive data. Additionally, Office 365 provides a Rights Management Service (RMS) that allows you to control who can access and use the data. This helps ensure that only authorized users can access the data.
Finally, Office 365 provides a number of tools for monitoring and auditing data usage. These tools allow you to track who is accessing the data and how it is being used. This helps ensure that the data is being used in accordance with GDPR regulations.
Overall, Office 365 provides a secure platform for storing and managing data that can help you meet GDPR compliance requirements. By using Office 365, you can ensure that your data is secure and that it is being used in accordance with GDPR regulations.
Conclusion
Office 365 is an excellent tool for meeting compliance requirements such as GDPR and HIPAA. It provides a secure platform for storing and sharing data, as well as a range of features that help organizations meet their compliance obligations. With Office 365, organizations can ensure that their data is secure and compliant with the latest regulations. This makes it an ideal choice for organizations looking to meet their compliance requirements.
What Is Windows Communication Foundation(WCF)
Windows Communication Foundation (WCF) is a .NET framework for developing, configuring and deploying services. It is introduce with .NET Framework 3.0.It is service oriented technology used for exchanging information. WCF has combined feature of .NET Remoting, Web Services and few other communications related technology.
Key Feature of WCF:
- Interoperable with other Services
- Provide better reliability and security compared to ASMX web services.
- No need to make much change in code for implementing the security model and changing the binding. Small changes in the configuration will make your requirements.
Difference between WCF and Web service
| Web Service | WCF |
|---|---|
| It can be hosted in IIS | It can be hosted in IIS, windows activation service, Self-hosting, Windows service. |
| [WebService] attribute has to be added to the class and [WebMethod] attribute represents the method exposed to client
Example. [WebService] public class myService: System.Web.Services.Webservice { [WebMethod] }
|
[ServiceContract] attribute has to be added to the class and [OperationContract] attribute represents the method exposed to client
Example: [ServiceContract] public Interface InterfaceTest { [OperationContract] public class myService:InterfaceTest { public string Test() return “Hello! WCF”; }
|
| Can be access through HTTP | Can be access through HTTP, TCP, Named pipes. |
| One-way, Request- Response are the different operations supported in web service. | One-Way, Request-Response, Duplex are different type of operations supported in WCF. |
| System.Xml.Serialization name space is used for serialization. | System.Runtime.Serialization namespace is used for serialization. |
| Can not be multi-threaded. | Can not be multi-threaded. |
| For binding it uses SOAP or XML | Support different type of bindings (BasicHttpBinding, WSHttpBinding, WSDualHttpBinding etc ) |
WCF Services has three important companent.
- Service Class – A WCF service class implements some service as a set of methods.
- Host Environment- It can be a application or a Service or a Windows Forms application or IIS as in case of the normal asmx web service in .NET.
- Endpoints –All the WCF communications are take place through end point.
Endpoints consist of three component Address, Binding and contract. They collectively called as ABC’s of endpoints.
Address: It is basically url address where WCF services is hosted.
Binding: Binding will describes how client will communicate with service.
Binding supported by WCF
|
Binding |
Description |
|
BasicHttpBinding |
Basic Web service communication. No security by default |
|
WSHttpBinding |
Web services with WS-* support. Supports transactions |
|
WSDualHttpBinding |
Web services with duplex contract and transaction support |
|
WSFederationHttpBinding |
Web services with federated security. Supports transactions |
|
MsmqIntegrationBinding |
Communication directly with MSMQ applications. Supports transactions |
|
NetMsmqBinding |
Communication between WCF applications by using queuing. Supports transactions |
|
NetNamedPipeBinding |
Communication between WCF applications on same computer. Supports duplex contracts and transactions |
|
NetPeerTcpBinding |
Communication between computers across peer-to-peer services. Supports duplex contracts |
|
NetTcpBinding |
Communication between WCF applications across computers. Supports duplex contracts and transactions |
|
BasicHttpBinding |
Basic Web service communication. No security by default |
|
WSHttpBinding |
Web services with WS-* support. Supports transactions |
Contract: The endpoints specify a Contract that defines which methods of the Service class will be accessible via the endpoint; each endpoint may expose a different set of methods. It is standard way of describing what the service does.
Mainly there are four types of contracts available in WCF.
- Service Contract: describe the operation that service can provide.
- Data Contract: describes the custom data type which is exposed to the client.
- Message Contract: WCF uses SOAP message for communication. Message Contract is used to control the structure of a message body and serialization process. It is also used to send / access information in SOAP headers. By default WCF takes care of creating SOAP messages according to service DataContracts and OperationContracts.
- Fault Contract: Fault Contract provides documented view for error occurred in the service to client. This help as to easy identity the what error has occurred, and where. By default when we throw any exception from service, it will not reach the client side.
Creating WCF service in visual studio 2013:
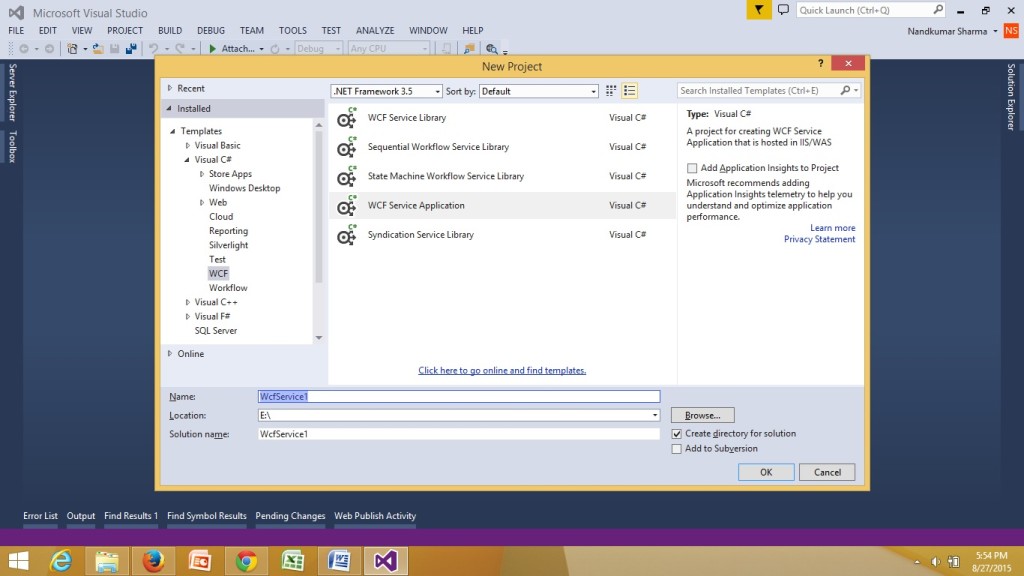
- First open Visual Studio 2013. Create a new project and select WCF Service Application and give it the name WcfService1.
- Delete default created IService1.cs and Service1.svc file.
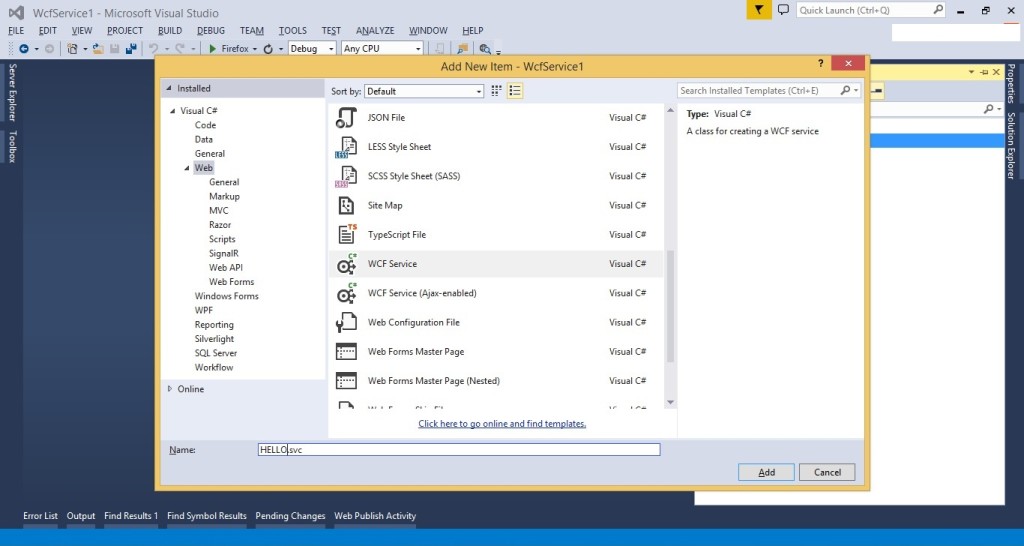
- Right-click on the project and select “Add” | “New Item…”
- From the Web tab choose WCF Service to add.
- give the service the name “HELLO.svc”
- Open IHELLO.cs and remove the “void DoWork()”.
IHELLO.cs
using System;
using System.Collections.Generic;
using System.Linq;
using System.Runtime.Serialization;
using System.ServiceModel;
using System.Text;
namespace WcfService1
{
// NOTE: You can use the “Rename” command on the “Refactor” menu to change the interface name “IHELLO” in both code and config file together.
[ServiceContract]
public interface IHELLO
{
[OperationContract]
string sayHello();
}
}
- Configure Endpoints with Metadata
To do this open the Web.config file. We are going to create one Endpoint with basicHttpBinding. We are adding a Endpoint also to configure the metadata of the service.
<services>
<service behaviorConfiguration=”WcfService1.HELLOBehavior” name=”WcfService1.HELLO”>
<endpoint address=”” binding=”basicHttpBinding” contract=”WcfService1.IHELLO”/>
<endpoint address=”mex” binding=”mexHttpBinding” contract=”IMetadataExchange” />
</service>
</services>
- Implement Service. HELLO.svc.cs
using System;
using System.Collections.Generic;
using System.Linq;
using System.Runtime.Serialization;
using System.ServiceModel;
using System.Text;
namespace WcfService1
{
public class HELLO : IHELLO
{
public string sayHello()
{
return “Hello! welcome to WCF”;
}
}
}
Now we have created the Service and configured the Endpoint.To host it press F5 in Visual Studio.
In the browser you will see the Service as in the following. 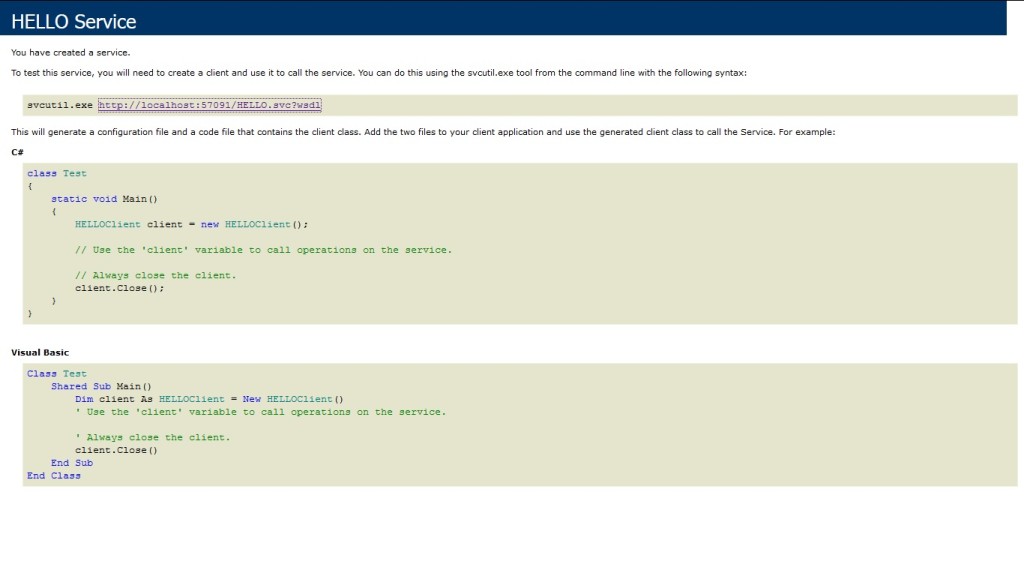 To view the metadata of the Service click on the WSDL URL.
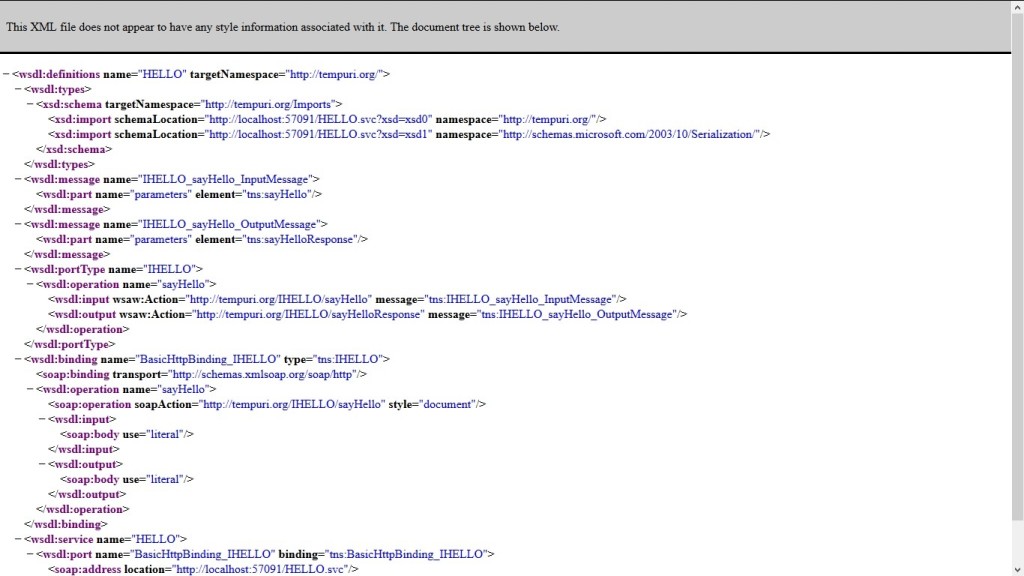
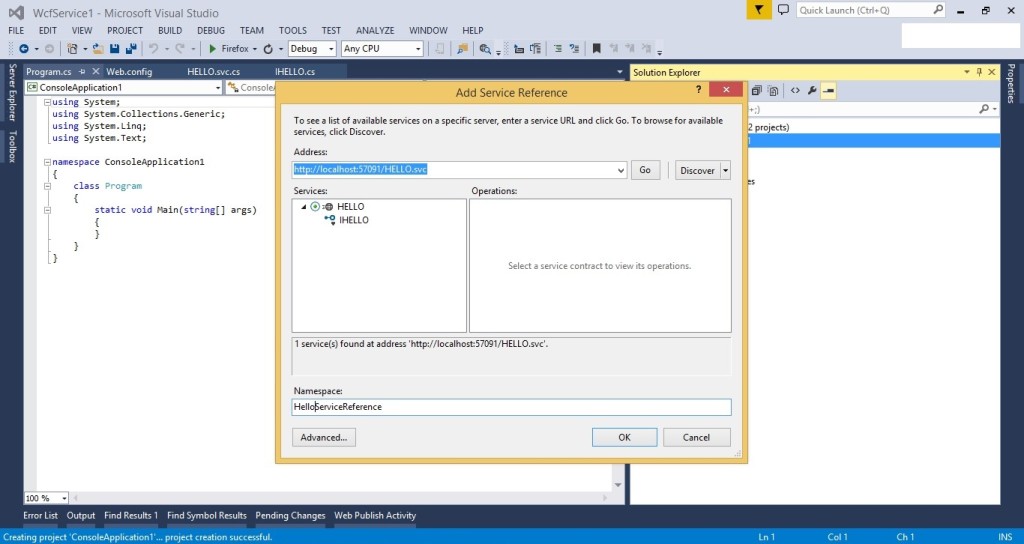
In Windows / Web application we can consume this WCF service by using “Add Service Reference”->Add Service Address “http://localhost:57091/HELLO.svc” -> Click on Go.
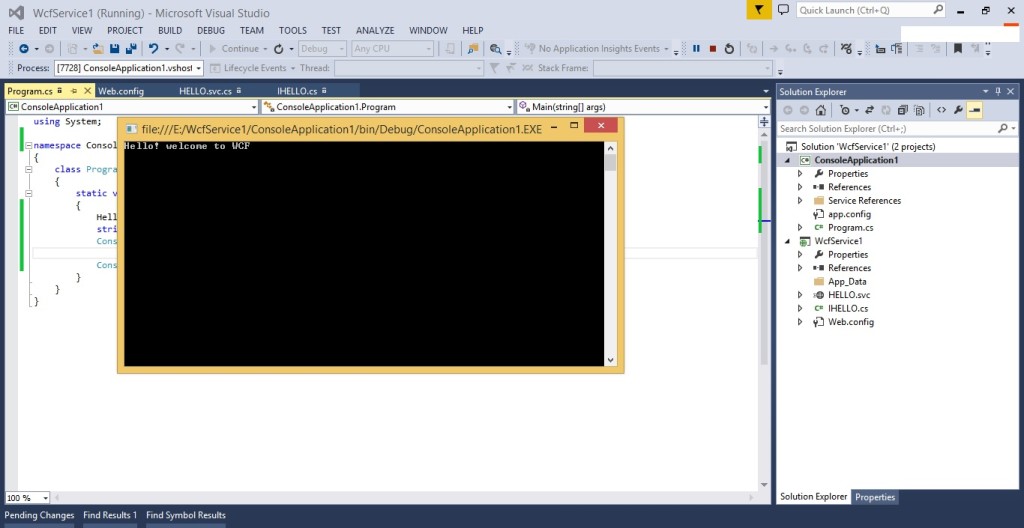
I had created console application and added service reference.
Program.cs
using System;
namespace ConsoleApplication1
{
class Program
{
static void Main(string[] args)
{
HelloServiceReference.HELLOClient oHell = new HelloServiceReference.HELLOClient();
string str= oHell.sayHello();
Console.WriteLine(str);
}
}
}
Related helpful links
https://msdn.microsoft.com/en-us/library/ms731082(v=vs.110).aspx
I hope this will help you.Your valuable feedback and comments are important for me.
SharePoint 2016 Farm configuration issue on Windows Azure Virtual Machine
Hi All,
I hope you all know that now we can create a SharePoint 2016 VM on Windows Azure. In case you have not tried it yet, you can follow below:
Select New on Windows Azure > Compute > Virtual Machine > From Gallery > Select SharePoint from left hand navigation > Select SharePoint Server 2016 IT preview
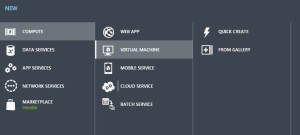
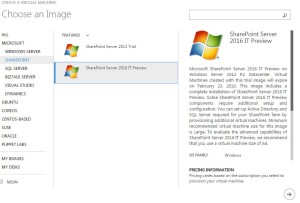
While I was working with this VM, I came across an issue where I was unable to configure a SharePoint 2016 farm using the SharePoint 2016 VM created in Windows Azure using one of their template. I found that root of issue was Active Directory. SharePoint cannot work without active directory and not everyone using Azure creates a VM with AD in Windows Azure itself. If you plan to create an AD forest in Azure and then add SharePoint 2016 VM to that domain, please follow my article:
Creating a Lab on Windows Azure
http://blogs.msdn.com/b/mvpawardprogram/archive/2015/02/09/creating-a-lab-on-windows-azure.aspx
If you are planning to use this VM only for learning purpose then you may want to create a SharePoint farm without Active Directory. Unlike previous versions of SharePoint, you cannot use Single Server install model to create a SharePoint farm without Active Directory or without installing SQL server.
To overcome this issue you need 1st install SQL Server and then use below PowerShell command to configure your SharePoint farm. You can download SQL server from below link
https://www.microsoft.com/en-in/download/details.aspx?id=42299
Once SQL server is installed and your local admin account has access to SQL server, you can use SharePoint PowerShell to create tour SharePoint 2016 Farm.
1. Open SharePoint PowerShell as Admin
2. You may want to type below command and provide actual values. When you execute the command, you will be requested for credentials of your local admin account you used while creating this Virtual Machine.
New-SPConfigurationDatabase -DatabaseName “SP2016_config” -DatabaseServer “Name of SQL Server” -Passphrase (ConvertTo-SecureString “Sharepoint@2016” -AsPlainText -force) -LocalServerRole SingleServerFarm -FarmCredentials (Get-Credential)
Note: I have observed that when people try to copy paste such commands, hyphen(-) sign does not work, so remove and add these sign again in whole command.
Once above command is executed successfully without any issue, you can execute SharePoint PSconfig wizard and complete SharePoint farm configuration.
Hope this will help you.
SharePoint site down “An application error occurred on the server” web.config error
Hi All,
Recently I got below error message which you might have seen. This is a very common and generic error message which can confuse you a lot. You may face this issue in all versions of SharePoint like SharePoint 2007, 2010, 2013 or SharePoint 2016. First let us look at the error message
#################### Error Start #############
Runtime Error Description: An application error occurred on the server. The current custom error settings for this application prevent the details of the application error from being viewed remotely (for security reasons). It could, however, be viewed by browsers running on the local server machine.
Details: To enable the details of this specific error message to be view able on remote machines, please create a <customErrors> tag within a “web.config” configuration file located in the root directory of the current web application. This <customErrors> tag should then have its “mode” attribute set to “Off”.
<!– Web.Config Configuration File –>
<configuration>
<system.web>
<customErrors mode=”Off”/>
</system.web>
</configuration>
Notes: The current error page you are seeing can be replaced by a custom error page by modifying the “defaultRedirect” attribute of the application’s <customErrors> configuration tag to point to a custom error page URL.
<!– Web.Config Configuration File –>
<configuration>
<system.web>
<customErrors mode=”RemoteOnly” defaultRedirect=”mycustompage.htm”/>
</system.web>
</configuration>
#################### Error End #############
We can see that error message says something about web.config file. Here is what we need to do.
1. Open IIS management console
2. Start > RUN > Inetmgr > Expand server
3. Expand the site you are getting this error on > right click > explore
Here you should be able to see a web.config file. If this web.config was recently modified by someone, please check with your team if anyone has recently modified this file, tried to deployed a farm\web application solution or run psconfig wizard on any of the SharePoint server in farm.
Note: If you have multiple SharePoint server, try the same on all the servers
In most cases, it is a web.config change done by someone from within the team which cause this issue.
If no one has done any changes:
1. Make a copy of this web.config file and open the original file. Search for “callstack” and set the value to True, again search for customerrors set it to OFF.
2. Rename the recent web.config to web.config.old with today’s date and revert the most recent web.config(date and time) file to web.config
3. Install Examdiff tool on a computer and copy the most recent web.config file and new web.config to identify the changes.
These steps will help you identify the actual cause of this error.
Myth Buster for SharePoint SQL RBS
Hi All,
In this article I would try to share my experience about SharePoint on SQL RBS. This article may help you decide if you should use SQL RBS with SharePoint or any other product.
This is my personal opinion about SQL RBS with SharePoint. I would suggest you to cross check below furnished details before taking final decision. Microsoft keeps enhancing its product so some of these may be fixed\resolved\changed.
Let’s first discuss what is SQL RBS? Normally when you upload a document, image, video, audio, etc on your SQL server it is stored in MDF (Master database file) of your SQL content database. As per my past experience when you upload anything to a content management system, you would revisit only 20 % of data uploaded, rest 80 % of data is never visited but used for record only purpose. IT pro’s suggest that you should keep your SQL content database on RAID 10 hard disk or SAN which is pretty expensive.
To resolve this issue Microsoft came out with SQL RBS which allows you to store your Files\BLOB outside (File system) of SQL database. This means you can use a Raid 0 drive to store BLOB files (image, video, document, etc). RBS is intended to lower storage costs by allowing you to store large read-intensive BLOBs on less expensive drives.
1st Myth of SQL RBS: Additional Storage for Content database.
This is the biggest myth about SQL RBS. Microsoft Suggest that your content database should be below 200 GB. Now days when we have a USB stick with 100 GB, a Content management server restricted to 200 GB is not a good deal. To overcome this issue few IT admin plan to use SQL RBS because RBS stores files outside of SQL server hence decrease the size of content database.
Reality: RBS does not increase the storage limits of content databases. All limitations still apply to RBS-enabled content databases. If you are using Remote BLOB Storage (RBS), the total volume of remote BLOB storage and metadata in the content database must not exceed the 200GB limit.
2nd Myth of SQL RBS: Files stored on FILESYSTEM through RBS cannot be accessed directly.
IT Pros and lot of other articles says that we cannot open the file directly from BLOB FILESYSTEM. We have to go through SQL database in order to read these files.
Reality: I was able to access FILESYSTEM where the BLOB files were stored and was able to open my txt, bmp, jpg, etc files. SharePoint is known for its Item level Security. So far SharePoint security was never compromised and access is only available on need to know basis. If any users who has access to FILESYSTEM can open any file stored in SharePoint without having access on SharePoint is a security issue. Also encryption is not supported on BLOBs, even if Transparent Data Encryption is enabled.
3rd Myth of SQL RBS: Better performance I hear a lot of IT PRO who comment that they would get better performance if FILES\BLOBS are stores outside of SQL Server.
Reality: I would accept this when we are using SharePoint to store Hugh amount of data files (70-80 % of BLOB). When I asked these IT Pros how much data is stored on dbo.docs, dbo.AllDocStreams, dbo.DocStreams, dbo.AllDocVersions, dbo.alldocs, etc table, they are not aware of same or they don’t bother. When you offload 70-80 % of data from your MDF file and store it FILESYSTEM you may feel better performance. If our content database stores BLOB files not more then 30-35 % then it would not make sense to go with RBS. Let me explain you why I say that, when you configure RBS you create number of additional tables on your content database. This means when we upload BLOB to SharePoint it will execute additional query to store data. Here SQL will first import image files, and then it may split the file based on size of file and then store it to FILESYSTEM. Again this process is reversed when we try to open or query the BLOB file. This will increase disk IO, RAM and processing power. Now if consumption of my resources is increased, how can I expect better performance? RBS does not support using data compression but data is compressed when uploaded to SQL MDF file. Microsoft says “Although using RBS with files larger than 1 MB can improve I/O and processor performance, using RBS with files smaller than 256 KB might decrease overall performance. Storing the BLOBs inline in the content database is more efficient with smaller files”
4th Myth of SQL RBS: Ease in management
A lot of IT Pro’s also comment that it is easy to manage smaller SQL databases, Better Technology, Ease in configuration, etc.
Reality: Why you want to take an additional Load of configuration anything extra on SQL. If any feature is available does not mean you should use it. Implementation of these features depends on its pros\cons and specific requirement of the feature. Also when you backup the database, it will backup all the files from FILESYSTEM along with SQL MDF\LDF files. Sizes of these databases backup does not decreases but it increase because RBS does not perform any compression. If you plan High availability through Mirroring or Log shipping, you need to follow additional steps to configure the same.
That’s it from my side. Feel free to comment or connect with me if you feel any of the above information is incorrect.
Reference:
https://technet.microsoft.com/en-us/library/cc262787.aspx
https://technet.microsoft.com/en-us/library/ff628583.aspx
MySQL server Replication
Hello Everyone,
Today we are doing mysql replication, for Mysql installation you can refer my previous blogs
for this setup we need to VM installed Mysql, server which contain primary DB will be “Master” & server which has replica of the DB know as a “Slave”
lets start the replication.
=====================================================================
Configure MySQL Master
1) Need to edit “/etc/my.cnf”
[mysqld]
server-id = 1
binlog-do-db=otrs #dbname
expire-logs-days=7
relay-log = /var/lib/mysql/mysql-relay-bin
relay-log-index = /var/lib/mysql/mysql-relay-bin.index
log-error = /var/lib/mysql/mysql.err
master-info-file = /var/lib/mysql/mysql-master.info
relay-log-info-file = /var/lib/mysql/mysql-relay-log.info
log-bin = mysql-bin
2) Restart the mysql service
# service mysqld restart
3) create a Slave user and password. For instance
[root@OtrsMaster ~]# mysql -u root -p
Enter password:
Welcome to the MySQL monitor. Commands end with ; or \g.
Your MySQL connection id is 17
Server version: 5.1.73-log Source distribution
Copyright (c) 2000, 2013, Oracle and/or its affiliates. All rights reserved.
Oracle is a registered trademark of Oracle Corporation and/or its
affiliates. Other names may be trademarks of their respective
owners.
Type ‘help;’ or ‘\h’ for help. Type ‘\c’ to clear the current input statement.
mysql>
4)
mysql> STOP SLAVE;
Query OK, 0 rows affected, 1 warning (0.00 sec)
mysql> GRANT REPLICATION SLAVE ON *.* TO ‘centos’@’%’ IDENTIFIED BY ‘centos’;
Query OK, 0 rows affected (0.00 sec)
mysql> FLUSH PRIVILEGES;
Query OK, 0 rows affected (0.00 sec)
5) Applied Read only lock on slave
mysql> FLUSH TABLES WITH READ LOCK;
Query OK, 0 rows affected (0.00 sec)
5)
mysql> SHOW MASTER STATUS;
+——————+———-+————–+——————+
| File | Position | Binlog_Do_DB | Binlog_Ignore_DB |
+——————+———-+————–+——————+
| mysql-bin.000001 | 106 | otrs | |
+——————+———-+————–+——————+
1 row in set (0.00 sec)
6) Note down the file (mysql-bin.000001) and position number (106)
7) Backup Master server database
# mysqldump –all-databases –user=root –password –master-data > masterdatabase.sql
8) After taking the backup Again login to MySQL as root user and unlock the tables
mysql> UNLOCK TABLES;
Query OK, 0 rows affected (0.01 sec)
mysql> quit
Bye
9) Copy the masterdatabase.sql file to your Slave server using SCP
scp masterdatabase.sql [email protected]:/root
Configure MySQL Slave
1) Need to edit “/etc/my.cnf”
[mysqld]
server-id = 2
master-host=192.168.0.200
master-connect-retry=60
master-user=sk
master-password=centos
replicate-do-db=otrs
relay-log = /var/lib/mysql/mysql-relay-bin
relay-log-index = /var/lib/mysql/mysql-relay-bin.index
log-error = /var/lib/mysql/mysql.err
master-info-file = /var/lib/mysql/mysql-master.info
relay-log-info-file = /var/lib/mysql/mysql-relay-log.info
log-bin = mysql-bin
max_allowed_packet=20M
query_cache_size=32M
innodb_buffer_pool_size = 256M
innodb_log_file_size = 512M
datadir=/var/lib/mysql
socket=/var/lib/mysql/mysql.sock
2) Import the master database:
mysql -u root -p < /root/masterdatabase.sql
3) # service mysqld restart
4) Log in to the MySQL & run the below commands
mysql> SLAVE STOP;
Query OK, 0 rows affected (0.01 sec)
mysql> CHANGE MASTER TO MASTER_HOST=’192.168.2.220′, MASTER_– USER=’centos’, MASTER_PASSWORD=’centos’, MASTER_LOG_FILE=’mysql-bin.000001′, MASTER_LOG_POS=20249;
Query OK, 0 rows affected (0.03 sec)
mysql> SLAVE START;
Query OK, 0 rows affected (0.01 sec)
mysql> SHOW SLAVE STATUS\G
*************************** 1. row ***************************
Slave_IO_State: Waiting for master to send event
Master_Host: 192.168.0.220
Master_User: centos
Master_Port: 3306
Connect_Retry: 60
Master_Log_File: mysql-bin.000001
Read_Master_Log_Pos: 20249
Relay_Log_File: mysql-relay-bin.000002
Relay_Log_Pos: 4941
Relay_Master_Log_File: mysql-bin.000001
Slave_IO_Running: Yes
Slave_SQL_Running: Yes
Replicate_Do_DB:
Replicate_Ignore_DB:
Replicate_Do_Table:
Replicate_Ignore_Table:
Replicate_Wild_Do_Table:
Replicate_Wild_Ignore_Table:
Last_Errno: 0
Last_Error:
Skip_Counter: 0
Exec_Master_Log_Pos: 20249
Relay_Log_Space: 5096
Until_Condition: None
Until_Log_File:
Until_Log_Pos: 0
Master_SSL_Allowed: No
Master_SSL_CA_File:
Master_SSL_CA_Path:
Master_SSL_Cert:
Master_SSL_Cipher:
Master_SSL_Key:
Seconds_Behind_Master: 0
Master_SSL_Verify_Server_Cert: No
Last_IO_Errno: 0
Last_IO_Error:
Last_SQL_Errno: 0
Last_SQL_Error:
1 row in set (0.00 sec)
mysql>
If your application & DB server are the same then installed the application on slave server before adding in to it Mysql Slave.
& rsync your application folders with slave server in scenario you will get Mysql replication as well as application server
[root@OtrsMaster ~]# crontab -l
*/10 * * * * /usr/bin/rsync -avr –progress –delete //var/article/* [email protected]:/opt/var/article/
Fail-over Master to slave
1)flush log if server was master after booting you have to run below command
mysql> flush logs;
Query OK, 0 rows affected (0.01 sec)
2)
mysql> SLAVE STOP;
Query OK, 0 rows affected (0.01 sec)
mysql> RESET MASTER;
Query OK, 0 rows affected (0.01 sec)
3)
mysql>CHANGE MASTER TO MASTER_HOST=’192.168.0.220′;
Query OK, 0 rows affected (0.01 sec)
mysql> SHOW MASTER STATUS;
+——————+———-+————–+——————+
| File | Position | Binlog_Do_DB | Binlog_Ignore_DB |
+——————+———-+————–+——————+
| mysql-bin.000001 | 20425 | | |
+——————+———-+————–+——————+
1 row in set (0.00 sec)
mysql>exit
After doing all these settings restart the applications services
[root@OtrsMaster ~]# /etc/init.d/httpd restart
Stopping httpd: [ OK ]
Starting httpd: [ OK ]
To make failed server (after rebuilding) again MySQL slave please follow “Configure MySQL Slave” section.
–Sachin.
Configure Office Web App 2013 Farm with SharePoint 2013 Farm
Hi Friends,
Today we will discuss on how to configure Multi Server Office Web Apps farm with a SharePoint farm. Also the specialty of this OWA configuration is that it can work inside and outside of firewall. Normally OWA farms are setup HTTP inside the firewall network(Internal network) and HTTPS outside the network(External world) but using this configuration we will configure HTTPS for both inside and outside network. This will not only decrease additional overhead and configuration but also is recommended by Microsoft to use HTTPS for production environment.
We need to meet below pre-requisites before we proceed further:
1. SharePoint farm configured and ready to use
2. Two or more Office Web Apps servers with setup files
3. One certificate for Office Web App
4. If you are using Windows server 2012 R2 then you would need to install latest update for Office Web Apps
5. FQDN name for your Office web app farm e.g.(owa.domain.com) and its DNS entry with Round Robin(You can also configure Windows NLB or a Load Balancer entry for same)
Installation of Office Web App is very simple, You just need to download the installable and execute it on all OWA servers.
Install Office Web apps on all Office Web Apps servers. If you are using Office Web App on Windows Server 2012 R2, you should install latest update for Office Web Apps. You would need an Office Web app certificate imported to IIS
Now Let’s configure Office Web App, Open Windows PowerShell and execute below command
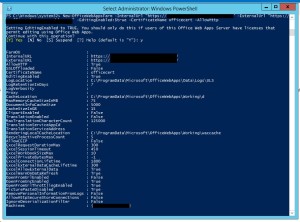
Once the Office Web App farm is configured, open IIS and make sure SSL binding for site HTTP80 has proper certificate attached.
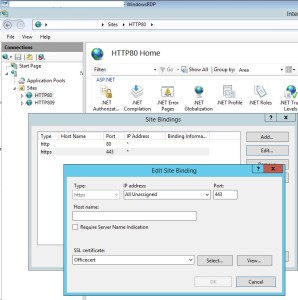
From IIS binding select the certificate and export the .cer file.
You need to import it to central admin manage trust.
To Attach this Office web app farm to SharePoint farm, you need to create a WOPI connection. Open SharePoint PowerShell on SharePoint server and execute below command:
New-SPWOPIBinding -ServerName “officewebapp.domain.com”
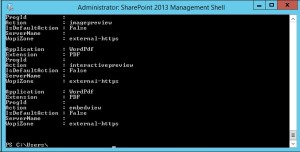
Now if you want to add other Office Web App Server to OWA farm, you need to execute below command on existing OWA server
new-officewebappsmachine -machinetojoin “owa2server.domain.com”
![]()
Hope this will help you
Configure Workflow Manager 1.0 with SharePoint Server 2013/2016/2019
Hi Friends,
Today we will discuss on how to configure Multi Server Workflow farm with SharePoint farm. Just of your information, you need to access Workflow farm only from WFE and Application servers. This means just like your database server, even workflow servers are not exposed to end users.
We need to meet below pre-requisites before we proceed further:
A. SharePoint farm configured and ready to use
B. Two or more Workflow servers with setup files
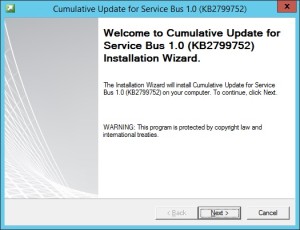
C. If you are using Windows server 2012 R2 then you would need update KB2799752(Service bus hotfix) and KB2799754(Workflow manager hotfix)
D. FQDN name for your workflow farm e.g.(Workflow.domain.com) and its DNS entry with Round Robin(You can also configure Windows NLB or a Load Balancer entry for same)
- Let’s get started with installation of Workflow Manager 1.0 on Workflow servers. We need installable as shown below

-
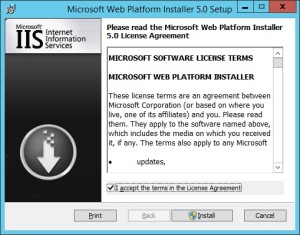
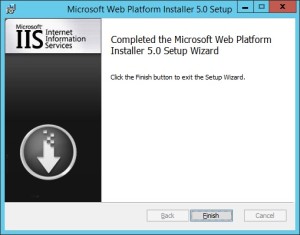
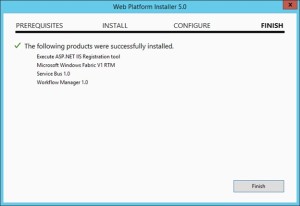
When you will try to install the workflow.exe file you will be asked to download and install WebPlatformInstaller.exe. Now all the updates and most components are installed through WebPlatforminstaller.
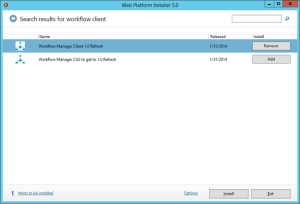
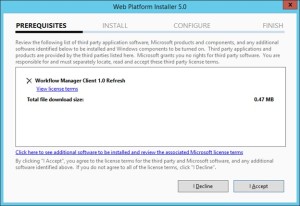
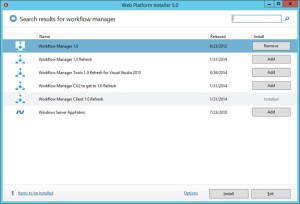
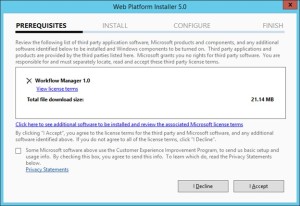
- Once the WebPlatforminstaller is installed, you need to search for Workflow manager and Workflow manager client and install the same.
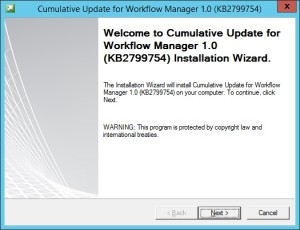
- Once Workflow Manager and client is installed, I would suggest you to install the updates as well.
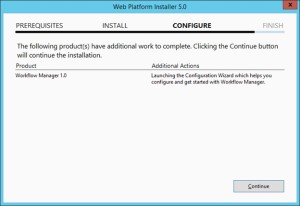
- Now let’s configure Workflow Server farm. This is very important so please follow steps carefully.
- Lets execute the Workflow Manager Configuration Wizard
- Select “Configure Workflow Manager with Custom Settings”
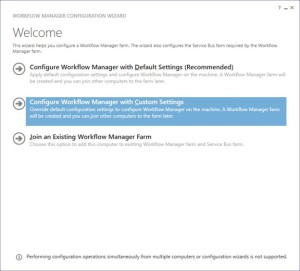
-
Now provide the SQL server instance name, Authentication, Certificate and SQL Workflow database names
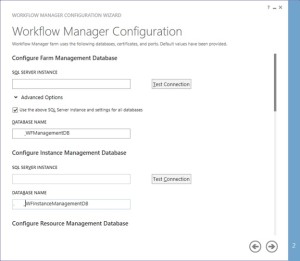
-
You need to provide the Workflow service account credentials which will be used to connect to SQL server and for workflow IIS Application pool.
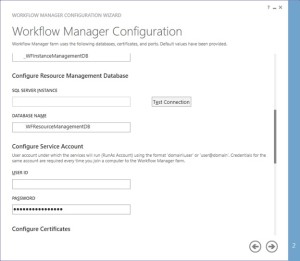
-
You would need to provide a Certificate Generation Key. It is just like Passphrase for your SharePoint farm
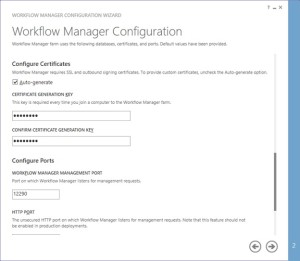
-
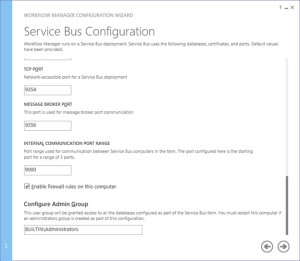
Make sure you select “Allow workflow management over http on this computer”
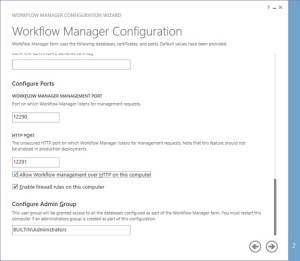
-
Along with Workflow Management, you need to configure Service Bus required by Workflow manager
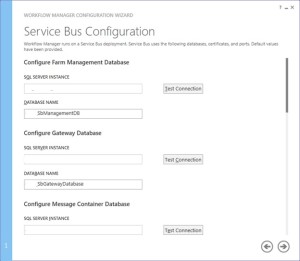
-
Make sure you select “use the same certificate generation key as provided for workflow manager”
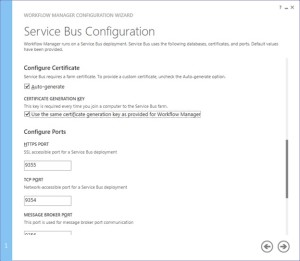
- Once the Workflow Farm is created, you need to join other Workflow server to the farm. To do so execute the same Workflow configuration wizard and select “Join an Existing Workflow Manager Farm”
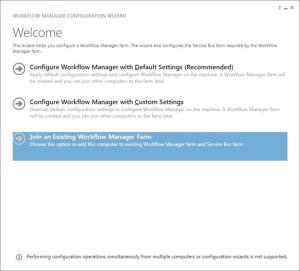
-
Provide the existing Workflow Farm SQL server instance name, Workflow database name and Service Bus farm database name
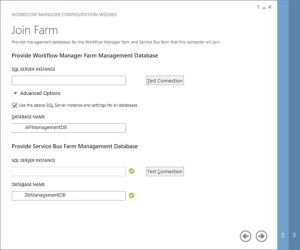
-
Provide the workflow service account and Certificate generation key used while creating workflow farm.
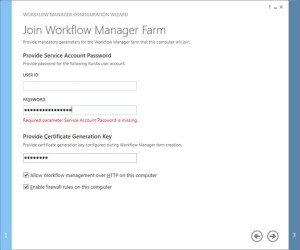
-
Select “use the same service account credentials as provided for Workflow Manager”, then select next
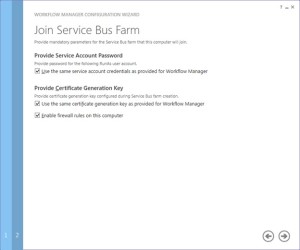
-
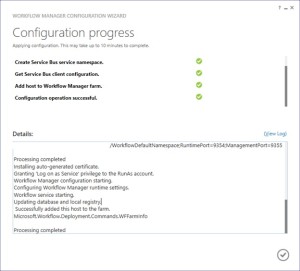
Once farm other server is joined to workflow farm you will see below
-
Once workflow is configured, you need to attach Workflow Farm to SharePoint farm. Make sure you have DNS entry(Workflow.domain.com) for your Workflow farm. If not DNS, you should at least have Host entry for same. Try to browse http://workflow.domain.com:12291 on WFE and Application server, you might see Authentication error.

-
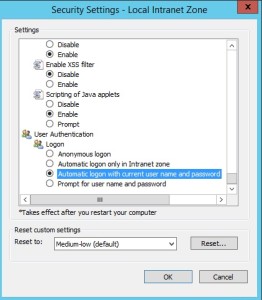
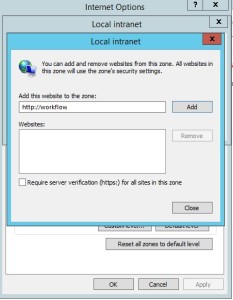
Add the URL to Local Intranet and set the Local Intranet zone to “Automatically login with current username and password”
-
Now you should be able to browse the workflow farm details, this shows you can connect to workflow farm and it is working fine.

-
Now execute below command in SharePoint Powershell
Register-SPWorkflowService -SPSite “http://sharepointsite” -workflowHostUri “http://workflow.domain.com:12291/” -AllowOauthHttp -ScopeName SharePoint –force

-
Now you need to activate the workflow feature on site
Enable-SPFeature -Identity WorkflowServiceStore –Url http://sharepointsite -
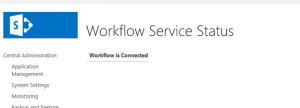
In Central Admin > Manage Service Application > Workflow Service Application Proxy
-
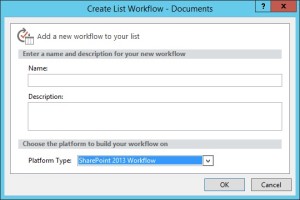
Open site in SharePoint designer – Select workflow from left pane – select new workflow
Note:
A. Workflow farm can co-locate on SharePoint servers
B. As per Microsoft articles, for high availability you need to have at least 3 Workflow Server in farm. You cannot have 2 workflow servers in a farm. It has to be 1 or 3.

