Posts Tagged ‘connect’
Connect to On Premises SharePoint 2013 site using Powershell on your local computer
Hi Friends,
Recently I had a word with Ryan Yates on our yammer group and found a interesting Powershell script. Ryan created a powershell script named “Client-side SharePoint PowerShell”is avaiable on Codeplex https://sharepointpowershell.codeplex.com. We can use this script to connect to on-premises SharePoint site using Powershell and execute queries on same. I found it pretty intreseting so I tried same. Below are couple of requirement to use this powershell script.
- Windows powershell 3.0
- Copy 15 folder from any sharepoint server(path C:\Program Files\Common Files\microsoft shared\Web Server Extensions) to local client machine at same location.
- Client user have atleast read permission on target URL.
- Client system should be part of same domain.
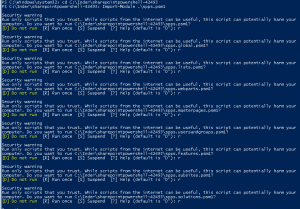
If above requirement are met, lets get connect to remote SharePoint server. We need to download “Client-side SharePoint PowerShell” from codeplex site and extract it to a folder(e.g. c:\inder). Then Open Windows Powershell(Run as Admin) and browse(cd C:\Inder\sharepointpowershell-42493) to Powershell folder as shown below:

- Now we We need to load “Client-side SharePoint PowerShell” module using “Import-Module .\spps.psm1” command

Note: You might have to select “R” multiple times to load all the scripts -
Finally we need to connect to SharePoint site using command “Initialize-SPPS -siteURL http://siteurl”

-
If we dont see any error message, it means our SharePoint is now conenct and ready to use.
Below are arguments you can use in this powershell
Upload Sandboxed WSP to the site
Add-Solution -path “$exampledir\Solutions\solution.wsp”
Activate the WSP
Install-Solution -solutionName “AESBTwitterWebpart.wsp”
Create a subsite
Add-Subsite -title “Subsite” -webTemplate “STS#0” -description “Description…” -url “subsite” -language 1033 -useSamePermissionsAsParentSite $true
Go to the subsite
Open-Subsite -relativeUrl “/subsite”
Enable the publishing feature
Enable-Feature -featureId “94c94ca6-b32f-4da9-a9e3-1f3d343d7ecb” -force $false -featureDefinitionScope “Web”
Create document library on the subsite
Add-DocumentLibrary -listTitle “Testdoclib”
Copy testfiles to this document library
Copy-Folder “$exampledir\Subsite\Testdoclib” “Testdoclib” $false
Go back to the root site
Open-Rootsite
copy contents of local folders to SharePoint
$stylelibdir = “$exampledir\Style Library”
$styleliburl = “/Style Library”
Set master page
$masterFile = “seattle_custom.master”
Set-CustomMasterPage $masterFile
Create news list
$newsListName = “News”
$newsItemsCSV = “$exampledir\News\items.csv”
Add news web part to the page
Add-Webpart “/Pages/default.aspx” “Header” 0 $webpartXml
Create SharePoint Groups
Add-Group -name “Example Group”
#roleTypes are Guest, Reader, Contributor, WebDesigner, Administrator, Editor
Web
Set-WebPermissions -groupname “Example Group” -roleType “Reader”
Pages lib
Set-ListPermissions -groupname “Example Group” -listname “Pages” -roleType “Reader”
News list
Set-ListPermissions -groupname “Example Group” -listname “News” -roleType “Reader”
Hope this will help you all and help you save time.
Note: If you get error while loading the SharePoint site, make sure you have properly copied 15 hive folder and you are running Windows powershell as admin
You can also check below article written by Ryan Yates himself:
http://www.kilasuit.org/Blog/Post/6/Getting-up-and-Running-with-SPPS-for-PowerShell-and-SharePoint-Usage
Connect to your Azure Subscription using Powershell
Today we will understand we can connect to our Azure Subscription using Powershell and run some basic command on it.
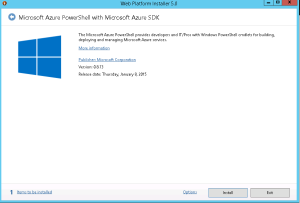
To connect to Azure subscription we need to download and install Azure Powershell. Copy paste below url on your browser and install the Web Platform Installer. This will give you option to download Azure Powershell.
http://go.microsoft.com/fwlink/p/?linkid=320376&clcid=0x409
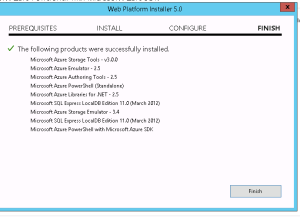
Once the Powershell is downloaded and installed, we will
Now we will download the Azure Setting file to connect to the azure server. In the Azure Powershell, type below command.
Get-AzurePublishSettingsFile
Once you login to your Azure website, you will get a file named “Visual Studio Premium with MSDN-date-credentials.publishsettings”. Save it to a secure location. This file contains secure credentials and additional information about subscriptions that you can use in your development environment.
Now Import the Azure Settings file to Powershell. Run “Import-AzurePublisingSettingsFile” and then type path of the file we just downloaded as shown in below image
To check Subsctiption details run below command
Get-AzureSubscription


