Archive for the ‘Linux’ Category
MySQL server Replication
Hello Everyone,
Today we are doing mysql replication, for Mysql installation you can refer my previous blogs
for this setup we need to VM installed Mysql, server which contain primary DB will be “Master” & server which has replica of the DB know as a “Slave”
lets start the replication.
=====================================================================
Configure MySQL Master
1) Need to edit “/etc/my.cnf”
[mysqld]
server-id = 1
binlog-do-db=otrs #dbname
expire-logs-days=7
relay-log = /var/lib/mysql/mysql-relay-bin
relay-log-index = /var/lib/mysql/mysql-relay-bin.index
log-error = /var/lib/mysql/mysql.err
master-info-file = /var/lib/mysql/mysql-master.info
relay-log-info-file = /var/lib/mysql/mysql-relay-log.info
log-bin = mysql-bin
2) Restart the mysql service
# service mysqld restart
3) create a Slave user and password. For instance
[root@OtrsMaster ~]# mysql -u root -p
Enter password:
Welcome to the MySQL monitor. Commands end with ; or \g.
Your MySQL connection id is 17
Server version: 5.1.73-log Source distribution
Copyright (c) 2000, 2013, Oracle and/or its affiliates. All rights reserved.
Oracle is a registered trademark of Oracle Corporation and/or its
affiliates. Other names may be trademarks of their respective
owners.
Type ‘help;’ or ‘\h’ for help. Type ‘\c’ to clear the current input statement.
mysql>
4)
mysql> STOP SLAVE;
Query OK, 0 rows affected, 1 warning (0.00 sec)
mysql> GRANT REPLICATION SLAVE ON *.* TO ‘centos’@’%’ IDENTIFIED BY ‘centos’;
Query OK, 0 rows affected (0.00 sec)
mysql> FLUSH PRIVILEGES;
Query OK, 0 rows affected (0.00 sec)
5) Applied Read only lock on slave
mysql> FLUSH TABLES WITH READ LOCK;
Query OK, 0 rows affected (0.00 sec)
5)
mysql> SHOW MASTER STATUS;
+——————+———-+————–+——————+
| File | Position | Binlog_Do_DB | Binlog_Ignore_DB |
+——————+———-+————–+——————+
| mysql-bin.000001 | 106 | otrs | |
+——————+———-+————–+——————+
1 row in set (0.00 sec)
6) Note down the file (mysql-bin.000001) and position number (106)
7) Backup Master server database
# mysqldump –all-databases –user=root –password –master-data > masterdatabase.sql
8) After taking the backup Again login to MySQL as root user and unlock the tables
mysql> UNLOCK TABLES;
Query OK, 0 rows affected (0.01 sec)
mysql> quit
Bye
9) Copy the masterdatabase.sql file to your Slave server using SCP
scp masterdatabase.sql root@192.168.0.220:/root
Configure MySQL Slave
1) Need to edit “/etc/my.cnf”
[mysqld]
server-id = 2
master-host=192.168.0.200
master-connect-retry=60
master-user=sk
master-password=centos
replicate-do-db=otrs
relay-log = /var/lib/mysql/mysql-relay-bin
relay-log-index = /var/lib/mysql/mysql-relay-bin.index
log-error = /var/lib/mysql/mysql.err
master-info-file = /var/lib/mysql/mysql-master.info
relay-log-info-file = /var/lib/mysql/mysql-relay-log.info
log-bin = mysql-bin
max_allowed_packet=20M
query_cache_size=32M
innodb_buffer_pool_size = 256M
innodb_log_file_size = 512M
datadir=/var/lib/mysql
socket=/var/lib/mysql/mysql.sock
2) Import the master database:
mysql -u root -p < /root/masterdatabase.sql
3) # service mysqld restart
4) Log in to the MySQL & run the below commands
mysql> SLAVE STOP;
Query OK, 0 rows affected (0.01 sec)
mysql> CHANGE MASTER TO MASTER_HOST=’192.168.2.220′, MASTER_– USER=’centos’, MASTER_PASSWORD=’centos’, MASTER_LOG_FILE=’mysql-bin.000001′, MASTER_LOG_POS=20249;
Query OK, 0 rows affected (0.03 sec)
mysql> SLAVE START;
Query OK, 0 rows affected (0.01 sec)
mysql> SHOW SLAVE STATUS\G
*************************** 1. row ***************************
Slave_IO_State: Waiting for master to send event
Master_Host: 192.168.0.220
Master_User: centos
Master_Port: 3306
Connect_Retry: 60
Master_Log_File: mysql-bin.000001
Read_Master_Log_Pos: 20249
Relay_Log_File: mysql-relay-bin.000002
Relay_Log_Pos: 4941
Relay_Master_Log_File: mysql-bin.000001
Slave_IO_Running: Yes
Slave_SQL_Running: Yes
Replicate_Do_DB:
Replicate_Ignore_DB:
Replicate_Do_Table:
Replicate_Ignore_Table:
Replicate_Wild_Do_Table:
Replicate_Wild_Ignore_Table:
Last_Errno: 0
Last_Error:
Skip_Counter: 0
Exec_Master_Log_Pos: 20249
Relay_Log_Space: 5096
Until_Condition: None
Until_Log_File:
Until_Log_Pos: 0
Master_SSL_Allowed: No
Master_SSL_CA_File:
Master_SSL_CA_Path:
Master_SSL_Cert:
Master_SSL_Cipher:
Master_SSL_Key:
Seconds_Behind_Master: 0
Master_SSL_Verify_Server_Cert: No
Last_IO_Errno: 0
Last_IO_Error:
Last_SQL_Errno: 0
Last_SQL_Error:
1 row in set (0.00 sec)
mysql>
If your application & DB server are the same then installed the application on slave server before adding in to it Mysql Slave.
& rsync your application folders with slave server in scenario you will get Mysql replication as well as application server
[root@OtrsMaster ~]# crontab -l
*/10 * * * * /usr/bin/rsync -avr –progress –delete //var/article/* root@192.168.0.220:/opt/var/article/
Fail-over Master to slave
1)flush log if server was master after booting you have to run below command
mysql> flush logs;
Query OK, 0 rows affected (0.01 sec)
2)
mysql> SLAVE STOP;
Query OK, 0 rows affected (0.01 sec)
mysql> RESET MASTER;
Query OK, 0 rows affected (0.01 sec)
3)
mysql>CHANGE MASTER TO MASTER_HOST=’192.168.0.220′;
Query OK, 0 rows affected (0.01 sec)
mysql> SHOW MASTER STATUS;
+——————+———-+————–+——————+
| File | Position | Binlog_Do_DB | Binlog_Ignore_DB |
+——————+———-+————–+——————+
| mysql-bin.000001 | 20425 | | |
+——————+———-+————–+——————+
1 row in set (0.00 sec)
mysql>exit
After doing all these settings restart the applications services
[root@OtrsMaster ~]# /etc/init.d/httpd restart
Stopping httpd: [ OK ]
Starting httpd: [ OK ]
To make failed server (after rebuilding) again MySQL slave please follow “Configure MySQL Slave” section.
–Sachin.
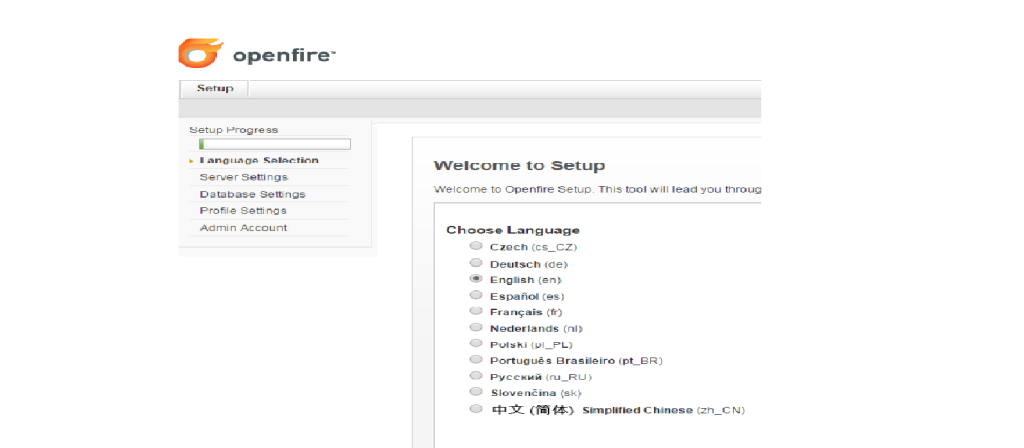
openfire installation on Centos 6.6
Hello Everyone,
Today we are installing openfire server on centos
what is openfire is opensource IM server means it’s best alternative for MS lync, you can also enable voice chat in openfire for that you have to install require plug inns.
& again best things for openfire is it’s FREE….
So here we start openfire installation
Login to the server as root This installs the dependencies:
yum -y install wget java glibc.i686
download RPM from
wget http://download.igniterealtime.org/openfire/openfire-3.8.1-1.i386.rpm
Run & installed the RPM
Yum –y install openfire-3.8.1-1.i386.rpm
Now start the openfire service
service openfire start
chkconfig openfire on
now stop the iptable for time being
service iptables stop
Install mysql server
yum -y install mysql-server
now start the mysql service
service mysqld start
chkconfig mysqld on
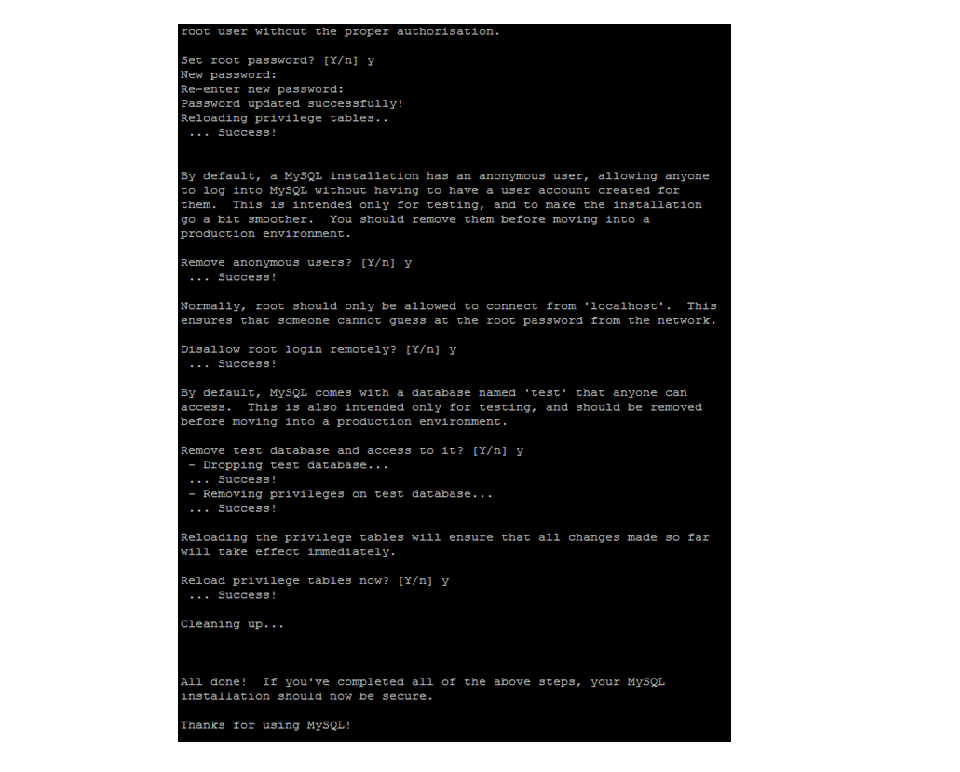
mysql secure installation
mysql_secure_installation
NOTE: RUNNING ALL PARTS OF THIS SCRIPT IS RECOMMENDED FOR ALL MySQL
SERVERS IN PRODUCTION — USE! PLEASE READ EACH STEP CAREFULLY!
In order to log into MySQL to secure it, we’ll need the current
password for the root user. If you’ve just installed MySQL, and
you haven’t set the root password yet, the password will be blank,
so you should just press enter here.
Enter current password for root (enter for none):
OK, successfully used password, moving on…
Setting the root password ensures that nobody can log into the MySQL
root user without the proper authorisation.
Set root password? [Y/n] y
New password:
Re-enter new password:
Password updated successfully!
Reloading privilege tables..
… Success! ………………………………………………………………………………………………………………………………………..
……………………………………………………………………………………………………………………………………………………………..
…………………………………………………………………………………………………………………………………………………………………………….
Now Restart mysql server
service mysqld restart
Now log in to the mysql with root username & password , create a database named “openfire”
mysql -u root –p
create a database openfire
mysql> — CREATE DATABASE openfire;
mysql> CREATE — USER ‘fire’@’localhost’ IDENTIFIED BY ‘root123’;
Query OK, 0 rows affected (0.00 sec)
mysql> GRANT SELECT,INSERT,UPDATE,DELETE,CREATE,DROP
-> ON openfire.*
-> TO ‘fire’@’localhost’;
Query OK, 0 rows affected (0.00 sec)
mysql> FLUSH PRIVILEGES;
Query OK, 0 rows affected (0.00 sec)
mysql>exit
Service iptables stop
Or
You can add below ports in iptables
-A INPUT -m state –state NEW -m tcp -p tcp –dport 9090 -j ACCEPT
-A INPUT -m state –state NEW -m tcp -p tcp –dport 5222 -j ACCEPT
-A INPUT -m state –state NEW -m tcp -p tcp –dport 5223 -j ACCEPT
-A INPUT -m state –state NEW -m tcp -p tcp –dport 9091 -j ACCEPT
-A INPUT -m state –state NEW -m tcp -p tcp –dport 7777 -j ACCEPT
-A INPUT -m state –state NEW -m tcp -p tcp –dport 7070 -j ACCEPT
-A INPUT -m state –state NEW -m tcp -p tcp –dport 7443 -j ACCEPT
-A INPUT -m state –state NEW -m tcp -p tcp –dport 5229 -j ACCEPT
-A INPUT -j REJECT –reject-with icmp-host-prohibited
[root@openfire ~]# service iptables restart
iptables: Setting chains to policy ACCEPT: filter [ OK ]
iptables: Flushing firewall rules: [ OK ]
iptables: Unloading modules: [ OK ]
iptables: Applying firewall rules: [ OK ]
http://hostname:9090/login.jsp
log in to the server as
admin
default password “admin”
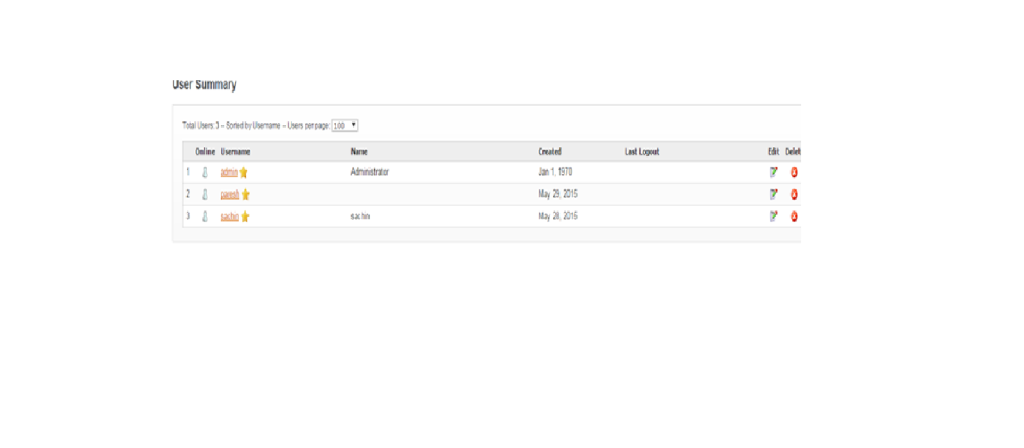
I have created user named “Sachin” & “paresh”
Install Spark messenger on your desktop
Downlod link for spark IM
http://www.igniterealtime.org/downloads/
It’s
Done
–Sachin
Installing Bacula (Enterprise Backup System) With Webmin
Hello Everyone,
Today we are installing the “Bacula”, Bacula is the Enterprise Backup solution & more IMP it’s free.
“Bacula is an open source, enterprise level computer backup system for heterogeneous networks. It is designed to automate backup tasks that had often required intervention from a systems administrator or computer operator.
Bacula supports Linux, UNIX, Windows, and Mac OS X backup clients, and a range of professional backup devices including tape libraries. Administrators and operators can configure the system via a command line console, GUI or web interface; its back-end is a catalog of information stored by MySQL, PostgreSQL, or SQLite.”
–Source WIKI
Currently i am taking backup of more than 1.5TB data on my auto-loader
Let’s start Bacula installation
Installing bacula & mysql all together
yum install bacula-director-mysql bacula-console bacula-client bacula-storage-mysql mysql-server mysql-devel –y
[root@Bacula ~]# yum install bacula-director-mysql bacula-console bacula-client bacula-storage-mysql mysql-server mysql-devel -y
Loaded plugins: fastestmirror
Setting up Install Process
base | 3.7 kB 00:00
base/primary_db | 4.6 MB 00:29
extras | 3.4 kB 00:00
extras/primary_db | 30 kB 00:00
updates | 3.4 kB 00:00
updates/primary_db | 2.8 MB 00:13
Resolving Dependencies
–> Running transaction check
—> Package bacula-client.x86_64 0:5.0.0-12.el6 will be installed
–> Processing Dependency: bacula-common = 5.0.0-12.el6 for package: bacula-client-5.0.0-12.el6.x86_64
—> Package bacula-console.x86_64 0:5.0.0-12.el6 will be installed
—> Package bacula-director-mysql.x86_64 0:5.0.0-12.el6 will be installed
–> Processing Dependency: bacula-director-common = 5.0.0-12.el6 for package: bacula-director-mysql-5.0.0-12.el6.x 86_64
—> Package bacula-storage-mysql.x86_64 0:5.0.0-12.el6 will be installed
–> Processing Dependency: bacula-storage-common = 5.0.0-12.el6 for package: bacula-storage-mysql-5.0.0-12.el6.x86 _64
—> Package mysql-devel.x86_64 0:5.1.73-3.el6_5 will be installed
–> Processing Dependency: mysql = 5.1.73-3.el6_5 for package: mysql-devel-5.1.73-3.el6_5.x86_64
–> Processing Dependency: openssl-devel for package: mysql-devel-5.1.73-3.el6_5.x86_64
—> Package mysql-server.x86_64 0:5.1.73-3.el6_5 will be installed
–> Processing Dependency: perl-DBI for package: mysql-server-5.1.73-3.el6_5.x86_64
–> Processing Dependency: perl-DBD-MySQL for package: mysql-server-5.1.73-3.el6_5.x86_64
–> Processing Dependency: perl(vars) for package: mysql-server-5.1.73-3.el6_5.x86_64
–> Processing Dependency: perl(strict) for package: mysql-server-5.1.73-3.el6_5.x86_64
–> Processing Dependency: perl(Sys::Hostname) for package: mysql-server-5.1.73-3.el6_5.x86_64
–> Processing Dependency: perl(POSIX) for package: mysql-server-5.1.73-3.el6_5.x86_64
–> Processing Dependency: perl(Getopt::Long) for package: mysql-server-5.1.73-3.el6_5.x86_64
–> Processing Dependency: perl(File::Temp) for package: mysql-server-5.1.73-3.el6_5.x86_64
–> Processing Dependency: perl(File::Path) for package: mysql-server-5.1.73-3.el6_5.x86_64
–> Processing Dependency: perl(File::Copy) for package: mysql-server-5.1.73-3.el6_5.x86_64
–> Processing Dependency: perl(File::Basename) for package: mysql-server-5.1.73-3.el6_5.x86_64
–> Processing Dependency: perl(Data::Dumper) for package: mysql-server-5.1.73-3.el6_5.x86_64
–> Processing Dependency: perl(DBI) for package: mysql-server-5.1.73-3.el6_5.x86_64
–> Processing Dependency: /usr/bin/perl for package: mysql-server-5.1.73-3.el6_5.x86_64
–> Running transaction check
—> Package bacula-common.x86_64 0:5.0.0-12.el6 will be installed
—> Package bacula-director-common.x86_64 0:5.0.0-12.el6 will be installed
–> Processing Dependency: perl(Logwatch) for package: bacula-director-common-5.0.0-12.el6.x86_64
–> Processing Dependency: logwatch for package: bacula-director-common-5.0.0-12.el6.x86_64
—> Package bacula-storage-common.x86_64 0:5.0.0-12.el6 will be installed
—> Package mysql.x86_64 0:5.1.73-3.el6_5 will be installed
—> Package openssl-devel.x86_64 0:1.0.1e-30.el6.8 will be installed
–> Processing Dependency: openssl = 1.0.1e-30.el6.8 for package: openssl-devel-1.0.1e-30.el6.8.x86_64
–> Processing Dependency: zlib-devel for package: openssl-devel-1.0.1e-30.el6.8.x86_64
–> Processing Dependency: krb5-devel for package: openssl-devel-1.0.1e-30.el6.8.x86_64
—> Package perl.x86_64 4:5.10.1-136.el6_6.1 will be installed
–> Processing Dependency: perl-libs = 4:5.10.1-136.el6_6.1 for package: 4:perl-5.10.1-136.el6_6.1.x86_64
–> Processing Dependency: perl-libs for package: 4:perl-5.10.1-136.el6_6.1.x86_64
–> Processing Dependency: perl(version) for package: 4:perl-5.10.1-136.el6_6.1.x86_64
–> Processing Dependency: perl(Pod::Simple) for package: 4:perl-5.10.1-136.el6_6.1.x86_64
–> Processing Dependency: perl(Module::Pluggable) for package: 4:perl-5.10.1-136.el6_6.1.x86_64
–> Processing Dependency: libperl.so()(64bit) for package: 4:perl-5.10.1-136.el6_6.1.x86_64
—> Package perl-DBD-MySQL.x86_64 0:4.013-3.el6 will be installed
—> Package perl-DBI.x86_64 0:1.609-4.el6 will be installed
–> Running transaction check
—> Package krb5-devel.x86_64 0:1.10.3-37.el6_6 will be installed
–> Processing Dependency: krb5-libs = 1.10.3-37.el6_6 for package: krb5-devel-1.10.3-37.el6_6.x86_64
–> Processing Dependency: libselinux-devel for package: krb5-devel-1.10.3-37.el6_6.x86_64
–> Processing Dependency: libcom_err-devel for package: krb5-devel-1.10.3-37.el6_6.x86_64
–> Processing Dependency: keyutils-libs-devel for package: krb5-devel-1.10.3-37.el6_6.x86_64
—> Package logwatch.noarch 0:7.3.6-52.el6 will be installed
–> Processing Dependency: perl(Date::Manip) for package: logwatch-7.3.6-52.el6.noarch
–> Processing Dependency: mailx for package: logwatch-7.3.6-52.el6.noarch
—> Package openssl.x86_64 0:1.0.1e-30.el6 will be updated
—> Package openssl.x86_64 0:1.0.1e-30.el6.8 will be an update
—> Package perl-Module-Pluggable.x86_64 1:3.90-136.el6_6.1 will be installed
—> Package perl-Pod-Simple.x86_64 1:3.13-136.el6_6.1 will be installed
–> Processing Dependency: perl(Pod::Escapes) >= 1.04 for package: 1:perl-Pod-Simple-3.13-136.el6_6.1.x86_64
—> Package perl-libs.x86_64 4:5.10.1-136.el6_6.1 will be installed
—> Package perl-version.x86_64 3:0.77-136.el6_6.1 will be installed
—> Package zlib-devel.x86_64 0:1.2.3-29.el6 will be installed
–> Running transaction check
—> Package keyutils-libs-devel.x86_64 0:1.4-5.el6 will be installed
—> Package krb5-libs.x86_64 0:1.10.3-33.el6 will be updated
—> Package krb5-libs.x86_64 0:1.10.3-37.el6_6 will be an update
—> Package libcom_err-devel.x86_64 0:1.41.12-21.el6 will be installed
—> Package libselinux-devel.x86_64 0:2.0.94-5.8.el6 will be installed
–> Processing Dependency: libsepol-devel >= 2.0.32-1 for package: libselinux-devel-2.0.94-5.8.el6.x86_64
–> Processing Dependency: pkgconfig(libsepol) for package: libselinux-devel-2.0.94-5.8.el6.x86_64
—> Package mailx.x86_64 0:12.4-8.el6_6 will be installed
—> Package perl-Date-Manip.noarch 0:6.24-1.el6 will be installed
–> Processing Dependency: perl(YAML::Syck) for package: perl-Date-Manip-6.24-1.el6.noarch
—> Package perl-Pod-Escapes.x86_64 1:1.04-136.el6_6.1 will be installed
–> Running transaction check
—> Package libsepol-devel.x86_64 0:2.0.41-4.el6 will be installed
—> Package perl-YAML-Syck.x86_64 0:1.07-4.el6 will be installed
–> Finished Dependency Resolution
Dependencies Resolved
==================================================================================================================
Package Arch Version Repository Size
==================================================================================================================
Installing:
bacula-client x86_64 5.0.0-12.el6 base 176 k
bacula-console x86_64 5.0.0-12.el6 base 110 k
bacula-director-mysql x86_64 5.0.0-12.el6 base 416 k
bacula-storage-mysql x86_64 5.0.0-12.el6 base 356 k
mysql-devel x86_64 5.1.73-3.el6_5 base 129 k
mysql-server x86_64 5.1.73-3.el6_5 base 8.6 M
Installing for dependencies:
bacula-common x86_64 5.0.0-12.el6 base 360 k
bacula-director-common x86_64 5.0.0-12.el6 base 136 k
bacula-storage-common x86_64 5.0.0-12.el6 base 496 k
keyutils-libs-devel x86_64 1.4-5.el6 base 29 k
krb5-devel x86_64 1.10.3-37.el6_6 updates 499 k
libcom_err-devel x86_64 1.41.12-21.el6 base 32 k
libselinux-devel x86_64 2.0.94-5.8.el6 base 137 k
libsepol-devel x86_64 2.0.41-4.el6 base 64 k
logwatch noarch 7.3.6-52.el6 base 302 k
mailx x86_64 12.4-8.el6_6 updates 235 k
mysql x86_64 5.1.73-3.el6_5 base 894 k
openssl-devel x86_64 1.0.1e-30.el6.8 updates 1.2 M
perl x86_64 4:5.10.1-136.el6_6.1 updates 10 M
perl-DBD-MySQL x86_64 4.013-3.el6 base 134 k
perl-DBI x86_64 1.609-4.el6 base 705 k
perl-Date-Manip noarch 6.24-1.el6 base 1.4 M
perl-Module-Pluggable x86_64 1:3.90-136.el6_6.1 updates 40 k
perl-Pod-Escapes x86_64 1:1.04-136.el6_6.1 updates 32 k
perl-Pod-Simple x86_64 1:3.13-136.el6_6.1 updates 212 k
perl-YAML-Syck x86_64 1.07-4.el6 base 75 k
perl-libs x86_64 4:5.10.1-136.el6_6.1 updates 578 k
perl-version x86_64 3:0.77-136.el6_6.1 updates 51 k
zlib-devel x86_64 1.2.3-29.el6 base 44 k
Updating for dependencies:
krb5-libs x86_64 1.10.3-37.el6_6 updates 766 k
openssl x86_64 1.0.1e-30.el6.8 updates 1.5 M
Transaction Summary
==================================================================================================================
Install 29 Package(s)
Upgrade 2 Package(s)
Total download size: 30 M
Downloading Packages:
(1/31): bacula-client-5.0.0-12.el6.x86_64.rpm | 176 kB 00:01
(2/31): bacula-common-5.0.0-12.el6.x86_64.rpm | 360 kB 00:03
(3/31): bacula-console-5.0.0-12.el6.x86_64.rpm | 110 kB 00:00
(4/31): bacula-director-common-5.0.0-12.el6.x86_64.rpm | 136 kB 00:00
(5/31): bacula-director-mysql-5.0.0-12.el6.x86_64.rpm | 416 kB 00:03
(6/31): bacula-storage-common-5.0.0-12.el6.x86_64.rpm | 496 kB 00:02
(7/31): bacula-storage-mysql-5.0.0-12.el6.x86_64.rpm | 356 kB 00:02
(8/31): keyutils-libs-devel-1.4-5.el6.x86_64.rpm | 29 kB 00:00
(9/31): krb5-devel-1.10.3-37.el6_6.x86_64.rpm | 499 kB 00:02
(10/31): krb5-libs-1.10.3-37.el6_6.x86_64.rpm | 766 kB 00:04
(11/31): libcom_err-devel-1.41.12-21.el6.x86_64.rpm | 32 kB 00:00
(12/31): libselinux-devel-2.0.94-5.8.el6.x86_64.rpm | 137 kB 00:00
(13/31): libsepol-devel-2.0.41-4.el6.x86_64.rpm | 64 kB 00:00
(14/31): logwatch-7.3.6-52.el6.noarch.rpm | 302 kB 00:01
(15/31): mailx-12.4-8.el6_6.x86_64.rpm | 235 kB 00:01
(16/31): mysql-5.1.73-3.el6_5.x86_64.rpm | 894 kB 00:04
(17/31): mysql-devel-5.1.73-3.el6_5.x86_64.rpm | 129 kB 00:00
(18/31): mysql-server-5.1.73-3.el6_5.x86_64.rpm | 8.6 MB 00:50
(19/31): openssl-1.0.1e-30.el6.8.x86_64.rpm | 1.5 MB 00:01
(20/31): openssl-devel-1.0.1e-30.el6.8.x86_64.rpm | 1.2 MB 00:02
(21/31): perl-5.10.1-136.el6_6.1.x86_64.rpm | 10 MB 00:19
(22/31): perl-DBD-MySQL-4.013-3.el6.x86_64.rpm | 134 kB 00:00
(23/31): perl-DBI-1.609-4.el6.x86_64.rpm | 705 kB 00:01
(24/31): perl-Date-Manip-6.24-1.el6.noarch.rpm | 1.4 MB 00:02
(25/31): perl-Module-Pluggable-3.90-136.el6_6.1.x86_64.rpm | 40 kB 00:00
(26/31): perl-Pod-Escapes-1.04-136.el6_6.1.x86_64.rpm | 32 kB 00:00
(27/31): perl-Pod-Simple-3.13-136.el6_6.1.x86_64.rpm | 212 kB 00:01
(28/31): perl-YAML-Syck-1.07-4.el6.x86_64.rpm | 75 kB 00:00
(29/31): perl-libs-5.10.1-136.el6_6.1.x86_64.rpm | 578 kB 00:02
(30/31): perl-version-0.77-136.el6_6.1.x86_64.rpm | 51 kB 00:00
(31/31): zlib-devel-1.2.3-29.el6.x86_64.rpm | 44 kB 00:00
——————————————————————————————————————
Total 245 kB/s | 30 MB 02:03
warning: rpmts_HdrFromFdno: Header V3 RSA/SHA1 Signature, key ID c105b9de: NOKEY
Retrieving key from file:///etc/pki/rpm-gpg/RPM-GPG-KEY-CentOS-6
Importing GPG key 0xC105B9DE:
Userid : CentOS-6 Key (CentOS 6 Official Signing Key) <centos-6-key@centos.org>
Package: centos-release-6-6.el6.centos.12.2.x86_64 (@anaconda-CentOS-201410241409.x86_64/6.6)
From : /etc/pki/rpm-gpg/RPM-GPG-KEY-CentOS-6
Running rpm_check_debug
Running Transaction Test
Transaction Test Succeeded
Running Transaction
Updating : krb5-libs-1.10.3-37.el6_6.x86_64 1/33
Updating : openssl-1.0.1e-30.el6.8.x86_64 2/33
Installing : bacula-common-5.0.0-12.el6.x86_64 3/33
Installing : bacula-storage-mysql-5.0.0-12.el6.x86_64 4/33
Installing : bacula-storage-common-5.0.0-12.el6.x86_64 5/33
Installing : mailx-12.4-8.el6_6.x86_64 6/33
Installing : 1:perl-Pod-Escapes-1.04-136.el6_6.1.x86_64 7/33
Installing : 3:perl-version-0.77-136.el6_6.1.x86_64 8/33
Installing : 4:perl-libs-5.10.1-136.el6_6.1.x86_64 9/33
Installing : 1:perl-Module-Pluggable-3.90-136.el6_6.1.x86_64 10/33
Installing : 1:perl-Pod-Simple-3.13-136.el6_6.1.x86_64 11/33
Installing : 4:perl-5.10.1-136.el6_6.1.x86_64 12/33
Installing : mysql-5.1.73-3.el6_5.x86_64 13/33
Installing : perl-DBI-1.609-4.el6.x86_64 14/33
Installing : perl-DBD-MySQL-4.013-3.el6.x86_64 15/33
Installing : perl-YAML-Syck-1.07-4.el6.x86_64 16/33
Installing : perl-Date-Manip-6.24-1.el6.noarch 17/33
Installing : logwatch-7.3.6-52.el6.noarch 18/33
Installing : bacula-director-mysql-5.0.0-12.el6.x86_64 19/33
Installing : bacula-director-common-5.0.0-12.el6.x86_64 20/33
Installing : libsepol-devel-2.0.41-4.el6.x86_64 21/33
Installing : libselinux-devel-2.0.94-5.8.el6.x86_64 22/33
Installing : libcom_err-devel-1.41.12-21.el6.x86_64 23/33
Installing : keyutils-libs-devel-1.4-5.el6.x86_64 24/33
Installing : krb5-devel-1.10.3-37.el6_6.x86_64 25/33
Installing : zlib-devel-1.2.3-29.el6.x86_64 26/33
Installing : openssl-devel-1.0.1e-30.el6.8.x86_64 27/33
Installing : mysql-devel-5.1.73-3.el6_5.x86_64 28/33
Installing : mysql-server-5.1.73-3.el6_5.x86_64 29/33
Installing : bacula-client-5.0.0-12.el6.x86_64 30/33
Installing : bacula-console-5.0.0-12.el6.x86_64 31/33
Cleanup : openssl-1.0.1e-30.el6.x86_64 32/33
Cleanup : krb5-libs-1.10.3-33.el6.x86_64 33/33
Verifying : perl-Date-Manip-6.24-1.el6.noarch 1/33
Verifying : bacula-client-5.0.0-12.el6.x86_64 2/33
Verifying : mysql-5.1.73-3.el6_5.x86_64 3/33
Verifying : openssl-devel-1.0.1e-30.el6.8.x86_64 4/33
Verifying : perl-DBI-1.609-4.el6.x86_64 5/33
Verifying : 1:perl-Pod-Escapes-1.04-136.el6_6.1.x86_64 6/33
Verifying : mysql-devel-5.1.73-3.el6_5.x86_64 7/33
Verifying : 3:perl-version-0.77-136.el6_6.1.x86_64 8/33
Verifying : bacula-console-5.0.0-12.el6.x86_64 9/33
Verifying : mysql-server-5.1.73-3.el6_5.x86_64 10/33
Verifying : bacula-director-mysql-5.0.0-12.el6.x86_64 11/33
Verifying : perl-DBD-MySQL-4.013-3.el6.x86_64 12/33
Verifying : bacula-common-5.0.0-12.el6.x86_64 13/33
Verifying : 4:perl-libs-5.10.1-136.el6_6.1.x86_64 14/33
Verifying : zlib-devel-1.2.3-29.el6.x86_64 15/33
Verifying : 1:perl-Module-Pluggable-3.90-136.el6_6.1.x86_64 16/33
Verifying : bacula-storage-mysql-5.0.0-12.el6.x86_64 17/33
Verifying : krb5-devel-1.10.3-37.el6_6.x86_64 18/33
Verifying : openssl-1.0.1e-30.el6.8.x86_64 19/33
Verifying : krb5-libs-1.10.3-37.el6_6.x86_64 20/33
Verifying : keyutils-libs-devel-1.4-5.el6.x86_64 21/33
Verifying : 4:perl-5.10.1-136.el6_6.1.x86_64 22/33
Verifying : libcom_err-devel-1.41.12-21.el6.x86_64 23/33
Verifying : mailx-12.4-8.el6_6.x86_64 24/33
Verifying : bacula-director-common-5.0.0-12.el6.x86_64 25/33
Verifying : libsepol-devel-2.0.41-4.el6.x86_64 26/33
Verifying : bacula-storage-common-5.0.0-12.el6.x86_64 27/33
Verifying : 1:perl-Pod-Simple-3.13-136.el6_6.1.x86_64 28/33
Verifying : logwatch-7.3.6-52.el6.noarch 29/33
Verifying : libselinux-devel-2.0.94-5.8.el6.x86_64 30/33
Verifying : perl-YAML-Syck-1.07-4.el6.x86_64 31/33
Verifying : openssl-1.0.1e-30.el6.x86_64 32/33
Verifying : krb5-libs-1.10.3-33.el6.x86_64 33/33
Installed:
bacula-client.x86_64 0:5.0.0-12.el6 bacula-console.x86_64 0:5.0.0-12.el6
bacula-director-mysql.x86_64 0:5.0.0-12.el6 bacula-storage-mysql.x86_64 0:5.0.0-12.el6
mysql-devel.x86_64 0:5.1.73-3.el6_5 mysql-server.x86_64 0:5.1.73-3.el6_5
Dependency Installed:
bacula-common.x86_64 0:5.0.0-12.el6 bacula-director-common.x86_64 0:5.0.0-12.el6
bacula-storage-common.x86_64 0:5.0.0-12.el6 keyutils-libs-devel.x86_64 0:1.4-5.el6
krb5-devel.x86_64 0:1.10.3-37.el6_6 libcom_err-devel.x86_64 0:1.41.12-21.el6
libselinux-devel.x86_64 0:2.0.94-5.8.el6 libsepol-devel.x86_64 0:2.0.41-4.el6
logwatch.noarch 0:7.3.6-52.el6 mailx.x86_64 0:12.4-8.el6_6
mysql.x86_64 0:5.1.73-3.el6_5 openssl-devel.x86_64 0:1.0.1e-30.el6.8
perl.x86_64 4:5.10.1-136.el6_6.1 perl-DBD-MySQL.x86_64 0:4.013-3.el6
perl-DBI.x86_64 0:1.609-4.el6 perl-Date-Manip.noarch 0:6.24-1.el6
perl-Module-Pluggable.x86_64 1:3.90-136.el6_6.1 perl-Pod-Escapes.x86_64 1:1.04-136.el6_6.1
perl-Pod-Simple.x86_64 1:3.13-136.el6_6.1 perl-YAML-Syck.x86_64 0:1.07-4.el6
perl-libs.x86_64 4:5.10.1-136.el6_6.1 perl-version.x86_64 3:0.77-136.el6_6.1
zlib-devel.x86_64 0:1.2.3-29.el6
Dependency Updated:
krb5-libs.x86_64 0:1.10.3-37.el6_6 openssl.x86_64 0:1.0.1e-30.el6.8
Complete!
Start mysql Service
service mysqld start
chkconfig mysqld on
assign password to mysql ( root123)
mysqladmin -u root password root123
Creating necessary databases for Bacula
/usr/libexec/bacula/grant_mysql_privileges -u root -p
[root@Bacula ~]# /usr/libexec/bacula/grant_mysql_privileges -u root -p
Enter password:
Host User Password Select_priv Insert_priv Update_priv Delete_priv Create_priv Drop_priv Reload_priv Shutdown_priv Process_priv File_priv Grant_priv References_priv Index_priv Alter_priv Show_db_priv Super_priv Create_tmp_table_priv Lock_tables_priv Execute_priv Repl_slave_priv Repl_client_priv Create_view_priv Show_view_priv Create_routine_priv Alter_routine_priv Create_user_priv Event_priv Trigger_priv ssl_type ssl_cipher x509_issuer x509_subjectmax_questions max_updates max_connections max_user_connections
localhost root *FAAFFE644E901CFAFAEC7562415E5FAEC243B8B2 Y Y Y Y Y Y Y Y Y Y Y Y Y Y Y Y YY Y Y Y Y Y Y Y Y Y Y 0 0 0 0
bacula.local root Y Y Y Y Y Y Y Y Y Y Y Y Y Y Y Y Y Y Y Y Y YY Y Y Y Y Y 0 0 0 0
127.0.0.1 root Y Y Y Y Y Y Y Y Y Y Y Y Y Y Y Y Y Y Y Y Y YY Y Y Y Y Y 0 0 0 0
localhost N N N N N N N N N N N N N N N N N N N N N NN N N N N N 0 0 0 0
- local N N N N N N N N N N N N N N N N N N N N N NN N N N N N 0 0 0 0
- localhost bacula N N N N N N N N N N N N N N N N N N N N N NN N N N N N 0 0 0 0
- % bacula N N N N N N N N N N N N N N N N N N N N N N NN N N N N 0 0 0 0
Privileges for user bacula granted on database bacula.
/usr/libexec/bacula/create_mysql_database -u root –p
[root@Bacula ~]# /usr/libexec/bacula/create_mysql_database -u root -p
Enter password:
Creation of bacula database succeeded.
/usr/libexec/bacula/make_mysql_tables -u root –p
[root@Bacula ~]# /usr/libexec/bacula/make_mysql_tables -u root -p
Enter password:
Creation of Bacula MySQL tables succeeded.
/usr/libexec/bacula/grant_bacula_privileges -u root –p
[root@Bacula ~]# /usr/libexec/bacula/grant_bacula_privileges -u root -p
Granting MySQL privileges
Enter password:
Host User Password Select_priv Insert_priv Update_priv Delete_priv Create_priv Drop_priv Reload_priv Shutdown_priv Process_priv File_priv Grant_priv References_priv Index_priv Alter_priv Show_db_priv Super_priv Create_tmp_table_priv Lock_tables_priv Execute_priv Repl_slave_priv Repl_client_priv Create_view_priv Show_view_priv Create_routine_priv Alter_routine_priv Create_user_priv Event_priv Trigger_priv ssl_type ssl_cipher x509_issuer x509_subjectmax_questions max_updates max_connections max_user_connections
localhost root *FAAFFE644E901CFAFAEC7562415E5FAEC243B8B2 Y Y Y Y Y Y Y Y Y Y Y Y Y Y Y Y YY Y Y Y Y Y Y Y Y Y Y 0 0 0 0
bacula.local root Y Y Y Y Y Y Y Y Y Y Y Y Y Y Y Y Y Y Y Y Y YY Y Y Y Y Y 0 0 0 0
127.0.0.1 root Y Y Y Y Y Y Y Y Y Y Y Y Y Y Y Y Y Y Y Y Y YY Y Y Y Y Y 0 0 0 0
localhost N N N N N N N N N N N N N N N N N N N N N NN N N N N N 0 0 0 0
bacula.local N N N N N N N N N N N N N N N N N N N N N NN N N N N N 0 0 0 0
localhost bacula N N N N N N N N N N N N N N N N N N N N N NN N N N N N 0 0 0 0
% bacula N N N N N N N N N N N N N N N N N N N N N N NN N N N N 0 0 0 0
Privileges for user bacula granted on database bacula.
set bacula user password on MySQL.
mysql -u root –p
[root@Bacula ~]# mysql -u root -p
Enter password:
Welcome to the MySQL monitor. Commands end with ; or \g.
Your MySQL connection id is 30
Server version: 5.1.73 Source distribution
Copyright (c) 2000, 2013, Oracle and/or its affiliates. All rights reserved.
Oracle is a registered trademark of Oracle Corporation and/or its
affiliates. Other names may be trademarks of their respective
owners.
Type ‘help;’ or ‘\h’ for help. Type ‘\c’ to clear the current input statement.
Type below command
mysql> UPDATE mysql.user SET password=PASSWORD(“root123”) WHERE user=’bacula’;
Query OK, 2 rows affected (0.00 sec)
Rows matched: 2 Changed: 2 Warnings: 0
mysql> FLUSH PRIVILEGES;
Query OK, 0 rows affected (0.00 sec)
Update all Bacula configuration files with new password and addresses
Edit file /etc/bacula/bacula-dir.conf,
[root@Bacula ~]# vi /etc/bacula/bacula-dir.conf
[…]
Director { # define myself
Name = bacula-dir
DIRport = 9101 # where we listen for UA connections
QueryFile = “/usr/libexec/bacula/query.sql”
WorkingDirectory = “/var/spool/bacula”
PidDirectory = “/var/run”
Maximum Concurrent Jobs = 1
Password = “root123” # Console password
Messages = Daemon
[…]
# Client (File Services) to backup
Client {
Name = bacula-fd
Address = 192.168.0.50
FDPort = 9102
Catalog = MyCatalog
Password = “root123” # password for FileDaemon
File Retention = 30 days # 30 days
Job Retention = 6 months # six months
AutoPrune = yes # Prune expired Jobs/Files
}
# Definition of file storage device
Storage {
Name = File
# Do not use “localhost” here
Address = 192.168.0.50 # N.B. Use a fully qualified name here
SDPort = 9103
Password = “root123”
Device = FileStorage
Media Type = File
}
[…]
# Generic catalog service
Catalog {
Name = MyCatalog
# Uncomment the following line if you want the dbi driver
# dbdriver = “dbi:sqlite3”; dbaddress = 127.0.0.1; dbport =
dbname = “bacula”; dbuser = “bacula”; dbpassword = “root123”
}
[…]
Console {
Name = bacula-mon
Password = “root123”
CommandACL = status, .status
}
Edit file /etc/bacula/bconsole.conf,
[root@Bacula ~]# vi /etc/bacula/bconsole.conf
#
# Bacula User Agent (or Console) Configuration File
#
Director {
Name = bacula-dir
DIRport = 9101
address = localhost
Password = “root123”
}
Update Storage
Edit file /etc/bacula/bacula-sd.conf,
Director {
Name = bacula-dir
Password = “root123”
}
Delete following lines
# Restricted Director, used by tray-monitor to get the
# status of the storage daemon
#
Director {
Name = bacula-mon
Password = “@@MON_SD_PASSWORD@@”
Monitor = yes
}
Add the backup folder
Device {
Name = FileStorage
Media Type = File
Archive Device = /tmp/mybackup
LabelMedia = yes; # lets Bacula label unlabeled media
Random Access = Yes;
AutomaticMount = yes; # when device opened, read it
RemovableMedia = no;
AlwaysOpen = no;
}
Now create mybackup folder in /tmp
[root@Bacula tmp]# mkdir mybackup
[root@Bacula tmp]# chown root.bacula mybackup/
[root@Bacula tmp]# ll
total 4
drwxr-xr-x. 2 root bacula 4096 Apr 22 14:19 mybackup
-rw——-. 1 root root 0 Apr 22 11:55 yum.log
Next restart all bacula daemons and make them to start automatically on every reboot
[root@Bacula tmp]# service bacula-dir start
Starting bacula-dir: [ OK ]
[root@Bacula tmp]# service bacula-fd start
Starting bacula-fd: [ OK ]
[root@Bacula tmp]# service bacula-sd start
Starting bacula-sd: [ OK ]
[root@Bacula tmp]# chkconfig bacula-dir on
[root@Bacula tmp]# chkconfig bacula-fd on
[root@Bacula tmp]# chkconfig bacula-sd on
[root@Bacula tmp]#
Now there is one more thing we have to open bacula’s require ports in iptables
[root@Bacula ~]# vi /etc/sysconfig/iptables
-A INPUT -m state –state NEW -m tcp -p tcp –dport 22 -j ACCEPT
-A INPUT -m state –state NEW -m tcp -p tcp –dport 9101 -j ACCEPT
-A INPUT -m state –state NEW -m tcp -p tcp –dport 9102 -j ACCEPT
-A INPUT -m state –state NEW -m tcp -p tcp –dport 9103 -j ACCEPT
-A INPUT -m state –state NEW -m tcp -p tcp –dport 10000 -j ACCEPT
We have opened the 10000 port because we are going to install “webmin” to mamage bacula using GUI
Bacula has been successfully installed
Now we are rebooting the server & checking it’s working fine or not
Type “bconsole “ if you will get ”*” then your configuration is correct
[root@Bacula ~]# bconsole
Connecting to Director 192.168.0.50:9101
1000 OK: bacula-dir Version: 5.0.0 (26 January 2010)
Enter a period to cancel a command.
*
Type exit to console
Now installing webmin to manage bacula
# wget http://sourceforge.net/projects/webadmin/files/webmin/1.660/webmin-1.660-1.noarch.rpm
# rpm -Uvh webmin-1.660-1.noarch.rpm
# service webmin start
# chkconfig webmin on
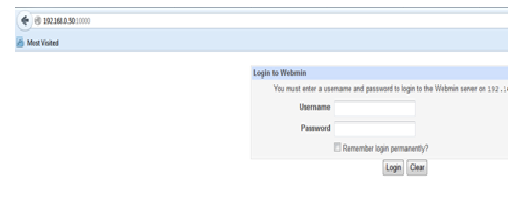
Access webmin “//http://server-ip-address:10000″ or “http://domain-name:10000/”.
Click on system –> Bacula backup system–> module configuration–>Next
Select database type “MYSQL” & enter your password
Now here your Bacula web-console
It’s Done….
–Sachin.
“Webmin” installation on Linux syste
Hello Everyone,
Today we are installing “webmin”
Being as a windows administrator working on Linux system it’s quite difficult to understand black screen. so you can do most of your work using webmin, it’s PHP based GUI application so can configure your linux system, can take system backup, manage your postfix server & do more.
“What is webmin”
Webmin is a web-based system configuration tool for Unix-like systems, although recent versions can also be installed and run on Windows.[4] With it, it is possible to configure operating system internals, such as users, disk quotas, services or configuration files, as well as modify and control open source apps, such as the Apache HTTP Server, PHP or MySQL.[5][6]
Webmin is largely based on Perl, running as its own process and web server. It defaults to TCP port 10000 for communicating, and can be configured to use SSL if OpenSSL is installed with additional required Perl Modules.
It is built around modules, which have an interface to the configuration files and the Webmin server. This makes it easy to add new functionality. Due to Webmin’s modular design, it is possible for anyone who is interested to write plugins for desktop configuration.
Webmin also allows for controlling many machines through a single interface, or seamless login on other webmin hosts on the same subnet or LAN.
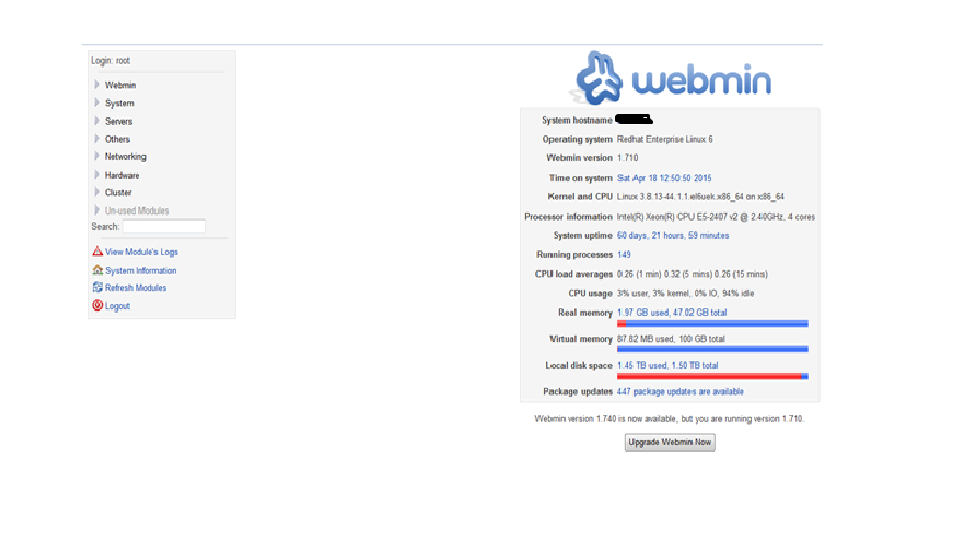
Webmin interface
Let’s start webmin installation
I already install one centos 6.4 OS
First command should be
Yum install update
For debian & ubuntu
Apt-get install update
Webmin RPM available on http://www.webmin.com
Or you can download it using wget command
You have to install wget
Yum install wget
cd /opt
wget http://www.webmin.com/jcameron-key.asc
[root@mail opt]# wget http://www.webmin.com/jcameron-key.asc
–2015-04-18 13:11:06– http://www.webmin.com/jcameron-key.asc
Resolving www.webmin.com… 216.34.181.97
Connecting to www.webmin.com|216.34.181.97|:80… connected.
HTTP request sent, awaiting response… 200 OK
Length: 1320 (1.3K) [text/plain]
Saving to: “jcameron-key.asc”
100%[======================================>] 1,320 –.-K/s in 0s
2015-04-18 13:11:11 (177 MB/s) – “jcameron-key.asc” saved [1320/1320]
wget http://www.webmin.com/download/rpm/webmin-current.rpm
[root@mail opt]# wget http://www.webmin.com/download/rpm/webmin-current.rpm
–2015-04-18 13:13:24– http://www.webmin.com/download/rpm/webmin-current.rpm
Resolving www.webmin.com… 216.34.181.97
Connecting to www.webmin.com|216.34.181.97|:80… connected.
HTTP request sent, awaiting response… 302 Found
Location: http://prdownloads.sourceforge.net/webadmin/webmin-1.740-1.noarch.rpm [following]
–2015-04-18 13:13:30– http://prdownloads.sourceforge.net/webadmin/webmin-1.740-1.noarch.rpm
Resolving prdownloads.sourceforge.net… 216.34.181.59
Connecting to prdownloads.sourceforge.net|216.34.181.59|:80… connected.
HTTP request sent, awaiting response… 301 Moved Permanently
Location: http://downloads.sourceforge.net/project/webadmin/webmin/1.740/webmin-1.740-1.noarch.rpm [following ]
–2015-04-18 13:13:36– http://downloads.sourceforge.net/project/webadmin/webmin/1.740/webmin-1.740-1.noarch .rpm
Resolving downloads.sourceforge.net… 216.34.181.59
Connecting to downloads.sourceforge.net|216.34.181.59|:80… connected.
HTTP request sent, awaiting response… 302 Found
Location: http://softlayer-sng.dl.sourceforge.net/project/webadmin/webmin/1.740/webmin-1.740-1.noarch.rpm [fo llowing]
–2015-04-18 13:13:41– http://softlayer-sng.dl.sourceforge.net/project/webadmin/webmin/1.740/webmin-1.740-1 .noarch.rpm
Resolving softlayer-sng.dl.sourceforge.net… 216.12.198.152
Connecting to softlayer-sng.dl.sourceforge.net|216.12.198.152|:80… connected.
HTTP request sent, awaiting response… 200 OK
Length: 25030571 (24M) [application/octet-stream]
Saving to: “webmin-current.rpm”
100%[===========================================================================================================================================================>] 25,030,571 23.0K/s in 9m 41s
2015-04-18 13:23:28 (42.1 KB/s) – “webmin-current.rpm” saved [25030571/2503057
Import PGP key
rpm –import jcameron-key.asc
[root@mail opt]# rpm –import jcameron-key.asc
now install webmin
yum install webmin-current.rpm
[root@mail opt]# yum install webmin-current.rpm
Loaded plugins: fastestmirror
Setting up Install Process
Examining webmin-current.rpm: webmin-1.740-1.noarch
Marking webmin-current.rpm to be installed
Loading mirror speeds from cached hostfile
* base: centosmirror.go4hosting.in
* extras: centosmirror.go4hosting.in
* updates: centosmirror.go4hosting.in
ox-backend | 1.3 kB 00:00
ox-frontend | 1.3 kB 00:00
ox-usm | 1.3 kB 00:00
Resolving Dependencies
–> Running transaction check
—> Package webmin.noarch 0:1.740-1 will be installed
–> Processing Dependency: /usr/bin/perl for package: webmin-1.740-1.noarch
–> Processing Dependency: /usr/bin/perl for package: webmin-1.740-1.noarch
–> Running transaction check
—> Package perl.x86_64 4:5.10.1-136.el6_6.1 will be installed
–> Processing Dependency: perl-libs = 4:5.10.1-136.el6_6.1 for package: 4:perl-5.10.1-136.el6_6.1.x86_64
–> Processing Dependency: perl-libs for package: 4:perl-5.10.1-136.el6_6.1.x86_64
–> Processing Dependency: perl(version) for package: 4:perl-5.10.1-136.el6_6.1.x86_64
–> Processing Dependency: perl(Pod::Simple) for package: 4:perl-5.10.1-136.el6_6.1.x86_64
–> Processing Dependency: perl(Module::Pluggable) for package: 4:perl-5.10.1-136.el6_6.1.x86_64
–> Processing Dependency: libperl.so()(64bit) for package: 4:perl-5.10.1-136.el6_6.1.x86_64
–> Running transaction check
—> Package perl-Module-Pluggable.x86_64 1:3.90-136.el6_6.1 will be installed
—> Package perl-Pod-Simple.x86_64 1:3.13-136.el6_6.1 will be installed
–> Processing Dependency: perl(Pod::Escapes) >= 1.04 for package: 1:perl-Pod-Simple-3.13-136.el6_6.1.x86_64
—> Package perl-libs.x86_64 4:5.10.1-136.el6_6.1 will be installed
—> Package perl-version.x86_64 3:0.77-136.el6_6.1 will be installed
–> Running transaction check
—> Package perl-Pod-Escapes.x86_64 1:1.04-136.el6_6.1 will be installed
–> Finished Dependency Resolution
Dependencies Resolved
=====================================================================================================================================================================================================
Package Arch Version Repository Size
=====================================================================================================================================================================================================
Installing:
webmin noarch 1.740-1 /webmin-current 64 M
Installing for dependencies:
perl x86_64 4:5.10.1-136.el6_6.1 updates 10 M
perl-Module-Pluggable x86_64 1:3.90-136.el6_6.1 updates 40 k
perl-Pod-Escapes x86_64 1:1.04-136.el6_6.1 updates 32 k
perl-Pod-Simple x86_64 1:3.13-136.el6_6.1 updates 212 k
perl-libs x86_64 4:5.10.1-136.el6_6.1 updates 578 k
perl-version x86_64 3:0.77-136.el6_6.1 updates 51 k
Transaction Summary
=====================================================================================================================================================================================================
Install 7 Package(s)
Total size: 76 M
Total download size: 11 M
Installed size: 100 M
Is this ok [y/N]: y
Downloading Packages:
http://centosmirror.go4hosting.in/centos/6.6/updates/x86_64/Packages/perl-5.10.1-136.el6_6.1.x86_64.rpm: [Errno 12] Timeout on http://centosmirror.go4hosting.in/centos/6.6/updates/x86_64/Packages/perl-5.10.1-136.el6_6.1.x86_64.rpm: (28, ‘Operation too slow. Less than 1 bytes/sec transfered the last 30 seconds’)
Trying other mirror.
(1/6): perl-5.10.1-136.el6_6.1.x86_64.rpm | 10 MB 00:03
(2/6): perl-Module-Pluggable-3.90-136.el6_6.1.x86_64.rpm | 40 kB 00:00
(3/6): perl-Pod-Escapes-1.04-136.el6_6.1.x86_64.rpm | 32 kB 00:00
(4/6): perl-Pod-Simple-3.13-136.el6_6.1.x86_64.rpm | 212 kB 00:00
(5/6): perl-libs-5.10.1-136.el6_6.1.x86_64.rpm | 578 kB 00:01
(6/6): perl-version-0.77-136.el6_6.1.x86_64.rpm | 51 kB 00:00
—————————————————————————————————————————————————————————————————–
Total 16 kB/s | 11 MB 11:46
Running rpm_check_debug
Running Transaction Test
Transaction Test Succeeded
Running Transaction
Installing : 1:perl-Pod-Escapes-1.04-136.el6_6.1.x86_64 1/7
Installing : 1:perl-Module-Pluggable-3.90-136.el6_6.1.x86_64 2/7
Installing : 4:perl-libs-5.10.1-136.el6_6.1.x86_64 3/7
Installing : 1:perl-Pod-Simple-3.13-136.el6_6.1.x86_64 4/7
Installing : 3:perl-version-0.77-136.el6_6.1.x86_64 5/7
Installing : 4:perl-5.10.1-136.el6_6.1.x86_64 6/7
Installing : webmin-1.740-1.noarch 7/7
Operating system is CentOS Linux
Webmin install complete. You can now login to http://mail.local:10000/
as root with your root password.
Verifying : 3:perl-version-0.77-136.el6_6.1.x86_64 1/7
Verifying : 1:perl-Pod-Simple-3.13-136.el6_6.1.x86_64 2/7
Verifying : 1:perl-Module-Pluggable-3.90-136.el6_6.1.x86_64 3/7
Verifying : 4:perl-5.10.1-136.el6_6.1.x86_64 4/7
Verifying : 4:perl-libs-5.10.1-136.el6_6.1.x86_64 5/7
Verifying : webmin-1.740-1.noarch 6/7
Verifying : 1:perl-Pod-Escapes-1.04-136.el6_6.1.x86_64 7/7
Installed:
webmin.noarch 0:1.740-1
Dependency Installed:
perl.x86_64 4:5.10.1-136.el6_6.1 perl-Module-Pluggable.x86_64 1:3.90-136.el6_6.1 perl-Pod-Escapes.x86_64 1:1.04-136.el6_6.1 perl-Pod-Simple.x86_64 1:3.13-136.el6_6.1
perl-libs.x86_64 4:5.10.1-136.el6_6.1 perl-version.x86_64 3:0.77-136.el6_6.1
Complete!
[root@mail opt]#
Webmin default port is 10000, we need to open this port in IPTABLE
[root@mail opt]# vi /etc/sysconfig/iptables
# Firewall configuration written by system-config-firewall
# Manual customization of this file is not recommended.
*filter
:INPUT ACCEPT [0:0]
:FORWARD ACCEPT [0:0]
:OUTPUT ACCEPT [0:0]
-A INPUT -m state –state ESTABLISHED,RELATED -j ACCEPT
-A INPUT -p icmp -j ACCEPT
-A INPUT -i lo -j ACCEPT
-A INPUT -m state –state NEW -m tcp -p tcp –dport 22 -j ACCEPT
-A INPUT -m state –state NEW -m tcp -p tcp –dport 10000 -j ACCEPT
-A INPUT -j REJECT –reject-with icmp-host-prohibited
-A FORWARD -j REJECT –reject-with icmp-host-prohibited
COMMIT
Save & exit
Restart the iptable service
[root@mail opt]# /etc/init.d/iptables restart
iptables: Setting chains to policy ACCEPT: filter [ OK ]
iptables: Flushing firewall rules: [ OK ]
iptables: Unloading modules: [ OK ]
iptables: Applying firewall rules: [ OK ]
Restart the webmin service
[root@mail opt]# /etc/init.d/webmin restart
Stopping Webmin server in /usr/libexec/webmin
Starting Webmin server in /usr/libexec/webmin
Pre-loaded WebminCore
Now you can access it using
http://ip:10000 or http://FQDN:10000
You can see the modules below even you can add more modules using same console
It’s Done
–Sachin
Installation of OTRS 2.4.7 & up gradation to OTRS 4
Hello Everyone,
Today we are doing installation & up gradation of OTRS 2.4.7 to OTRS 4
so lets get started
What is the OTRS
OTRS, an initialism for Open-source Ticket Request System, is a free and open-source trouble ticket system software package that a company, organization, or other entity can use to assign tickets to incoming queries and track further communications about them
Lets install OTRS 2.4.7
My environment : centos 6.6 with 1GB RAM ( not really require)
After installing Centos you have to update the OS first
command
yum update
install wget
yum install wget
Adding EPEL Repository to RHEL / CentOS / Scientific Linux 6.x
wget http://epel.mirror.net.in/epel/6/i386/epel-release-6-8.noarch.rpm
rpm -Uvh epel-release-6-8.noarch.rpm
yum install yum-priorities –y
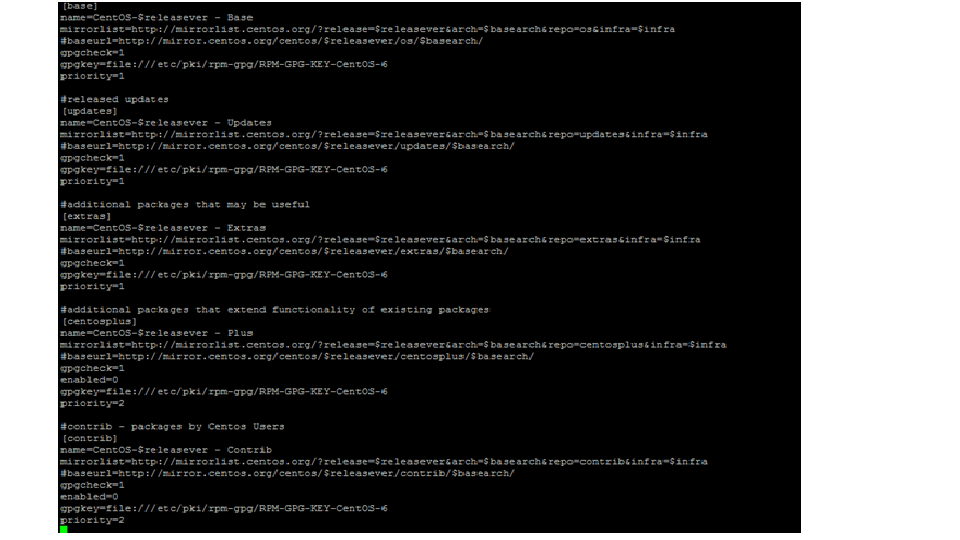
now you have to edit centos base repo
vi /etc/yum.repos.d/CentOS-Base.repo
Change the priority for [base], [updates], [extras]: priority=1.
cd /tmp
wget http://mirror.de.leaseweb.net/epel/6/x86_64/epel-release-6-8.noarch.rpm
rpm –import https://fedoraproject.org/static/0608B895.txt
rpm -i epel-release-6-8.noarch.rpm
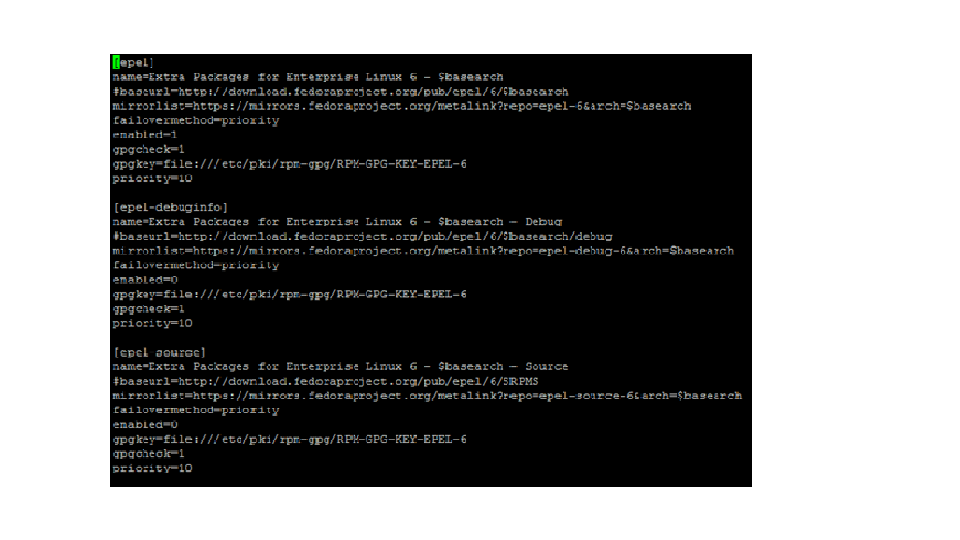
now edit epel repo
vi /etc/yum.repos.d/epel.repo to priority=10
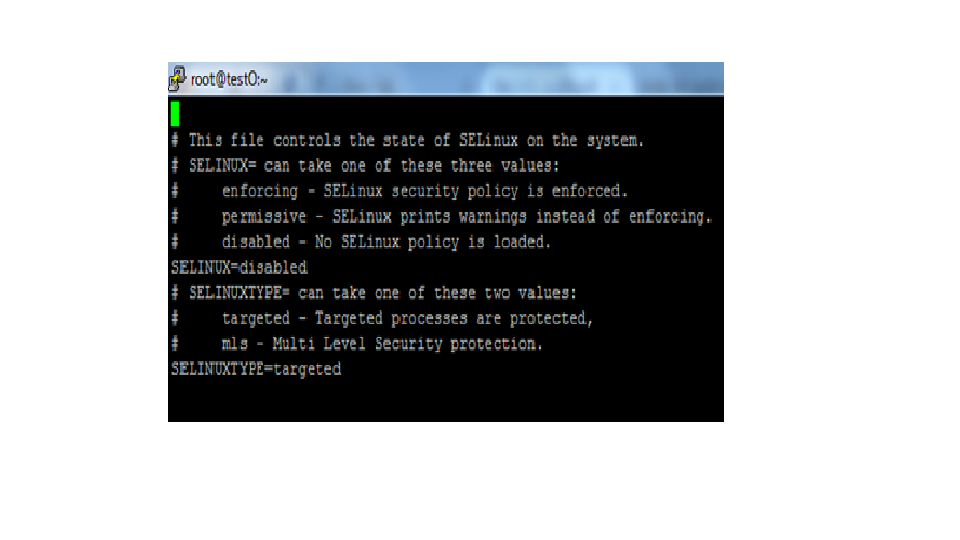
Deactivate SELINUX
Vi /etc/sysconfig/selinux
SELINUX=disabled
Reboot
Init 6
Installing Apache webserver
yum install httpd –y
service httpd start
chkconfig httpd on
installing MySQL DB
yum install mysql-server –y
Set Mysql caching
vi /etc/my.cnf
add below lines
max_allowed_packet=500M
MySQL 4.x has query caching available.
Enable it for vast improvement and it may be all you need to tweak.
query_cache_type=1
query_cache_limit=1M
query_cache_size=32M
service mysqld start
chkconfig mysqld on
Configuring mysql
mysql_secure_installation
Install prerequisites for OTRS 2.4.7
yum install perl perl-Bit-Vector perl-CPAN perl-Carp-Clan perl-DBD-MySQL perl-DBI perl-Date-Calc perl-Digest-HMAC perl-Digest-SHA perl-Digest-SHA1 perl-ExtUtils-MakeMaker perl-ExtUtils-ParseXS perl-GD perl-GDGraph perl-GDGraph3d perl-GDTextUtil perl-Module-Pluggable perl-Net-DNS perl-Pod-Escapes perl-Pod-Simple perl-Test-Harness perl-devel perl-libs perl-version vim-enhanced zlib-devel libpng-devel libjpeg-devel freetype-devel fontconfig-devel gd gd-devel perl-Bit-Vector perl-Date-Calc perl-Date-Leapyear perl-Date-ICal perl-DBI perl-Digest-HMAC perl-Digest-SHA1 perl-Net-DNS perl-GD perl-GD-Graph3d perl-GDGraph perl-GDTextUtil mod_perl make gcc perl-CGI perl-SOAP-Lite perl-XML-Parser perl-Net-SMTP-SSL perl-DateTime-Format-DateParse perl-DateTime-Format-Mail perl-DateTime libgdata perl-core perl-Crypt-SSLeay perl-LDAP procmail perl-YAML perl-YAML-LibYAML perl-Text-CSV_XS perl-JSON-XS perl-YAML-LibYAML perl-JSON-XS perl-PDF-API2 –y
installing OTRS
wget http://ftp.otrs.org/pub/otrs/RPMS/redhat/8.0/otrs-2.4.7-01.noarch.rpm
yum install otrs-2.4.7-01.noarch.rpm
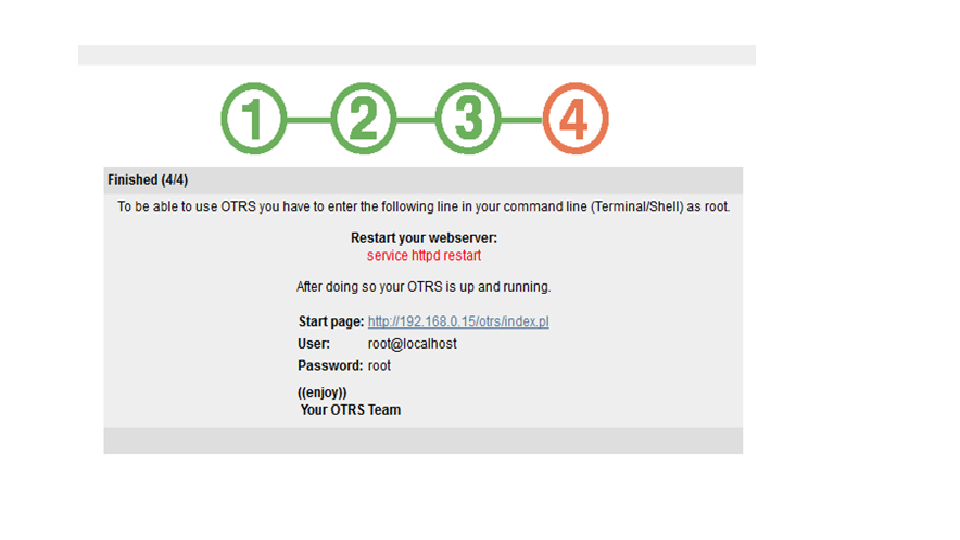
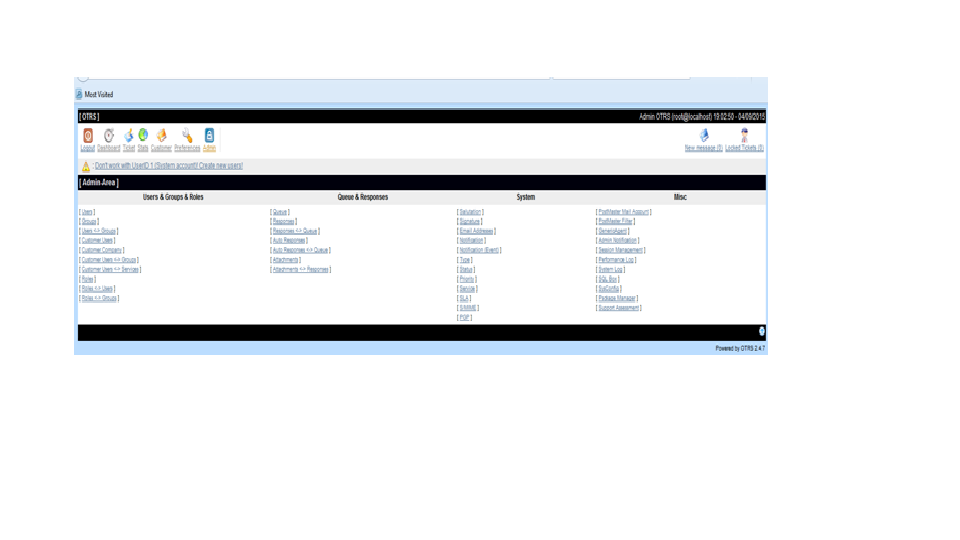
OTRS 2.4.7
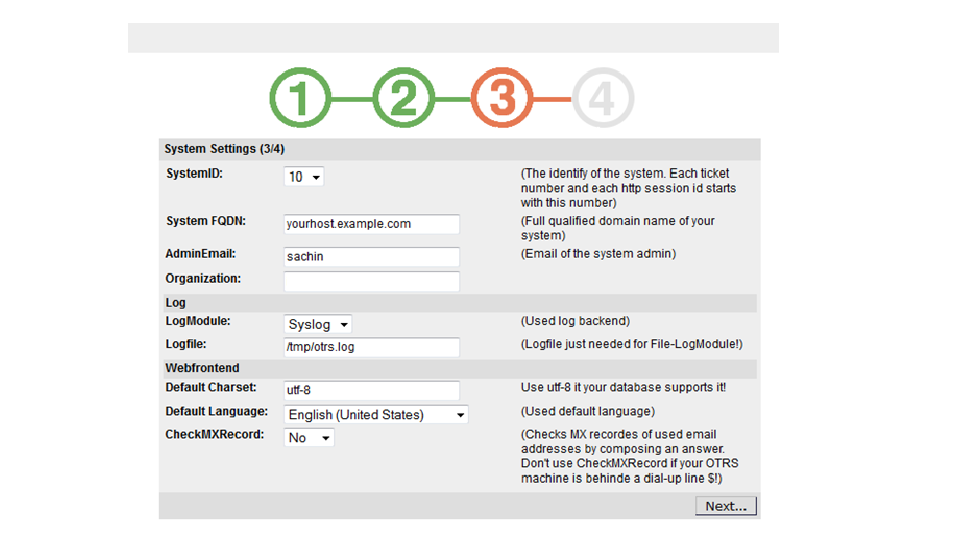
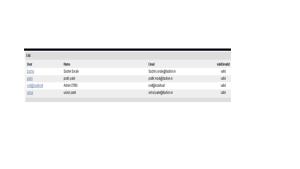
Three new users are created
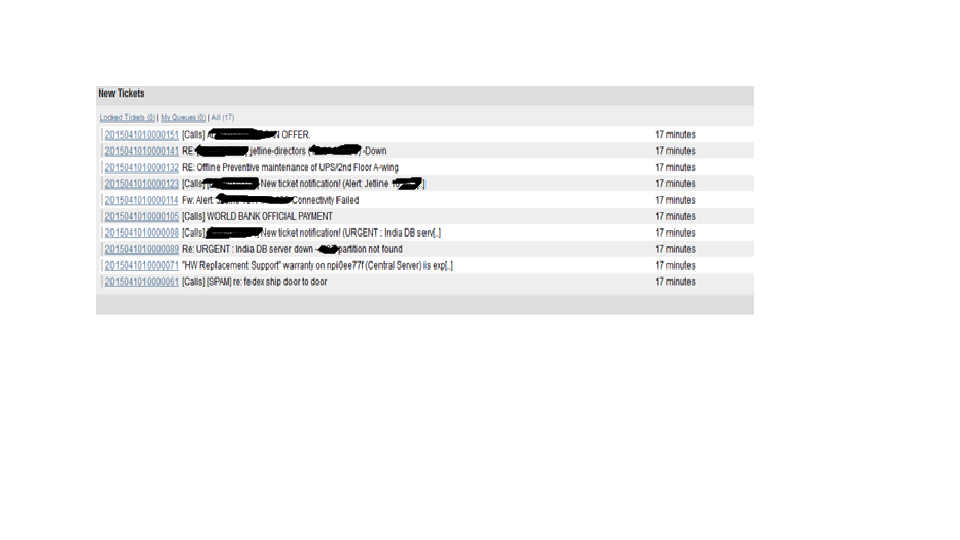
New tickets are generated using Email ID
installation is done now upgradation
Preparation for up gradation
Deactivate E-Mail
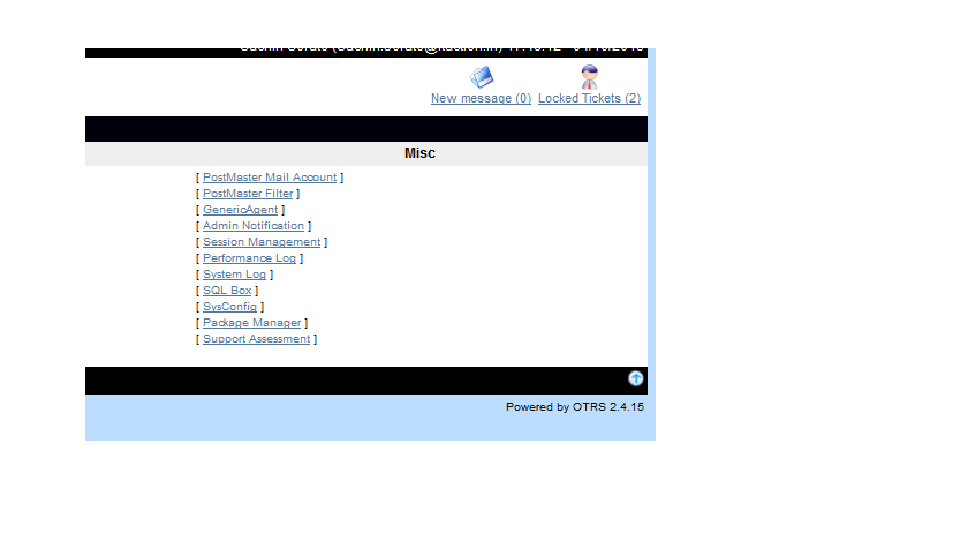
Admin -> SysConfig -> Framework -> Core::Sendmail
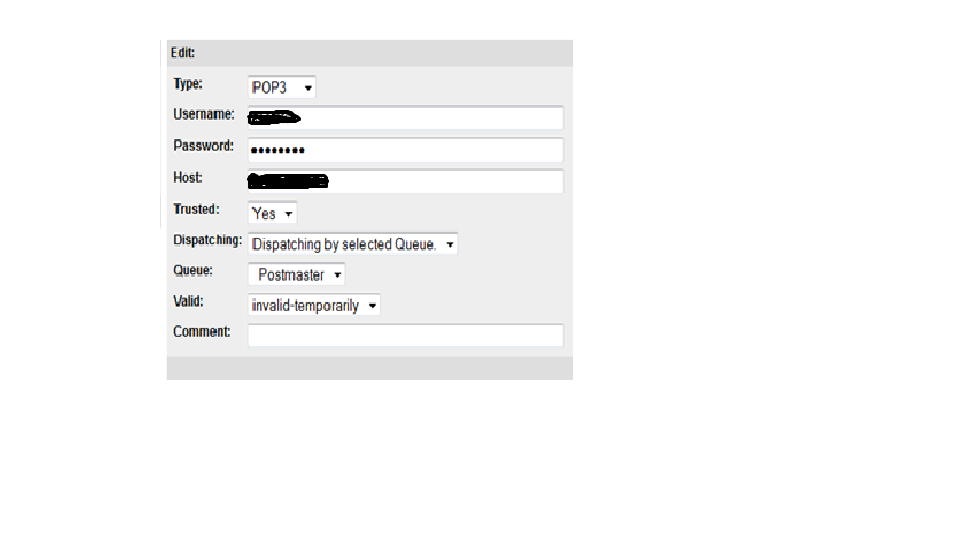
Disable the postmaster email account
Admin -> PostMaster Mail Account
Change to invalid temporary
Log off all users session except your session
Stop the require services
Service otrs stop
Service httpd stop
Service crond stop
Service postfix stop
Taking database backup using backup script
root@testO scripts]# ./backup.pl -d /opt/otrs/ -c gzip -t dbonly
download version 3.1.12
[root@testO ~]# cd /tmp/
[root@testO tmp]# wget http://ftp.otrs.org/pub/otrs/RPMS/redhat/8.0/otrs-2.4.15-01.noarch.rpm
[root@testO tmp]# yum install otrs-2.4.15-01.noarch.rpm
[root@testO scripts]# /opt/otrs/bin/otrs.SetPermissions.pl –otrs-user=otrs –web-user=apache –otrs-group=apache –web-group=apache /opt/otrs
cat /opt/otrs/scripts/DBUpdate-to-2.3.mysql.sql | mysql -p -f -u root otrs
cat /opt/otrs/scripts/DBUpdate-to-2.3-post.mysql.sql | mysql -p -f -u root otrs
[root@testO tmp]# service httpd restart
Stopping httpd: [FAILED]
Starting httpd: [ OK ]
[root@testO tmp]# service crond restart
Starting crond: [ OK ]
[root@testO tmp]# service postfix restart
Shutting down postfix: [FAILED]
Starting postfix: [ OK ]
[root@testO tmp]# service otrs start
hostname: Unknown host
Starting OTRS..
Checking httpd … done.
Checking MySQL … done.
Checking database connect… It looks Ok! done.
Enable /opt/otrs/bin/PostMaster.pl … done.
Checking otrs spool dir… done.
Creating cronjobs (source /opt/otrs/var/cron/*) …
done.
–>> http:///otrs/index.pl <<–
Final start of OTRS.. done
ok we have upgraded OTRS 2.4.7 to 2.4.15 now we are upgrading 2.4.15 to 3.0.1
now here come the tricky part, i have tried to upgrade using slandered procedure but Database not migrated
so here is my procedure upgrade otrs to 3.0.1
Upgrading OTRS from 2.4.15 to 3.0.1
I have download the “otrs-3.0.1.tar.gz” from http://ftp.otrs.org/pub/otrs/
i transfer downloaded file using WINSCP
Take OTRS backup using ./backup.pl script
Take mysql backup using
mysqldump -u root -proot123 –all-databases > /tmp/all-database.sql
mysqldump -u root -proot123 otrs > /tmp/otrs.sql
Transfers downloaded file to OTRS system to
/opt/
Stop the required services
httpd
otrs
postfix
crond
Rename the otrs folder to otrs.old
Rename the otrs-3.0.1 to otrs
Copy the below files in new OTRS folder
Kernel/Config.pm
Kernel/Config/GenericAgent.pm
Kernel/Config/Files/ZZZAuto.pm
var/*
Run the below commands step by step
/opt/otrs/bin/SetPermissions.pl –otrs-user=otrs –web-user=apache –otrs-group=apache –web-group=apache /opt/otrs
Check if any module missing
/opt/otrs/bin/otrs.CheckModules.pl
cat /opt/otrs/scripts/DBUpdate-to-3.0.mysql.sql | mysql -p -f -u root otrs
su -s /bin/bash -c “/opt/otrs/scripts/DBUpdate-to-3.0.pl” otrs
cat /opt/otrs/scripts/DBUpdate-to-3.0-post.mysql.sql | mysql -p -f -u root otrs
su -s /bin/bash -c “/opt/otrs/bin/otrs.RebuildConfig.pl” otrs
Start require services
service httpd start
service crond start
service postfix start
service otrs start
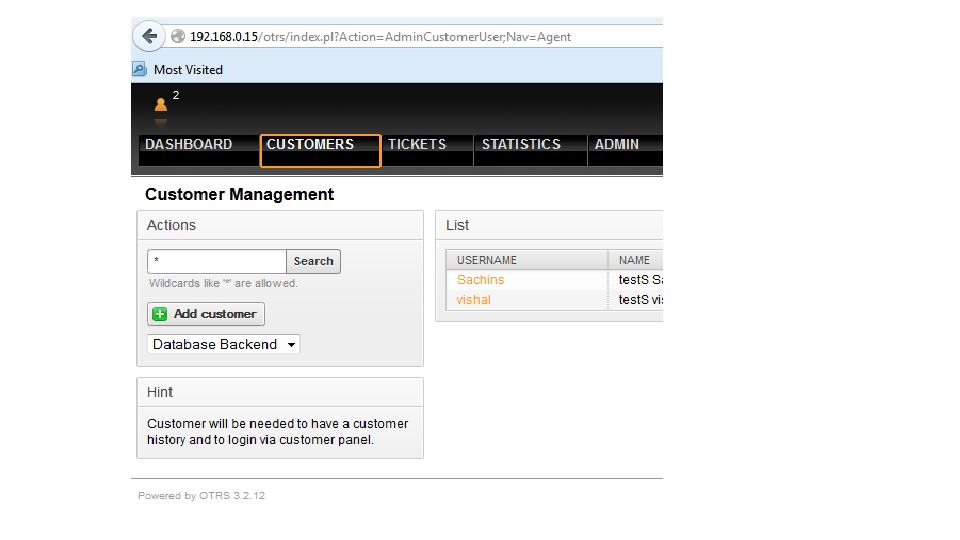
log in to the otrs you can see otrs has been updated to version 3.0.1
u can see users & tickets are there
now we are upgrading 3.1.18 -> 3.2.12
OTRS Upgrade 3.1.18 -> 3.2.12
Take backup before up gradation
Stop require services
service httpd stop
service crond stop
service postfix stop
service otrs stop
wget http://ftp.otrs.org/pub/otrs/RPMS/rhel/6/otrs-3.2.12-01.noarch.rpm
yum install otrs-3.2.12-01.noarch.rpm
/opt/otrs/bin/otrs.SetPermissions.pl –otrs-user=otrs –web-user=apache –otrs-group=apache –web-group=apache /opt/otrs
cat /opt/otrs/scripts/DBUpdate-to-3.2.mysql.sql | mysql -p -f -u root otrs
cat /opt/otrs/scripts/DBUpdate-to-3.2.mysql.sql | mysql -p -f -u root otrs
su -s /bin/bash -c “/opt/otrs/scripts/DBUpdate-to-3.2.pl” otrs
su -s /bin/bash -c “/opt/otrs/bin/otrs.DeleteCache.pl” otrs
Start require services
service httpd start
service crond start
service postfix start
service otrs start
upgraded to 3.1.18 -> 3.2.12
now i am not getting this document tooo long
you have to follow same procedure up-gradation of 3.1.18 to 3.2.12
each time make sure your taking backup
& one more thing there is sequence of up gradation 2.4.7>>2.4.15>>3.0.1>>3.1.18>>3.2.12>>3.3.3>>4.0.
i have successfully completed to 4.0
Best Of Luck
-Sachin..
Owncloud 7 installation & integration with Active directory 2012
Hello Everyone,
I was searching a product which has documentation storage & editing like share-point
I know SharePoint do lot of stuff other than document sharing “Own-cloud” is good alternative for online documents editing as well as dropbox,sugarsync,google drive,
cloud storage for in-house infra.
Features
* it has an agent for windows,mac & linux
* you can store your data on your local drive & then sync with owncloud server
* File Version no a days most IMP things that system admin need
* it has agent for all leading mobiles OS
* Open office give you power to edit online .odt files
* & most IMP it’s FREE
Lets setup the Owncloud
I already installed AD in my Virtual Environment
AD details:
Domain : SVM.test.local
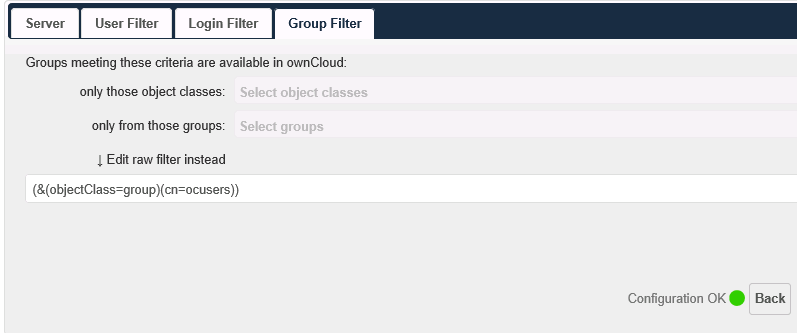
group : ocusers
users : oc1, oc2, oc3
above users added in ocusers group
Create one user with delegate control
i have created “owncloudaduser”
My owncloud server is Ubuntu server
owncloud installation instruction find on ownclud site
http://software.opensuse.org/download/package?project=isv:ownCloud:community&package=owncloud
after installation you can access owncloud
owncloud URL : http://IP/owncloud/
when your log in owncloud ask you to create admin account
Click on Admin option
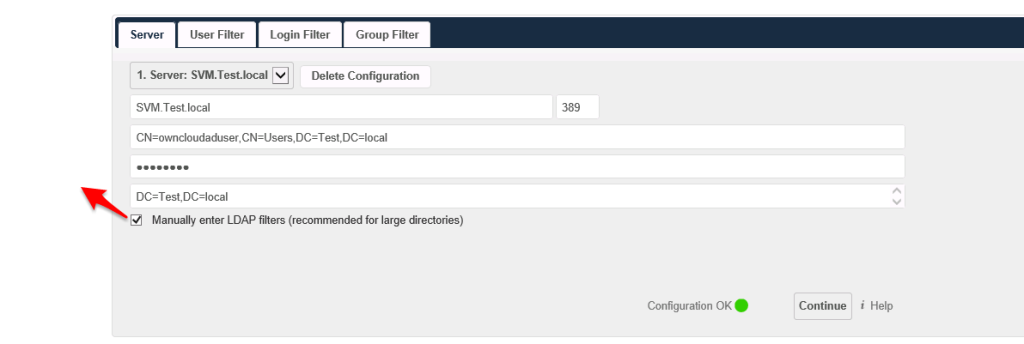
SVM.Test.local
CN=owncloudaduser,CN=Users,DC=Test,DC=local
Password
DC=Test,DC=local
Manually enter LDAP filters (recommended for large directories)
(objectClass=*)
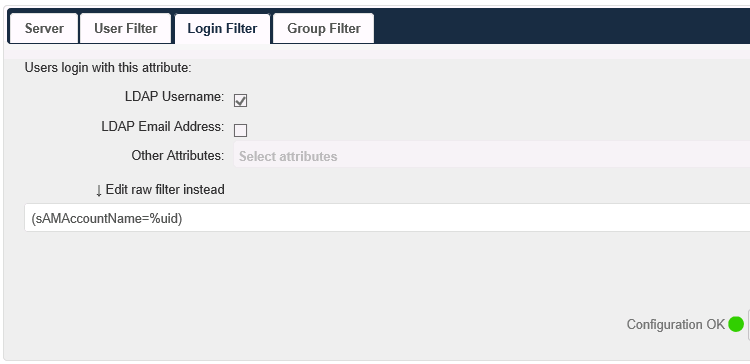
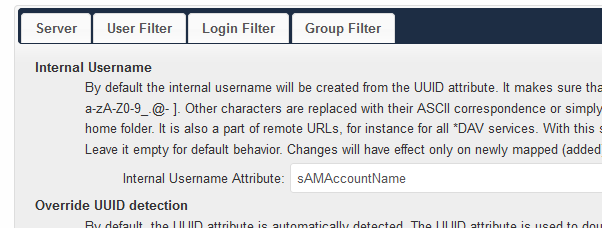
(sAMAccountName=%uid)
on left hand site there two options
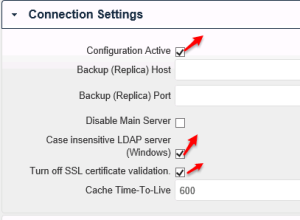
Click on Advance
600
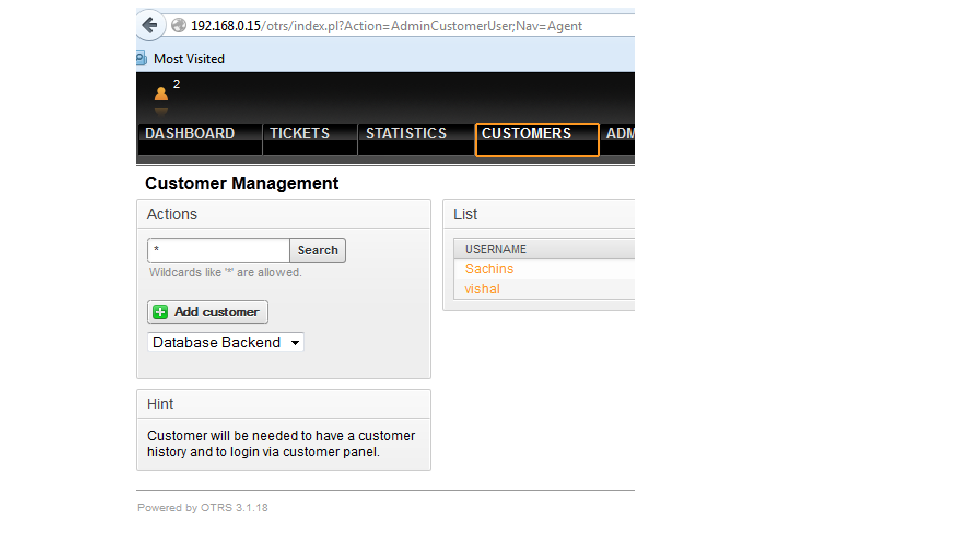
now you can see your all users on user option

