Archive for January, 2015
Azure Powershell Error No current subscription has been designated. Use Select-AzureSubscription – Current to set the current subscription
Hello Everyone, Today i was doing some testing and configuration on my Windows Azure server and got a weird error message as shown below:
Test-AzureStaticVNetIP : No current subscription has been designated. Use Select-AzureSubscription –
Current <subscriptionName> to set the current subscription.
At line:1 char:1
+ Test-AzureStaticVNetIP –VNetName test –IPAddress 11.0.0.1
+ ~~~~~~~~~~~~~~~~~~~~~~~~~~~~~~~~~~~~~~~~~~~~~~~~~~~~~~~~~~~~~~~~~~~
+ CategoryInfo : NotSpecified: (:) [Test-AzureStaticVNetIP], ApplicationException
+ FullyQualifiedErrorId :
System.ApplicationException,Microsoft.WindowsAzure.Commands.ServiceManagement.IaaS.TestA
zureStaticVNetIPCommand
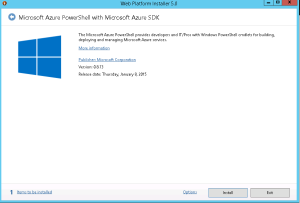
Did some research and found that we need to connect to Azure subscription and then run these command. To do so we need to download and install Azure Powershell. Copy paste below url on your browser and install the Web Platform Installer. This will give you option to download Azure Powershell.
http://go.microsoft.com/fwlink/p/?linkid=320376&clcid=0x409
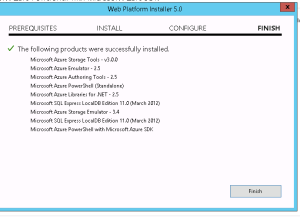
Once the Powershell is downloaded and installed, we will
Now we will download the Azure Setting file to connect to the azure server. In the Azure Powershell, type below command.
Get-AzurePublishSettingsFile
Once you login to your Azure website, you will get a file named “Visual Studio Premium with MSDN-date-credentials.publishsettings”. Save it to a secure location. This file contains secure credentials and additional information about subscriptions that you can use in your development environment.
Now Import the Azure Settings file to Powershell. Run “Import-AzurePublisingSettingsFile” and then type path of the file we just downloaded as shown in below image
To check Subscription details run below command
Get-AzureSubscription
Now the command completed successfully.
Connect to your Azure Subscription using Powershell
Today we will understand we can connect to our Azure Subscription using Powershell and run some basic command on it.
To connect to Azure subscription we need to download and install Azure Powershell. Copy paste below url on your browser and install the Web Platform Installer. This will give you option to download Azure Powershell.
http://go.microsoft.com/fwlink/p/?linkid=320376&clcid=0x409
Once the Powershell is downloaded and installed, we will
Now we will download the Azure Setting file to connect to the azure server. In the Azure Powershell, type below command.
Get-AzurePublishSettingsFile
Once you login to your Azure website, you will get a file named “Visual Studio Premium with MSDN-date-credentials.publishsettings”. Save it to a secure location. This file contains secure credentials and additional information about subscriptions that you can use in your development environment.
Now Import the Azure Settings file to Powershell. Run “Import-AzurePublisingSettingsFile” and then type path of the file we just downloaded as shown in below image
To check Subsctiption details run below command
Get-AzureSubscription
New year gift from Microsoft Learning – Second shot free is back
Microsoft recently announced that Microsoft Learning brought back its most popular Second Shot Offer for MCP exams.
The Second Shot offer will help you retake an exam in case you failed it the first time between January 5th 2015 and May 31st 2015
Again as mentioned in my previous posts that all exams are now taken at Pearson Vue testing centers and scheduled directly from your MCP portal and there is no coded needed. Prometric is now not an option for MCP examination.
Once you register for an MCP exam between January 5, 2015, and May 31, 2015, you will be eligible for a free retake if you don’t pass it. You have 30 days from the date you took the initial exam to schedule a retake. To schedule your retake, sign in, select your exam from the exam list, and click Schedule now for free.
Please do read Frequently Asked Questions(FAQ) below:
https://www.microsoft.com/learning/en-us/second-shot.aspx
Best Of Luck for the examination 🙂


