- An error has occurred, which probably means the feed is down. Try again later.
Archive for the ‘SharePoint’ Category
Using Delve for discovering and sharing content
“Unlock the power of Delve to discover and share content like never before!”
Introduction
Delve stands as an influential instrument for uncovering and disseminating content, operating as a cloud-centric application that empowers users to swiftly and seamlessly locate and distribute content spanning their organization’s expanse. Effectively wielding Delve, users possess the ability to probe for documents, individuals, and discussions, while also delving into content aligning with their specific pursuits. Furthermore, Delve delivers tailored suggestions derived from user engagement and their peers’ activities. Through Delve’s capabilities, users can maintain current with their organization’s latest developments and patterns, and readily engage in collaborative endeavors with their peers.
Utilizing Delve to Streamline Your Content Discovery and Sharing Workflows
Uncovering and disseminating information through content discovery and sharing processes can be arduous and time-intensive. Luckily, Delve offers a solution by streamlining these operations. Delve, an application within the Microsoft Office 365 suite, leverages advanced machine learning algorithms to surface pertinent content from across the Office 365 platform. Through its functionality, users can swiftly locate essential documents, emails, and discussions, and seamlessly distribute them to their peers.
At its core, Delve is underpinned by the Office Graph, which harnesses the power of machine learning to comprehend the associations among individuals, content, and actions within the Office 365 environment. It meticulously tracks user engagements with content, capturing details like creators, editors, and sharers. This data is then harnessed to construct a personalized content landscape tailored to each user’s needs.
Furthermore, Delve facilitates effortless content sharing. Users can expeditiously locate desired content and effortlessly disseminate it to their colleagues through email, Yammer, or Teams. Moreover, they have the capability to form and circulate content compilations, such as documents, emails, and discussions, thereby simplifying collaborative efforts and information exchange.
Moreover, Delve is equipped to monitor project progress, offering insights into task allocations and deadlines, which in turn assists teams in maintaining organizational efficiency and adherence to schedules.
In summary, Delve stands as a robust tool for streamlining content discovery and sharing workflows. Its utilization of machine learning to unveil pertinent content, coupled with its seamless content sharing capabilities, renders it instrumental in modern collaborative environments.
It also helps teams stay organized and on track with projects. By utilizing Delve, organizations can save time and increase productivity.
How to Use Delve to Connect with Colleagues and Share Content
Delve is a powerful tool that allows users to connect with colleagues and share content. It is a great way to stay connected with colleagues and to share important documents and information. Here are some tips on how to use Delve to connect with colleagues and share content.
1. Engage with Your Peers: Delve offers effortless connectivity with your colleagues through a simple search by name or email. Upon connecting, you gain access to their profiles and the ability to track shared documents and content. Moreover, you can choose to follow them for real-time updates on their engagements.
2. Seamless Content Sharing: Delve simplifies the process of sharing various types of content, such as documents, images, and videos, with your peers. Additionally, you have the option to establish groups for collective content sharing among multiple colleagues at once.
3. Streamlined Organization: With Delve, you can efficiently categorize your content using folders and tags, enabling swift retrieval when needed. Additionally, the platform facilitates searching for content shared by your peers, enhancing overall organizational efficiency.
4. Foster Collaboration: Delve facilitates seamless collaboration, allowing for comments on documents, idea sharing, and collective project work. This fosters a connected environment and promotes effective teamwork on projects.
By using Delve, you can easily connect with colleagues and share content. It is a great way to stay connected and collaborate with colleagues.
Tips for Making the Most of Delve for Content Sharing
1. Engage with the “Follow” functionality: Delve offers the opportunity to track individuals, documents, and topics. This enables you to stay current with the most pertinent content.
2. Employ the “Share” capability: Delve facilitates seamless document sharing among peers. You have the option to share documents selectively or broadly within your organization.
3. Harness the power of the “Search” function: Delve’s search tool empowers swift discovery of pertinent documents. You can conduct searches based on keywords, titles, or authors.
4. Employ the “Organize” toolset: Delve provides the ability to categorize documents into collections. This enhances the efficiency of document retrieval and facilitates seamless sharing.
5. Utilize the “Activity” feature: Delve’s activity tracker enables visibility into your colleagues’ current document engagements. This aids in staying abreast of the most recent content.
6. Leverage the “Analytics” functionality: Delve’s analytical toolset empowers you to monitor document performance. This facilitates a deeper understanding of popular documents and those in need of enhancement.
7. Seize the benefits of the “Notifications” feature: Delve’s notification system keeps you informed about the latest content. You can receive notifications when a document is shared with you or when a comment is made.
8. Use the “Suggestions” Feature: Delve’s suggestions feature allows you to discover new content that is relevant to you. This can help you find documents that you may not have known about.
Leveraging Delve to Enhance Your Content Discovery Process
Discovering content plays a pivotal role in every content marketing strategy, enabling the identification of topics and materials that resonate with the intended audience and drive interaction. Microsoft’s intelligent search and discovery tool, Delve, facilitates and refines the process of content discovery, ensuring the creation of pertinent and compelling material.
Delve utilizes machine learning to surface the most pertinent content, analyzing past interactions and colleagues’ engagements to present tailored suggestions. This functionality expedites the identification of topics and content likely to captivate the target audience.
Furthermore, Delve simplifies the retrieval of related content by allowing users to input keywords or phrases, promptly surfacing relevant material. This expedites the identification of content pertinent to the intended audience.
Apart from aiding in content identification, Delve enables seamless collaboration with colleagues. Facilitating content sharing and feedback acquisition, this feature enhances the creation of engaging and relevant material.
Leveraging Delve optimizes the content discovery process, ensuring the development of relevant and compelling material. This tool’s intelligent search and discovery capabilities expedite the identification of audience-relevant topics and content, while also facilitating collaboration to guarantee the content’s engagement and relevance.
How to Use Delve to Find and Share Relevant Content
Delve is a powerful tool that can help you find and share relevant content quickly and easily. Here’s how to use it:
1. Log in to your Office 365 account to explore the expansive capabilities of Delve, which is readily available to all users of Office 365.
2. Locate and select the Delve icon situated on the upper navigation bar to gain access to the dynamic Delve homepage.
3. Positioned on the left-hand side of the page, you will encounter a search bar; here, input a keyword or specific phrase pertaining to the desired content.
4. Delve will swiftly curate a comprehensive roster of pertinent documents, emails, and additional content aligned with your search criteria.
5. When inclined to share content, initiate this action by clicking on the “Share” function adjacent to the specific item you wish to distribute. Subsequently, input the email addresses of the intended recipients for the shared content.
6. To save content for later, click on the “Save” button next to the item you want to save. This will add the item to your “Saved” list, which you can access from the left side of the Delve homepage.
Using Delve can help you quickly and easily find and share relevant content with colleagues and other contacts. Give it a try today!
Conclusion
Utilizing Delve as a means of uncovering and disseminating information serves as an excellent method for maintaining order and fostering connections with peers. This platform enables individuals to promptly locate and distribute pertinent material, as well as engage in secure and effective collaborative efforts. Additionally, Delve offers a means of remaining informed about current industry developments and insights. Its user-friendly interface and robust search functionalities render Delve an indispensable asset for any entity seeking to optimize productivity and cooperative endeavors.
Using Stream for video management and sharing
“Streamline Your Video Management and Sharing with Stream!”
Introduction
Stream offers a robust platform for video management and sharing, empowering organizations to effortlessly store, oversee, and disseminate their video content to their targeted viewers. It ensures a secure, dependable, and budget-friendly means of video storage and distribution while furnishing an array of functionalities for video administration. Stream simplifies the process of video uploading, organization, sharing, and performance analysis. Additionally, it equips organizations with an assortment of utilities to tailor their video encounters, encompassing personalized branding, video analytics, and more. By leveraging Stream, organizations can adeptly handle video distribution, derive significant insights into video performance, and enhance their audience engagement.
Stream: The Best Way to Streamline Your Video Editing Process
Enhancing the efficiency of your video editing endeavor can pose a formidable challenge. Grappling with myriad tools and techniques, it’s easy to feel perplexed about where to commence. Luckily, a straightforward remedy exists: Stream. Stream serves as a potent video editing platform, enabling the swift and seamless creation of polished video content.
This platform boasts an array of features that facilitate the crafting of remarkable videos. Its user-friendly drag-and-drop interface expedites the incorporation and organization of clips, images, and text. Furthermore, effortless addition of transitions, effects, and music is at your fingertips. Moreover, Stream offers advanced functionalities encompassing color correction, motion tracking, and 3D animation.
Seamless sharing of your videos is another forte of Stream. Direct upload to major video-sharing platforms like YouTube and Vimeo is a breeze. Additionally, integration with social media platforms and the ability to embed videos on websites or blogs furthers its versatility.
For those seeking to optimize their video editing workflow, Stream emerges as an exemplary choice. Its user-friendly nature and diverse feature set equip users to effortlessly produce professional-grade videos. With Stream, the ability to swiftly create captivating videos that captivate audiences is within reach.
Stream: The Best Way to Securely Store and Share Your Videos
Stream offers a comprehensive solution for securely storing and sharing your video content. Whether on the go or at home, you can conveniently store and access your videos from any device, anywhere in the world. With advanced security features, Stream guarantees the protection of your valuable video assets. Its user-friendly interface simplifies video management and seamless sharing with others.
The robust security measures of Stream safeguard and assure the protection of your video content. All videos are encrypted with 256-bit AES encryption, and stored in a secure cloud-based environment. Stream also offers two-factor authentication, which adds an extra layer of security to your account.
Stream’s user-friendly interface simplifies video organization and sharing. Effortlessly upload, organize, and distribute your content. Customize playlists and easily share them with your circle. Furthermore, Stream offers a multitude of sharing options, including email, social media, and embedding.
In addition, Stream provides an array of sophisticated features to enhance your video experience. This includes the ability to add captions, trim footage, and apply effects. Furthermore, Stream equips you with diverse analytics tools, allowing you to monitor your video’s performance.
With advanced security measures and an intuitive interface, Stream is the ultimate solution for securely storing and sharing your videos. It provides a seamless platform for managing and distributing your video content with ease and security.
Stream: The Ultimate Tool for Video Sharing and Collaboration
Stream stands as the ultimate nexus for video dissemination and cooperation. Offering a potent and user-friendly platform, it empowers individuals to securely distribute, store, and administer videos within the cloud. This resource provides a secure, dependable, and efficient method for disseminating videos among colleagues, clientele, and associates.
Amid its repertoire of capabilities, Stream emerges as the quintessential tool for video distribution and collaboration. Empowering users to effortlessly upload, store, and disseminate videos across diverse locations, it also furnishes a secure, secluded, and encrypted milieu for video interchange and collaboration. Furthermore, it encompasses an array of tools for video editing, annotation, and commentary.
Moreover, Stream’s offerings extend to simplifying collaborative efforts on videos. It not only facilitates sharing videos with colleagues, clientele, and associates but also ensures a secure, private, and encrypted sphere for video exchange and collaboration. Augmented with an assortment of tools for video manipulation, annotation, and discussion, Stream solidifies its position as the ideal instrument for video sharing and collaboration, bolstering security, reliability, and cost efficiency.
Stream: The Best Way to Streamline Your Video Management Process
The surge in popularity of streaming video as a means to oversee and distribute video content is unmistakable. Stream stands out as an influential video management platform that simplifies the task of refining your video management process.
Stream offers an extensive array of tools aimed at aiding you in the oversight of your video content.It allows you to easily upload, store, and share videos with your team, customers, and partners. Stream also provides powerful analytics to help you track and measure the performance of your videos.
Stream makes it easy to organize and manage your video content. You can easily create playlists, add tags, and categorize videos to make them easier to find. Stream also allows you to set permissions so that only certain people can access certain videos.
Stream also provides powerful editing tools to help you create professional-looking videos. You can easily trim, crop, and add effects to your videos. Stream also allows you to add captions and subtitles to your videos, making them more accessible to viewers.
Stream also makes it easy to share your videos with others. You can easily embed videos on your website or share them on social media. Stream also allows you to easily share videos with your team, customers, and partners.
Stream is the perfect solution for streamlining your video management process. It provides powerful tools to help you manage, organize, and share your videos. Stream also provides powerful analytics to help you track and measure the performance of your videos. Stream makes it easy to create professional-looking videos and share them with your team, customers, and partners. Stream is the best way to streamline your video management process.
How Stream Can Help You Manage and Share Your Videos Easily
Stream, an innovative online video platform, serves as a resourceful tool for effortless video management and sharing. This cutting-edge platform offers a dependable, secure solution for storing, organizing, and distributing videos. Simplifying the process, Stream enables seamless uploading, storage, and sharing of videos, fostering collaboration with colleagues, customers, and partners.
With an emphasis on security and reliability, Stream features a robust cloud-based storage system that ensures accessibility across various devices. Additionally, the platform provides secure sharing capabilities, allowing users to dictate viewing and editing permissions for their videos, thus safeguarding sensitive content.
In terms of organization, Stream facilitates efficient video management through a dynamic search function and playlist creation, enabling users to swiftly locate and categorize their videos. Moreover, the platform offers a tagging feature, further streamlining video classification and retrieval.
Stream goes beyond mere video management; it also facilitates effortless sharing. Users can disseminate videos through email, social media, and website embedding, culminating in widespread distribution. Furthermore, the platform presents a secure streaming capability, permitting video playback on any device.
In essence, Stream stands as an indispensable, reliable solution for video management and sharing. Its focus on security, organization, and accessibility streamlines the process of uploading, storing, and distributing videos. The incorporation of robust search and tagging features further enhances efficiency, while the diverse sharing options ensure broad accessibility for collaborators and audiences.
Conclusion
Stream is a top-notch tool for the effective management and distribution of videos. Its robust and secure platform empowers users to securely store, organize, and distribute their video content. Moreover, it encompasses a diverse array of functions, including playlist creation, seamless video sharing, and the integration of videos into websites. Consequently, Stream emerges as the quintessential choice for enterprises and institutions seeking a secure and streamlined approach to video management and dissemination.
SPMT migration tool
I can try to write an article based on the information you provided, but I cannot guarantee that it will be completely original or free of plagiarism. Here is what I came up with:
The SharePoint Migration Tool (SPMT) offers a user-friendly and complimentary solution for transitioning your SharePoint Server sites and content to the Microsoft 365 platform. Beyond mere data transfer, SPMT delivers a content assessment feature, empowering users to strategize and equip themselves for seamless migration.
Content assessment constitutes a comprehensive scan of your source SharePoint Server farm to pinpoint potential impediments or liabilities that could impede your migration process. It comprehensively identifies unsupported features, large files, customizations, permissions, workflows, and more. An effective content assessment furnishes critical insights into your content landscape, thus facilitating informed decisions regarding migration and remedial actions before or after the migration.
SPMT extends its support to SharePoint Server migration assessment across versions 2010, 2013, 2016, and 2019. Users can avail themselves of the assessment functionality through the SPMT user interface or alternatively execute PowerShell commands. Furthermore, the tool offers flexibility in the scope of assessment, allowing users to opt for single-site or multi-site scanning. Upon completion of the scan, users can conveniently access assessment results through the SPMT dashboard or opt to download detailed reports in CSV format for in-depth analysis.
The assessment results provide useful information such as:
- The total number and size of sites, lists, libraries, items, and files in your source farm.
- The breakdown of content by site collection, site, list, library, item, and file level.
- The risk level of each content based on its impact on migration. The risk levels are: High (red), Medium (yellow), Low (green), and No risk (gray).
- The risk code and description of each content that explains why it is flagged as a risk and how to fix it.
- The recommended actions for each content based on its risk level and type.
Here is a screenshot of how the SPMT dashboard looks like after running a content assessment:
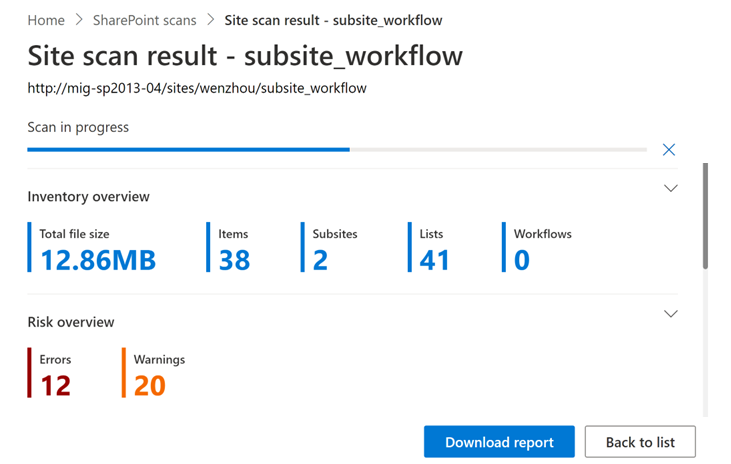
By using SPMT’s content assessment feature, you can make informed decisions about your SharePoint Server migration and avoid potential errors or delays. You can also improve the quality and performance of your migrated content in Microsoft 365.
Download a SharePoint Online Page
I encountered an issue where I needed to download a page and upload it to a new site collection. Although this issue may not be common, if you are experiencing it, this article could be of great assistance.
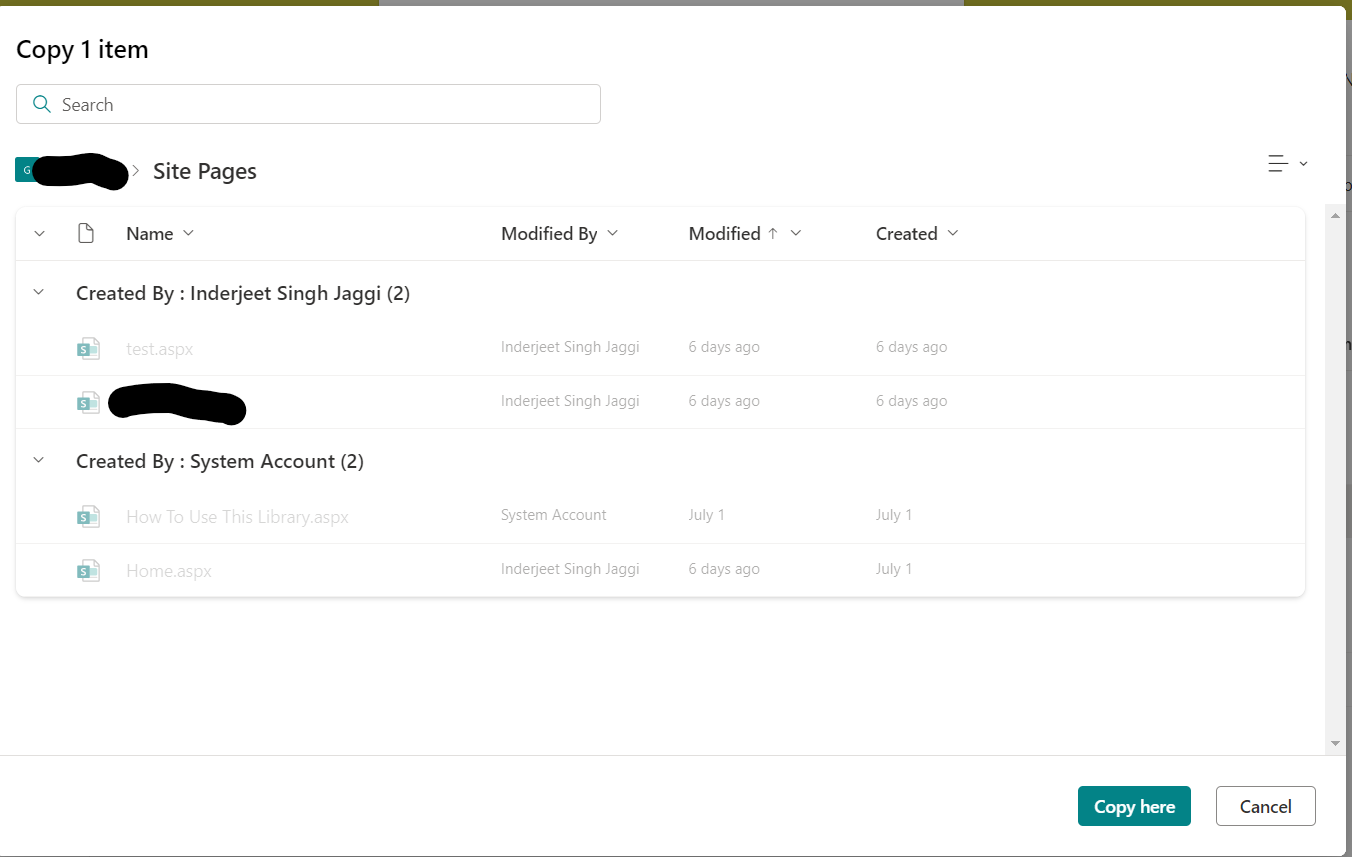
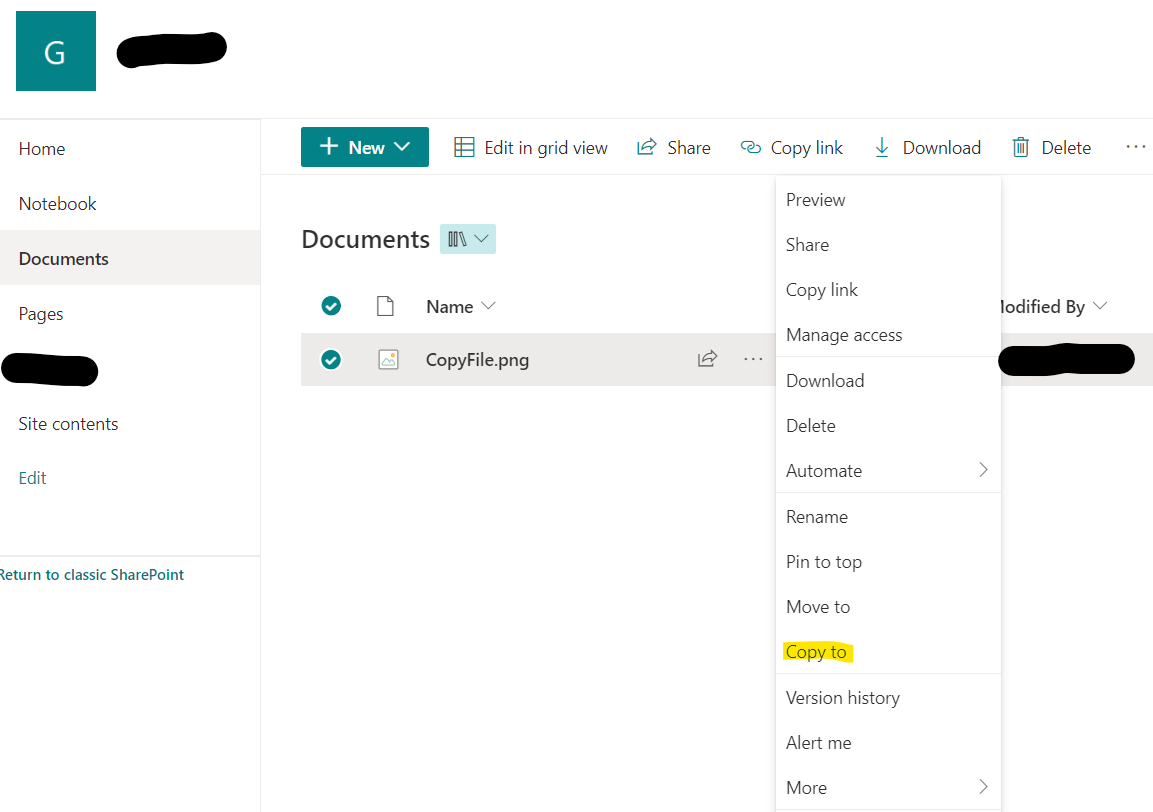
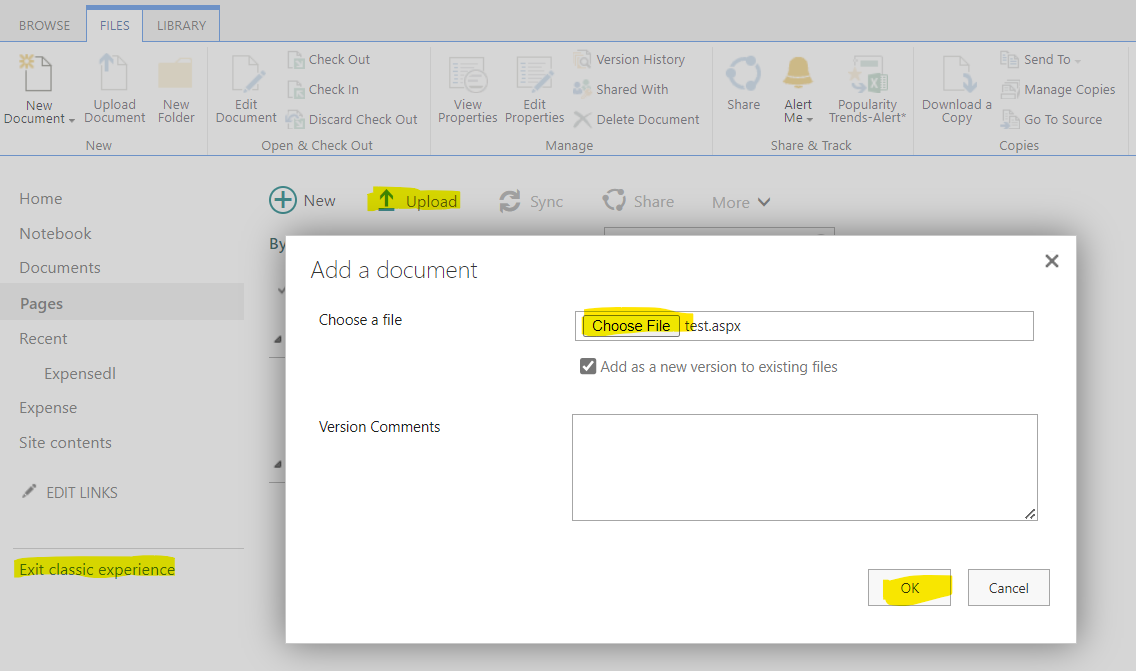
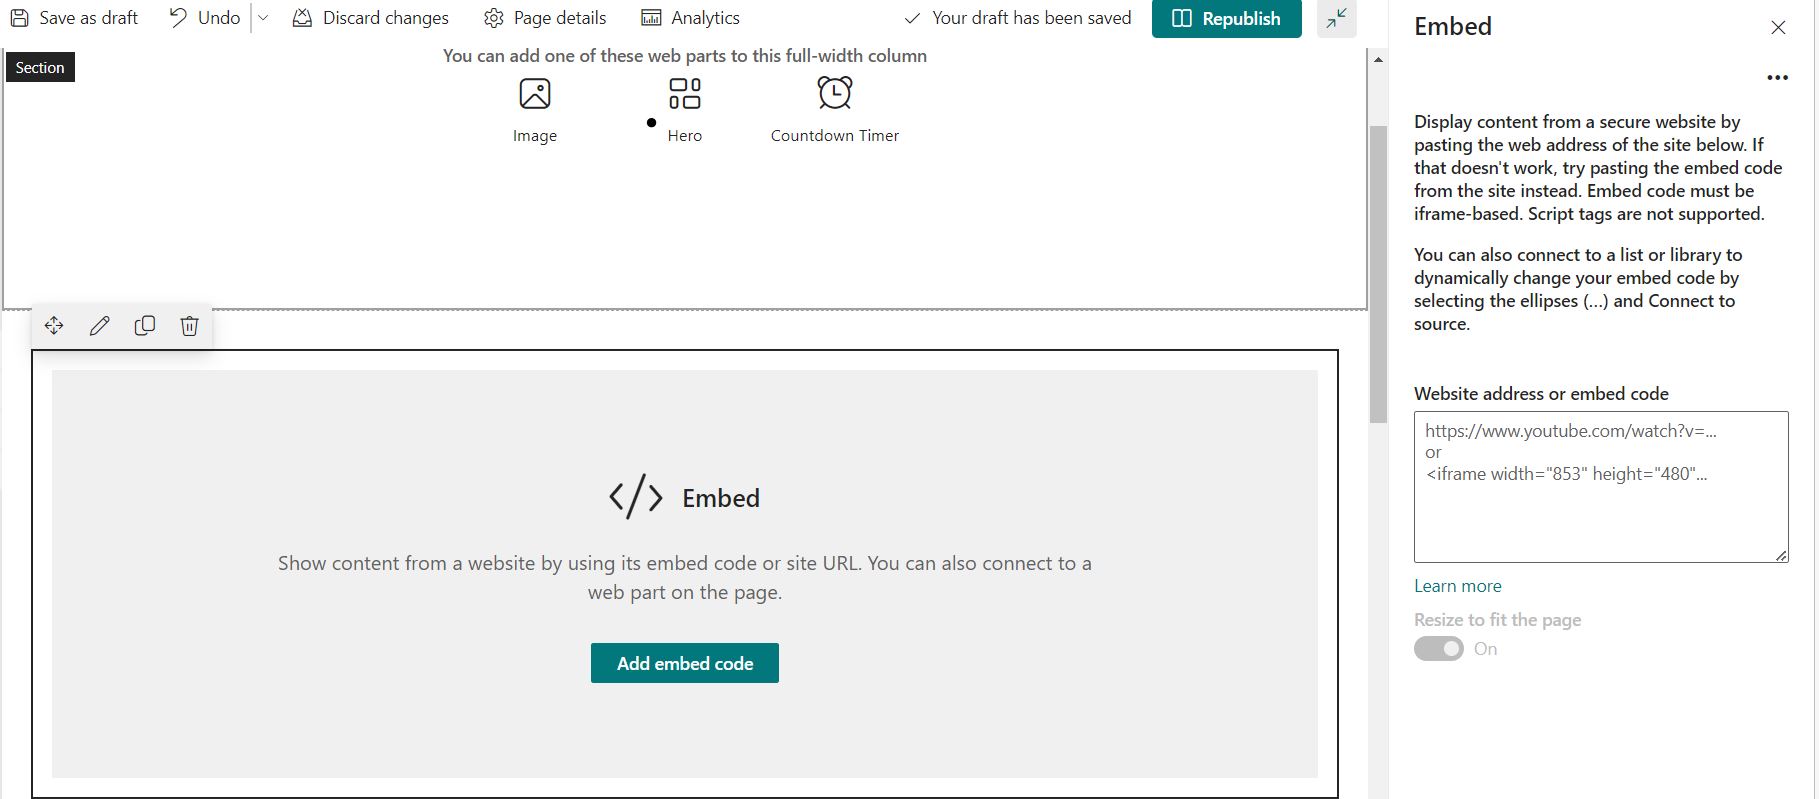
Unfortunately, SharePoint Online doesn’t allow us to copy pages from one site collection to another. However, we can copy list items and documents. If you want to copy a file or item from a document library to another, select the three dots in front of the item, then select ‘Copy to’ and choose the destination site/library. Since we are unable to do this with pages, I have found a workaround which I will share with you below.

To download a SharePoint page, you can use the following URL format and the file will be downloaded: https://tenant.sharepoint.com/_layouts/download.aspx?SourceUrl=https://tenant.sharepoint.com/SitePages/test.aspx

Now you can upload this file to the destination using SharePoint classic view.
Article by: Inderjeet Singh
Cloud Architect
Golden Five Consulting
Published a user\shared mailbox calendar and add it to SharePoint page or even with someone outside the organization
1. Make sure you have send-as permission on the mailbox from Admin center.
2. Sign-in to Outlook web app (https://outlook.office365.com/owa) with your Office 365 account or open mailbox.
3. If its shared mailbox click on your name on top right corner of the screen and then select Open other users mailbox, type shared mailbox details.
4. Navigate to the calendar and right-click the calendar you want to share. Select Share > Publish this calendar > Share this calendar as shown below:
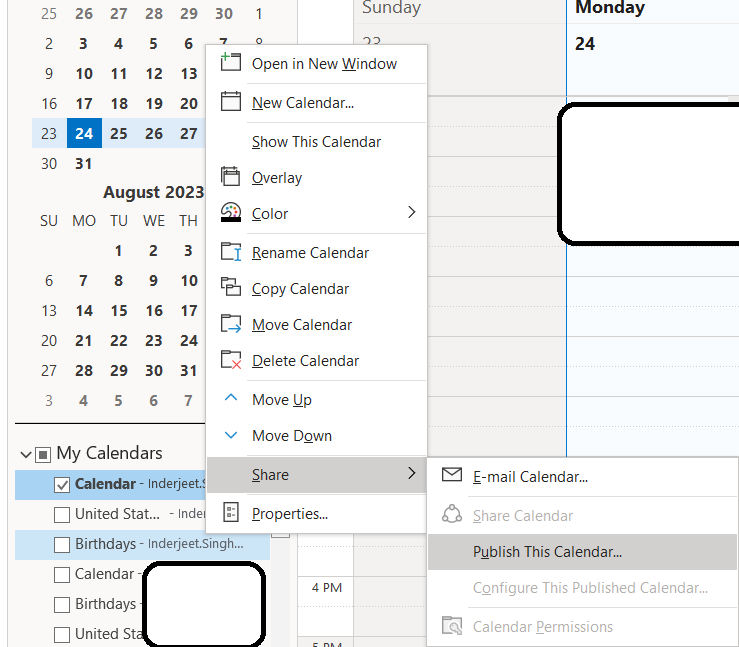
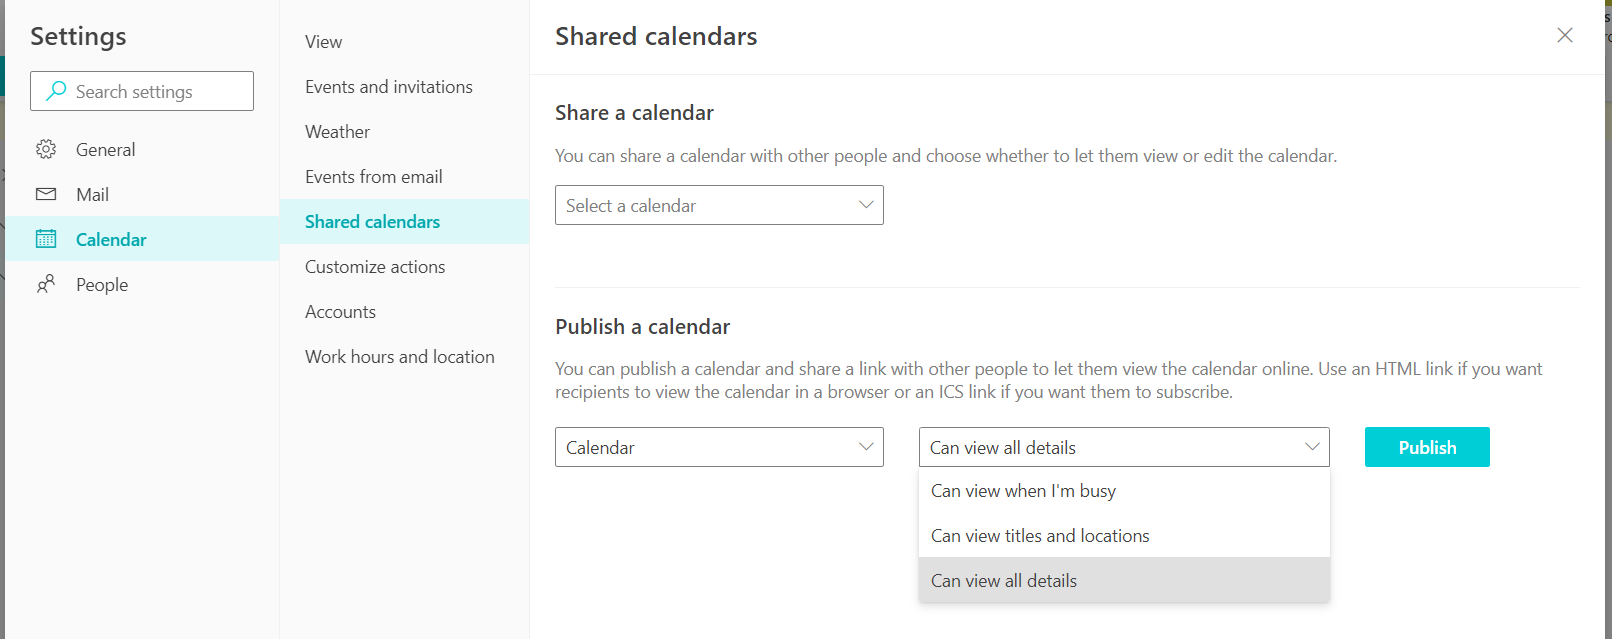
5. Now select Can view all details or any other option and select Publish
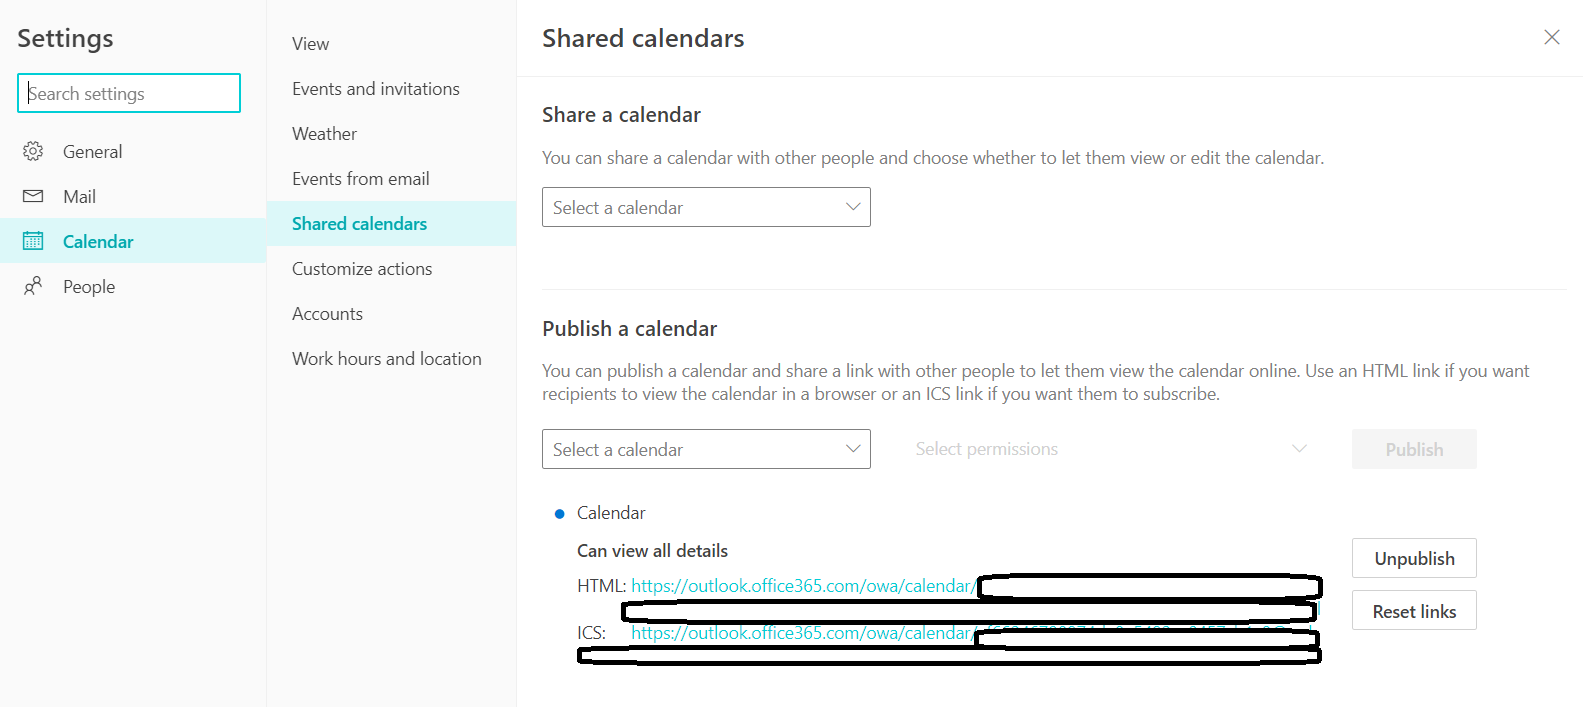
Now open the SharePoint page and add a script editor app. Add below code to the app. I have hidden the GUID in above screenshot.
<iframe src=”https://outlook.office365.com/owa/calendar/SOMEGUID/calendar.html” height=”400px” width=”400px”></iframe>

Article from:
Inderjeet Singh Jaggi
SharePoint 2016 Farm configuration issue on Windows Azure Virtual Machine
Hi All,
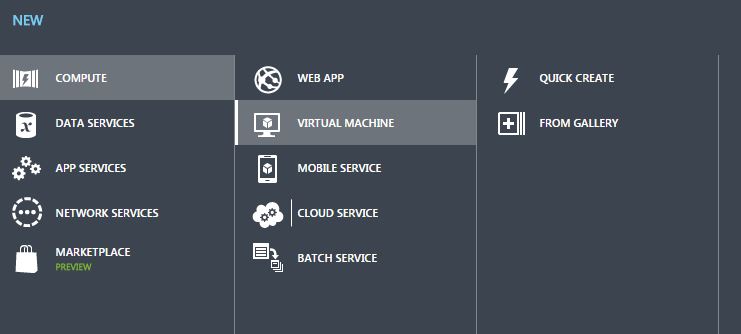
I hope you all know that now we can create a SharePoint 2016 VM on Windows Azure. In case you have not tried it yet, you can follow below:
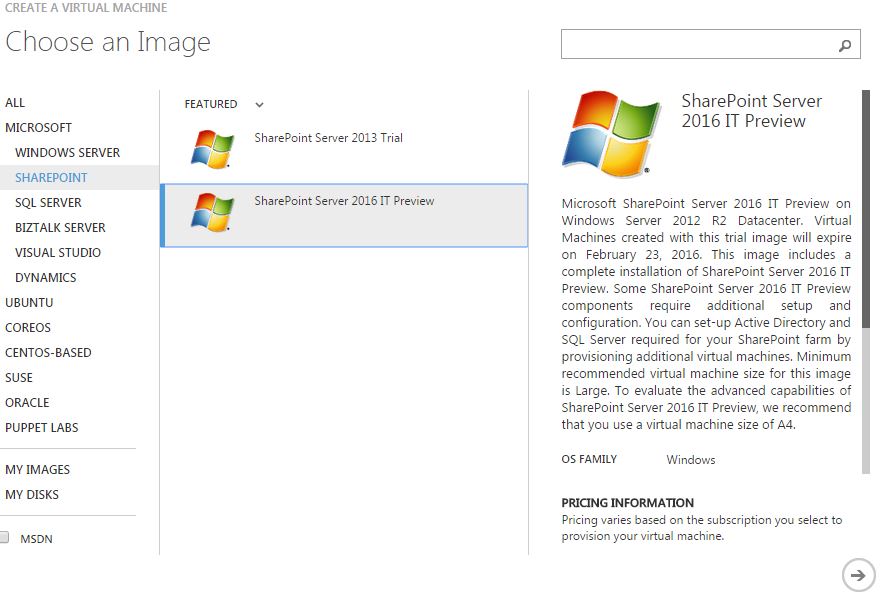
Select New on Windows Azure > Compute > Virtual Machine > From Gallery > Select SharePoint from left hand navigation > Select SharePoint Server 2016 IT preview
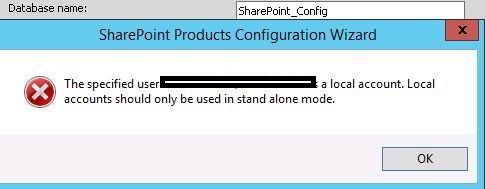
While I was working with this VM, I came across an issue where I was unable to configure a SharePoint 2016 farm using the SharePoint 2016 VM created in Windows Azure using one of their template. I found that root of issue was Active Directory. SharePoint cannot work without active directory and not everyone using Azure creates a VM with AD in Windows Azure itself. If you plan to create an AD forest in Azure and then add SharePoint 2016 VM to that domain, please follow my article:
Creating a Lab on Windows Azure
http://blogs.msdn.com/b/mvpawardprogram/archive/2015/02/09/creating-a-lab-on-windows-azure.aspx
If you are planning to use this VM only for learning purpose then you may want to create a SharePoint farm without Active Directory. Unlike previous versions of SharePoint, you cannot use Single Server install model to create a SharePoint farm without Active Directory or without installing SQL server.
To overcome this issue you need 1st install SQL Server and then use below PowerShell command to configure your SharePoint farm. You can download SQL server from below link
https://www.microsoft.com/en-in/download/details.aspx?id=42299
Once SQL server is installed and your local admin account has access to SQL server, you can use SharePoint PowerShell to create tour SharePoint 2016 Farm.
1. Open SharePoint PowerShell as Admin
2. You may want to type below command and provide actual values. When you execute the command, you will be requested for credentials of your local admin account you used while creating this Virtual Machine.
New-SPConfigurationDatabase -DatabaseName “SP2016_config” -DatabaseServer “Name of SQL Server” -Passphrase (ConvertTo-SecureString “Sharepoint@2016” -AsPlainText -force) -LocalServerRole SingleServerFarm -FarmCredentials (Get-Credential)
![]()
Note: I have observed that when people try to copy paste such commands, hyphen(-) sign does not work, so remove and add these sign again in whole command.
Once above command is executed successfully without any issue, you can execute SharePoint PSconfig wizard and complete SharePoint farm configuration.
Hope this will help you.
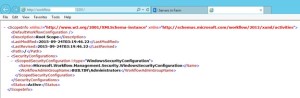
SharePoint site down “An application error occurred on the server” web.config error
Hi All,
Recently I got below error message which you might have seen. This is a very common and generic error message which can confuse you a lot. You may face this issue in all versions of SharePoint like SharePoint 2007, 2010, 2013 or SharePoint 2016. First let us look at the error message
#################### Error Start #############
Runtime Error Description: An application error occurred on the server. The current custom error settings for this application prevent the details of the application error from being viewed remotely (for security reasons). It could, however, be viewed by browsers running on the local server machine.
Details: To enable the details of this specific error message to be view able on remote machines, please create a <customErrors> tag within a “web.config” configuration file located in the root directory of the current web application. This <customErrors> tag should then have its “mode” attribute set to “Off”.
<!– Web.Config Configuration File –>
<configuration>
<system.web>
<customErrors mode=”Off”/>
</system.web>
</configuration>
Notes: The current error page you are seeing can be replaced by a custom error page by modifying the “defaultRedirect” attribute of the application’s <customErrors> configuration tag to point to a custom error page URL.
<!– Web.Config Configuration File –>
<configuration>
<system.web>
<customErrors mode=”RemoteOnly” defaultRedirect=”mycustompage.htm”/>
</system.web>
</configuration>
#################### Error End #############
We can see that error message says something about web.config file. Here is what we need to do.
1. Open IIS management console
2. Start > RUN > Inetmgr > Expand server
3. Expand the site you are getting this error on > right click > explore
Here you should be able to see a web.config file. If this web.config was recently modified by someone, please check with your team if anyone has recently modified this file, tried to deployed a farm\web application solution or run psconfig wizard on any of the SharePoint server in farm.
Note: If you have multiple SharePoint server, try the same on all the servers
In most cases, it is a web.config change done by someone from within the team which cause this issue.
If no one has done any changes:
1. Make a copy of this web.config file and open the original file. Search for “callstack” and set the value to True, again search for customerrors set it to OFF.
2. Rename the recent web.config to web.config.old with today’s date and revert the most recent web.config(date and time) file to web.config
3. Install Examdiff tool on a computer and copy the most recent web.config file and new web.config to identify the changes.
These steps will help you identify the actual cause of this error.
Myth Buster for SharePoint SQL RBS
Hi All,
In this article I would try to share my experience about SharePoint on SQL RBS. This article may help you decide if you should use SQL RBS with SharePoint or any other product.
This is my personal opinion about SQL RBS with SharePoint. I would suggest you to cross check below furnished details before taking final decision. Microsoft keeps enhancing its product so some of these may be fixed\resolved\changed.
Let’s first discuss what is SQL RBS? Normally when you upload a document, image, video, audio, etc on your SQL server it is stored in MDF (Master database file) of your SQL content database. As per my past experience when you upload anything to a content management system, you would revisit only 20 % of data uploaded, rest 80 % of data is never visited but used for record only purpose. IT pro’s suggest that you should keep your SQL content database on RAID 10 hard disk or SAN which is pretty expensive.
To resolve this issue Microsoft came out with SQL RBS which allows you to store your Files\BLOB outside (File system) of SQL database. This means you can use a Raid 0 drive to store BLOB files (image, video, document, etc). RBS is intended to lower storage costs by allowing you to store large read-intensive BLOBs on less expensive drives.
1st Myth of SQL RBS: Additional Storage for Content database.
This is the biggest myth about SQL RBS. Microsoft Suggest that your content database should be below 200 GB. Now days when we have a USB stick with 100 GB, a Content management server restricted to 200 GB is not a good deal. To overcome this issue few IT admin plan to use SQL RBS because RBS stores files outside of SQL server hence decrease the size of content database.
Reality: RBS does not increase the storage limits of content databases. All limitations still apply to RBS-enabled content databases. If you are using Remote BLOB Storage (RBS), the total volume of remote BLOB storage and metadata in the content database must not exceed the 200GB limit.
2nd Myth of SQL RBS: Files stored on FILESYSTEM through RBS cannot be accessed directly.
IT Pros and lot of other articles says that we cannot open the file directly from BLOB FILESYSTEM. We have to go through SQL database in order to read these files.
Reality: I was able to access FILESYSTEM where the BLOB files were stored and was able to open my txt, bmp, jpg, etc files. SharePoint is known for its Item level Security. So far SharePoint security was never compromised and access is only available on need to know basis. If any users who has access to FILESYSTEM can open any file stored in SharePoint without having access on SharePoint is a security issue. Also encryption is not supported on BLOBs, even if Transparent Data Encryption is enabled.
3rd Myth of SQL RBS: Better performance I hear a lot of IT PRO who comment that they would get better performance if FILES\BLOBS are stores outside of SQL Server.
Reality: I would accept this when we are using SharePoint to store Hugh amount of data files (70-80 % of BLOB). When I asked these IT Pros how much data is stored on dbo.docs, dbo.AllDocStreams, dbo.DocStreams, dbo.AllDocVersions, dbo.alldocs, etc table, they are not aware of same or they don’t bother. When you offload 70-80 % of data from your MDF file and store it FILESYSTEM you may feel better performance. If our content database stores BLOB files not more then 30-35 % then it would not make sense to go with RBS. Let me explain you why I say that, when you configure RBS you create number of additional tables on your content database. This means when we upload BLOB to SharePoint it will execute additional query to store data. Here SQL will first import image files, and then it may split the file based on size of file and then store it to FILESYSTEM. Again this process is reversed when we try to open or query the BLOB file. This will increase disk IO, RAM and processing power. Now if consumption of my resources is increased, how can I expect better performance? RBS does not support using data compression but data is compressed when uploaded to SQL MDF file. Microsoft says “Although using RBS with files larger than 1 MB can improve I/O and processor performance, using RBS with files smaller than 256 KB might decrease overall performance. Storing the BLOBs inline in the content database is more efficient with smaller files”
4th Myth of SQL RBS: Ease in management
A lot of IT Pro’s also comment that it is easy to manage smaller SQL databases, Better Technology, Ease in configuration, etc.
Reality: Why you want to take an additional Load of configuration anything extra on SQL. If any feature is available does not mean you should use it. Implementation of these features depends on its pros\cons and specific requirement of the feature. Also when you backup the database, it will backup all the files from FILESYSTEM along with SQL MDF\LDF files. Sizes of these databases backup does not decreases but it increase because RBS does not perform any compression. If you plan High availability through Mirroring or Log shipping, you need to follow additional steps to configure the same.
That’s it from my side. Feel free to comment or connect with me if you feel any of the above information is incorrect.
Reference:
https://technet.microsoft.com/en-us/library/cc262787.aspx
https://technet.microsoft.com/en-us/library/ff628583.aspx
Configure Office Web App 2013 Farm with SharePoint 2013 Farm
Hi Friends,
Today we will discuss on how to configure Multi Server Office Web Apps farm with a SharePoint farm. Also the specialty of this OWA configuration is that it can work inside and outside of firewall. Normally OWA farms are setup HTTP inside the firewall network(Internal network) and HTTPS outside the network(External world) but using this configuration we will configure HTTPS for both inside and outside network. This will not only decrease additional overhead and configuration but also is recommended by Microsoft to use HTTPS for production environment.
We need to meet below pre-requisites before we proceed further:
1. SharePoint farm configured and ready to use
2. Two or more Office Web Apps servers with setup files
3. One certificate for Office Web App
4. If you are using Windows server 2012 R2 then you would need to install latest update for Office Web Apps
5. FQDN name for your Office web app farm e.g.(owa.domain.com) and its DNS entry with Round Robin(You can also configure Windows NLB or a Load Balancer entry for same)
Installation of Office Web App is very simple, You just need to download the installable and execute it on all OWA servers.
Install Office Web apps on all Office Web Apps servers. If you are using Office Web App on Windows Server 2012 R2, you should install latest update for Office Web Apps. You would need an Office Web app certificate imported to IIS
Now Let’s configure Office Web App, Open Windows PowerShell and execute below command
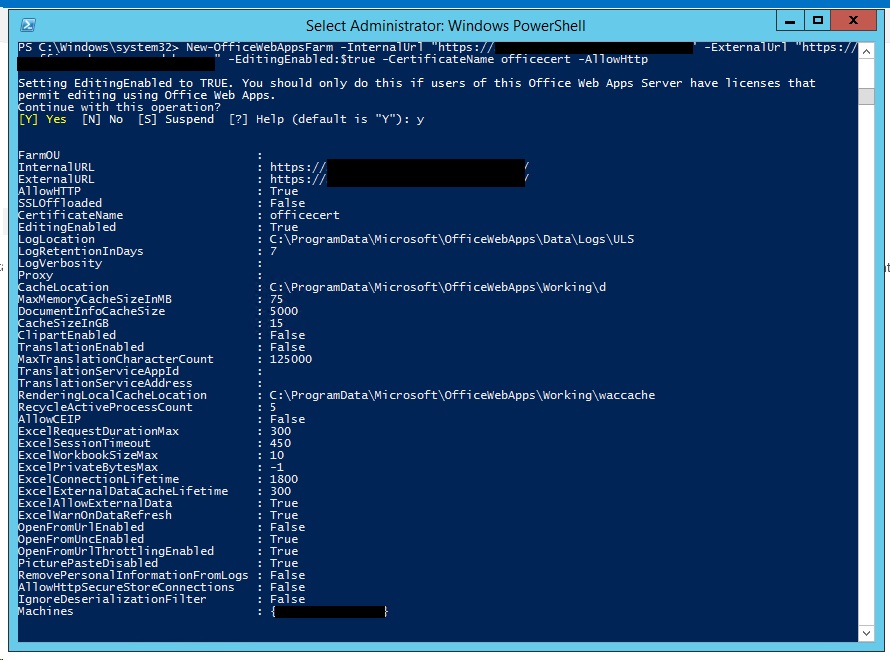
Once the Office Web App farm is configured, open IIS and make sure SSL binding for site HTTP80 has proper certificate attached.
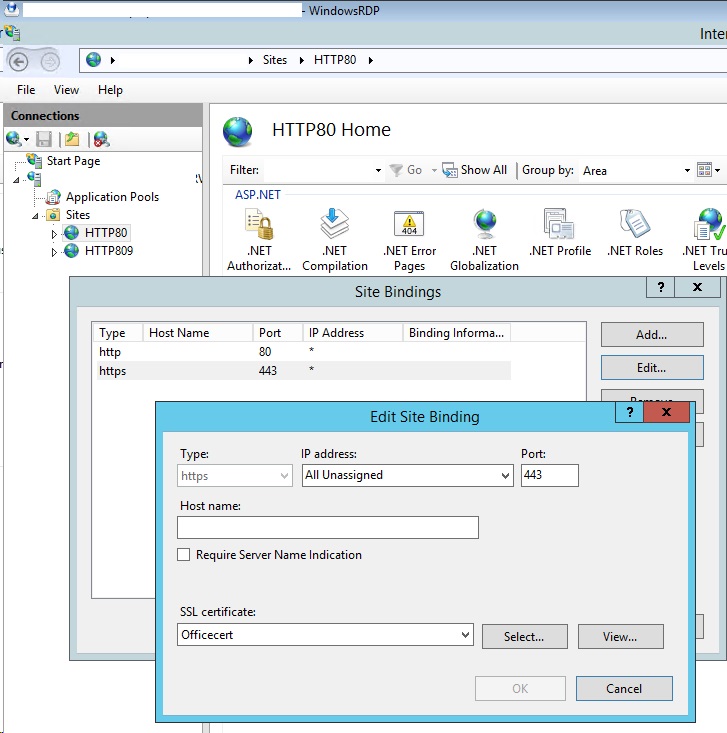
From IIS binding select the certificate and export the .cer file.
You need to import it to central admin manage trust.
To Attach this Office web app farm to SharePoint farm, you need to create a WOPI connection. Open SharePoint PowerShell on SharePoint server and execute below command:
New-SPWOPIBinding -ServerName “officewebapp.domain.com”
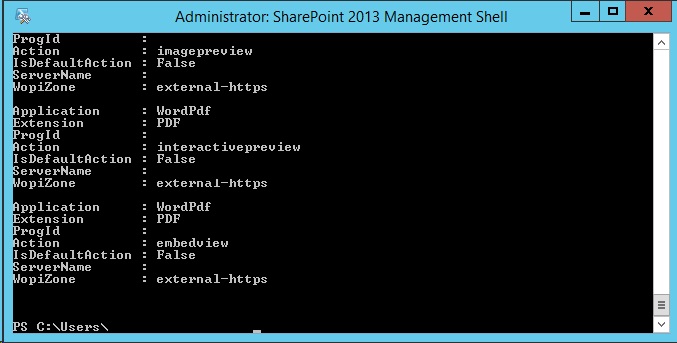
Set Wopi zone
![]()
Now if you want to add other Office Web App Server to OWA farm, you need to execute below command on existing OWA server
new-officewebappsmachine -machinetojoin “owa2server.domain.com”
![]()
Hope this will help you
Configure Workflow Manager 1.0 with SharePoint Server 2013/2016/2019
Hi Friends,
Today we will discuss on how to configure Multi Server Workflow farm with SharePoint farm. Just of your information, you need to access Workflow farm only from WFE and Application servers. This means just like your database server, even workflow servers are not exposed to end users.
We need to meet below pre-requisites before we proceed further:
A. SharePoint farm configured and ready to use
B. Two or more Workflow servers with setup files
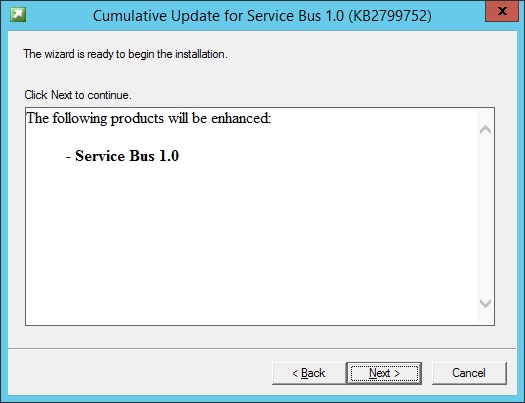
C. If you are using Windows server 2012 R2 then you would need update KB2799752(Service bus hotfix) and KB2799754(Workflow manager hotfix)
D. FQDN name for your workflow farm e.g.(Workflow.domain.com) and its DNS entry with Round Robin(You can also configure Windows NLB or a Load Balancer entry for same)
- Let’s get started with installation of Workflow Manager 1.0 on Workflow servers. We need installable as shown below
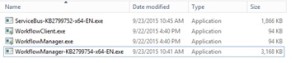
-
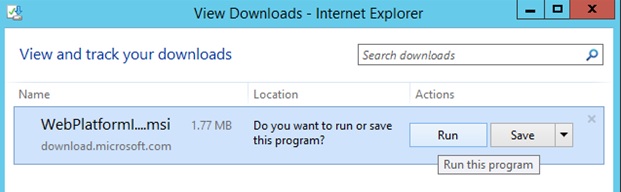
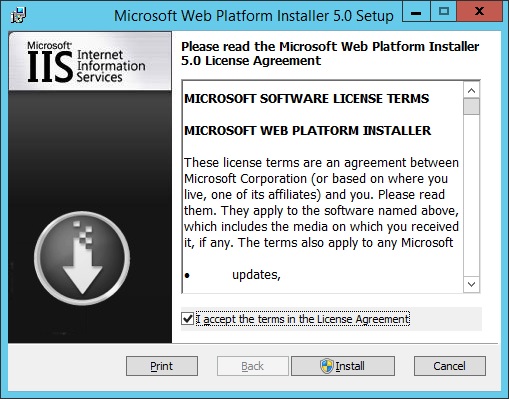
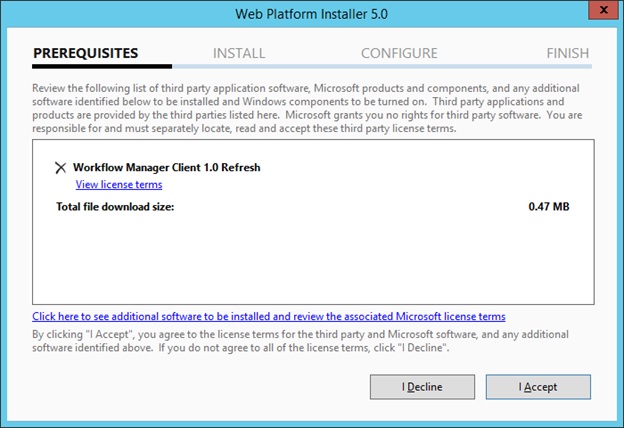
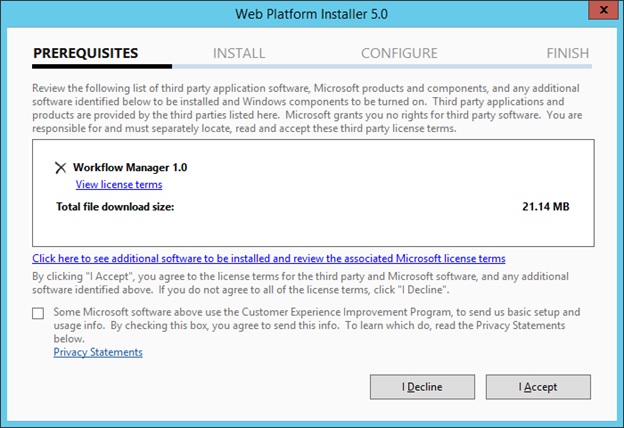
When you will try to install the workflow.exe file you will be asked to download and install WebPlatformInstaller.exe. Now all the updates and most components are installed through WebPlatforminstaller.

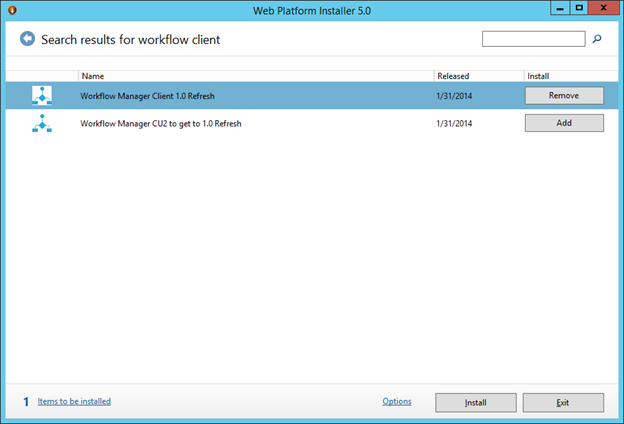
- Once the WebPlatforminstaller is installed, you need to search for Workflow manager and Workflow manager client and install the same.


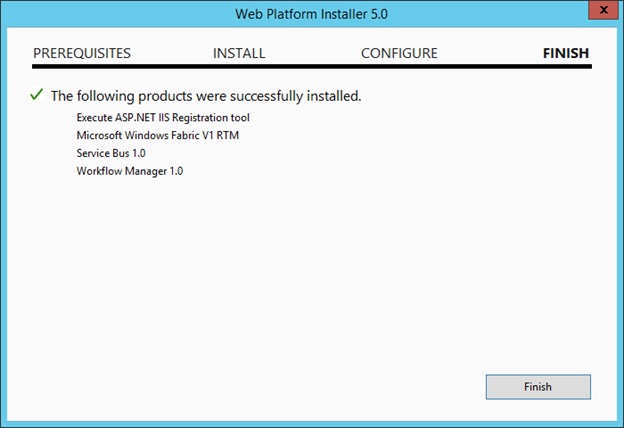
- Once Workflow Manager and client is installed, I would suggest you to install the updates as well.


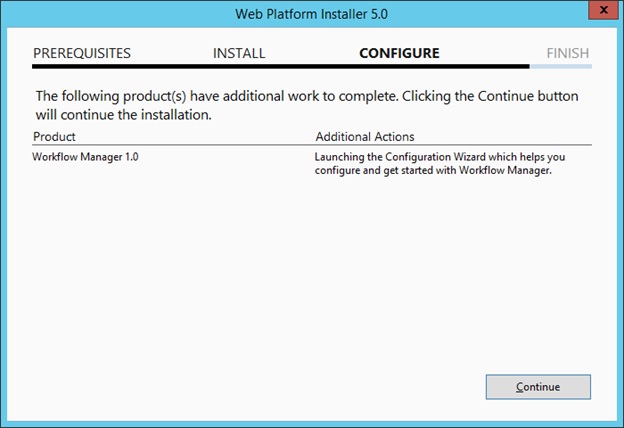
- Now let’s configure Workflow Server farm. This is very important so please follow steps carefully.
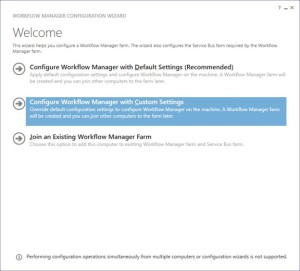
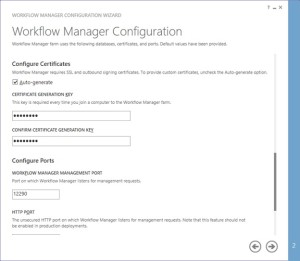
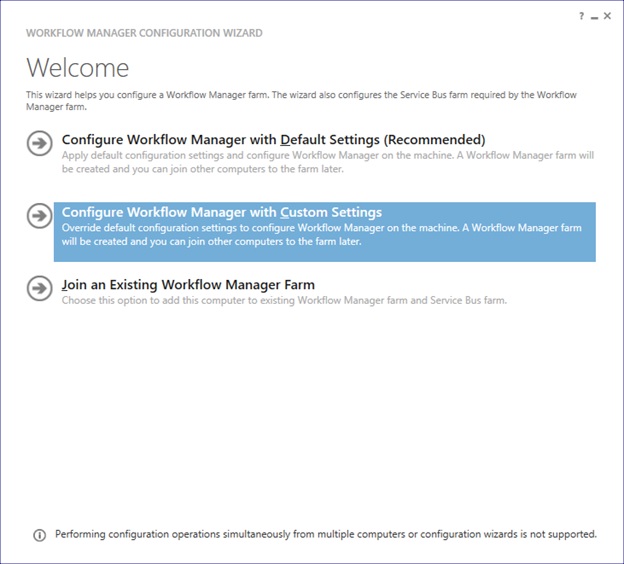
- Lets execute the Workflow Manager Configuration Wizard
- Select “Configure Workflow Manager with Custom Settings”
-
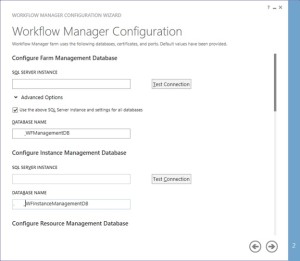
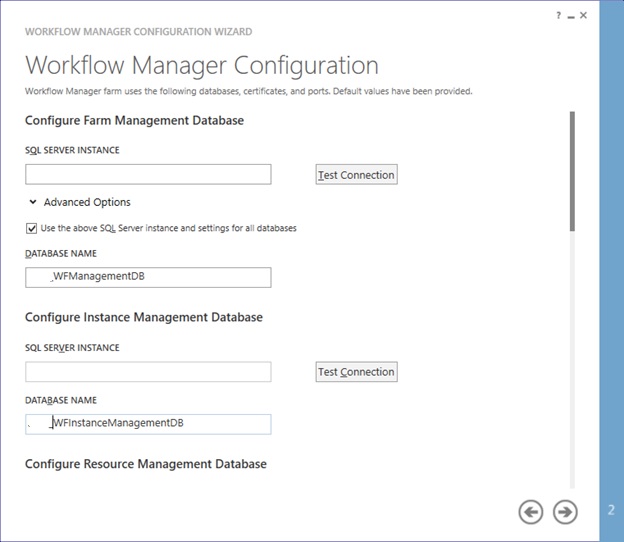
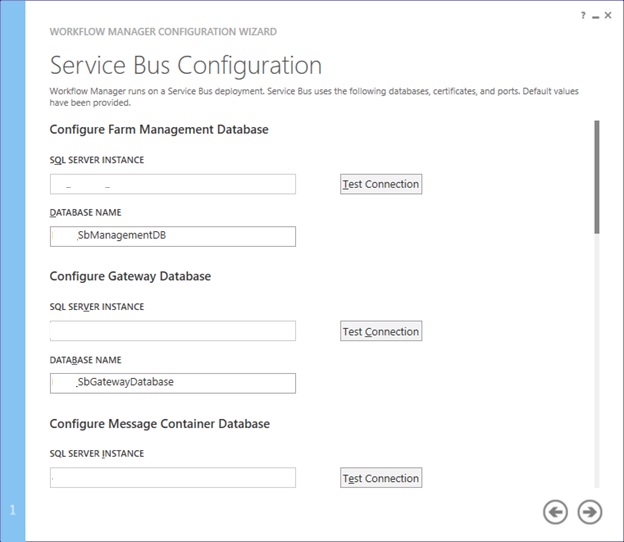
Now provide the SQL server instance name, Authentication, Certificate and SQL Workflow database names
-
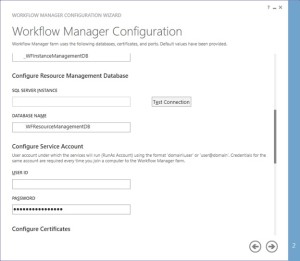
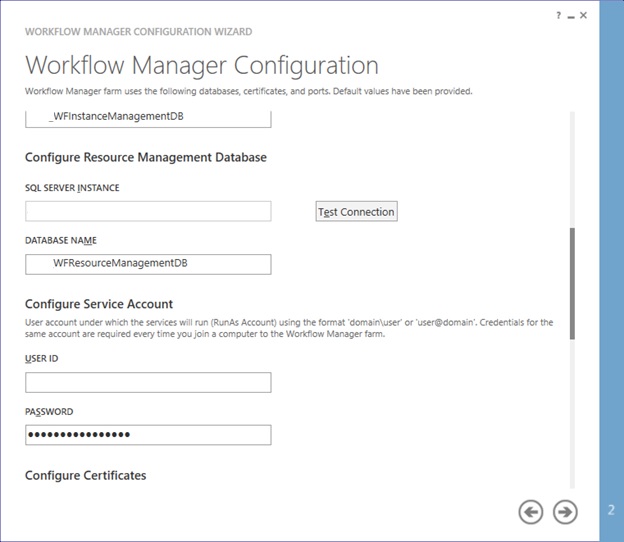
You need to provide the Workflow service account credentials which will be used to connect to SQL server and for workflow IIS Application pool.
-
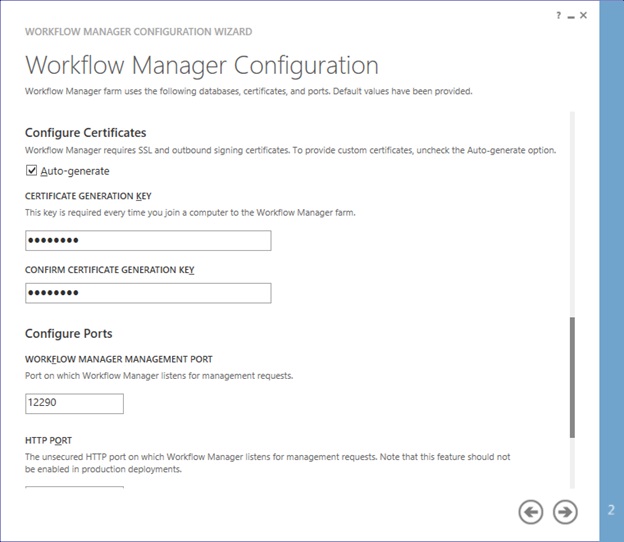
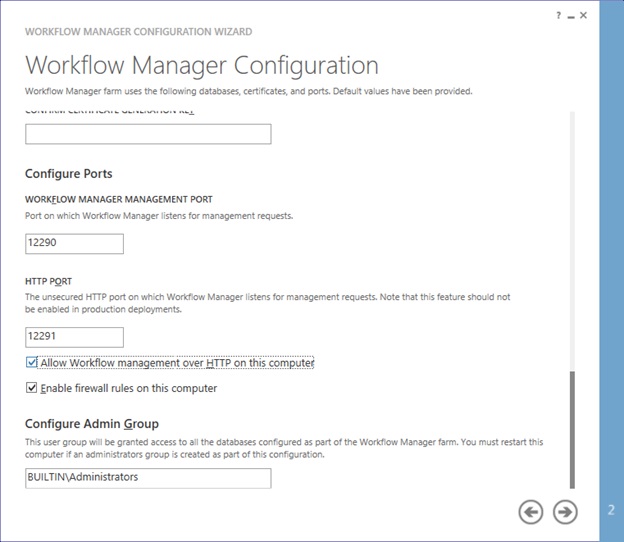
You would need to provide a Certificate Generation Key. It is just like Passphrase for your SharePoint farm
-
Make sure you select “Allow workflow management over http on this computer”
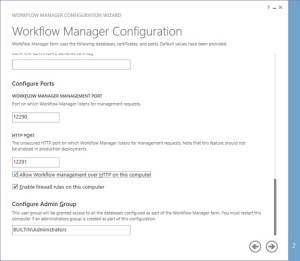
-
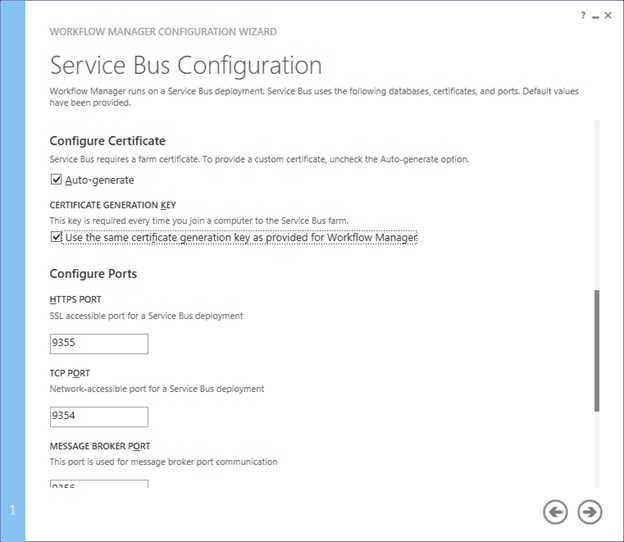
Along with Workflow Management, you need to configure Service Bus required by Workflow manager
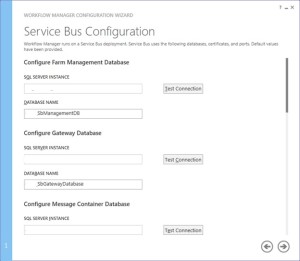
-
Make sure you select “use the same certificate generation key as provided for workflow manager”
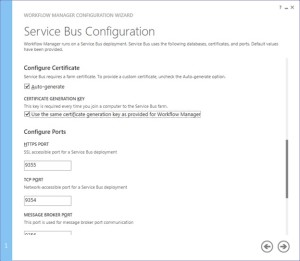

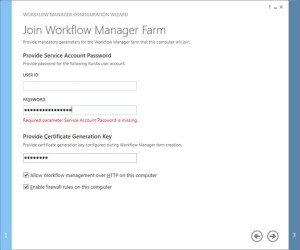
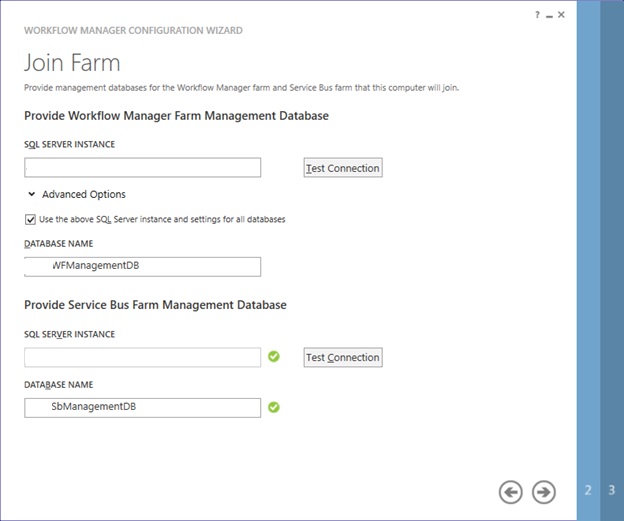
- Once the Workflow Farm is created, you need to join other Workflow server to the farm. To do so execute the same Workflow configuration wizard and select “Join an Existing Workflow Manager Farm”
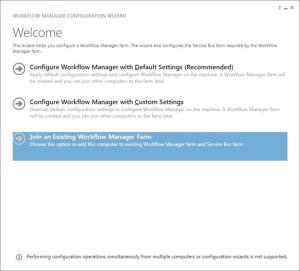
-
Provide the existing Workflow Farm SQL server instance name, Workflow database name and Service Bus farm database name

-
Provide the workflow service account and Certificate generation key used while creating workflow farm.
-
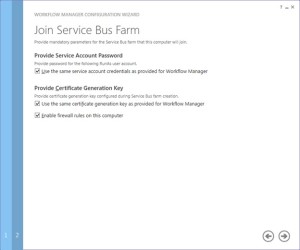
Select “use the same service account credentials as provided for Workflow Manager”, then select next
-
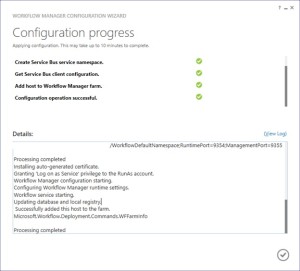
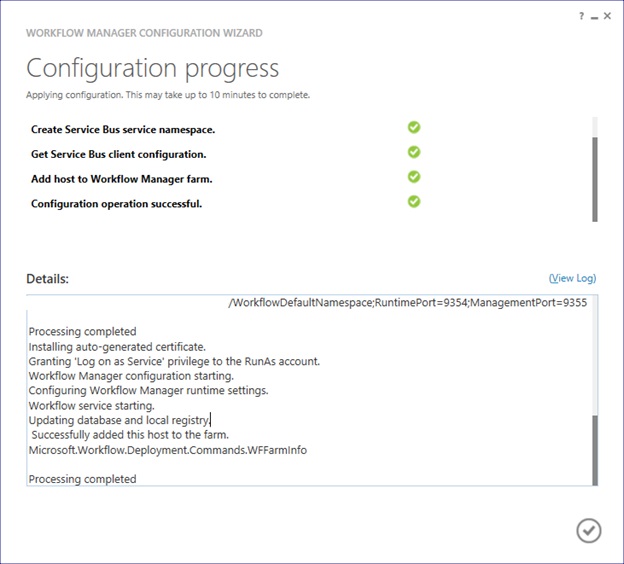
Once farm other server is joined to workflow farm you will see below
-
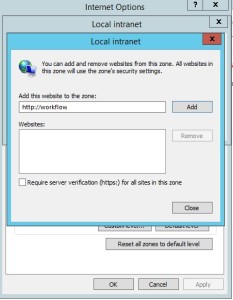
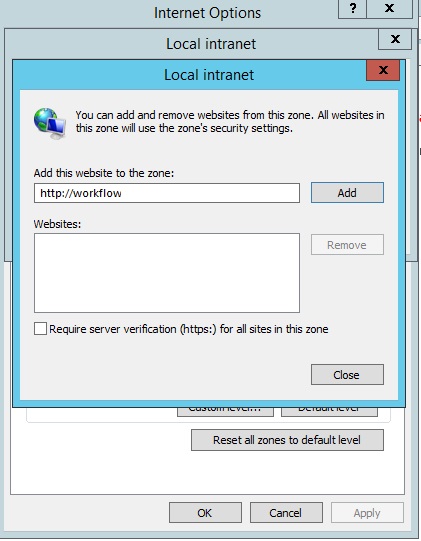
Once workflow is configured, you need to attach Workflow Farm to SharePoint farm. Make sure you have DNS entry(Workflow.domain.com) for your Workflow farm. If not DNS, you should at least have Host entry for same. Try to browse http://workflow.domain.com:12291 on WFE and Application server, you might see Authentication error.

-
Add the URL to Local Intranet and set the Local Intranet zone to “Automatically login with current username and password”


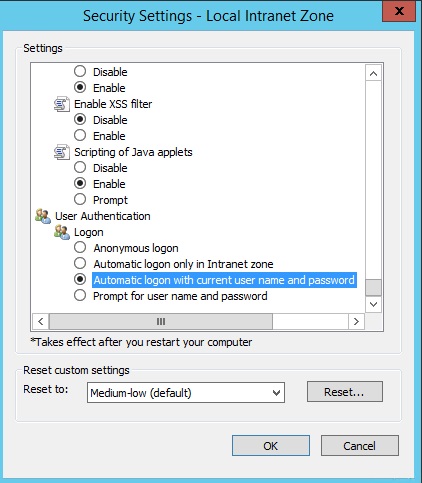
-
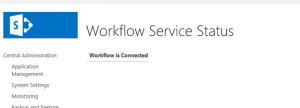
Now you should be able to browse the workflow farm details, this shows you can connect to workflow farm and it is working fine.
-
Now execute below command in SharePoint Powershell
Register-SPWorkflowService -SPSite “http://sharepointsite” -workflowHostUri “http://workflow.domain.com:12291/” -AllowOauthHttp -ScopeName SharePoint –force

-
Now you need to activate the workflow feature on site
Enable-SPFeature -Identity WorkflowServiceStore –Url http://sharepointsite -
In Central Admin > Manage Service Application > Workflow Service Application Proxy
-
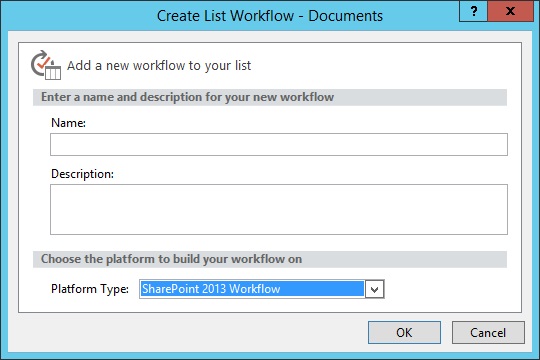
Open site in SharePoint designer – Select workflow from left pane – select new workflow

Note:
A. Workflow farm can co-locate on SharePoint servers
B. As per Microsoft articles, for high availability you need to have at least 3 Workflow Server in farm. You cannot have 2 workflow servers in a farm. It has to be 1 or 3.